YOTSUME-KÖRBCHEN Anleitung / Instructions
←
→
Transkription von Seiteninhalten
Wenn Ihr Browser die Seite nicht korrekt rendert, bitte, lesen Sie den Inhalt der Seite unten
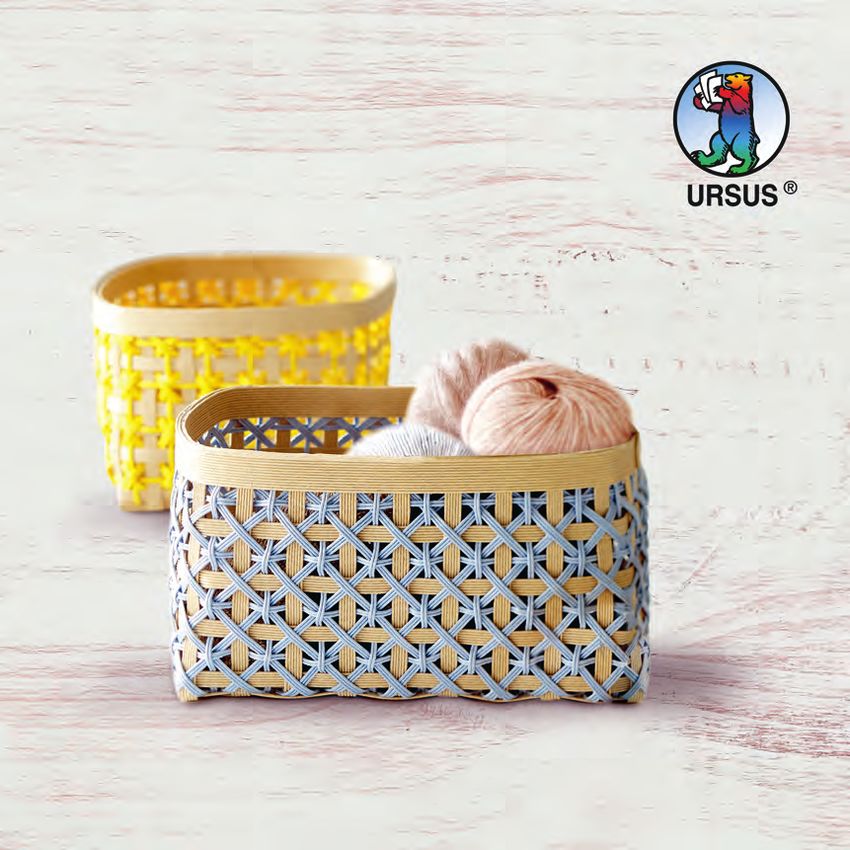
YOTSUME-KÖRBCHEN
Anleitung / Instructions

    Mit Anleitungsvideo
    With video tutorial
    Avec vidéo d’instruction
    Con video di istruzioni
    Con vídeo de instrucción
LEGende / Legend
       12 Schnüre = 1 Papierband                                  Abschnitt E: 6 Schnur breit
                                                                                                                          Min. 0:10
       12 strings = 1 paper band                                  Section E: 6 strings wide

                                                                                                          1
        1                                                                                                     2
             2                                                                                                    3
                 3                                                                                                    4
                     4                                                                                                    5
                         5                                                                                                    6
                             6
                                 7
                                     8                            Das Zerteilen gelingt z. B.        Pieces can be separated
                                         9                        mit einem Cutter.                  with a cutter, for example.
                                             10
                                                  11
                                                       12

    Tipps / Hints
    Abschnitt E: 4 x 6 Schnur breit
    Section E: 4 x 6 strings wide
                                                                                                  Position im Video finden
    1 Papierband                             2 Abschnitte                    Min. 0:10            Find position on video
    1 paper band                             2 sections

                                                                             Aus einem Papierband erhält man 2 Abschnitte der
                                                                             benötigten Breite. Daher reichen 2 Papierbänder
                                                                             aus um alle Abschnitte E zuzuschneiden.

                                                                             One paper band makes 2 sections of the necessary
                                                                             width. Therefore, 2 paper bands are sufficient to cut
                                                                             all sections E to size.
            12 Schnur                         6 Schnur      6 Schnur
2           12 strings                        6 strings     6 strings
Materialliste / List of materials
  Länge der benötigten Papierbänder, Körbchengröße: 19 cm (L) × 13 cm (B) × 11 cm (H)
  Length of required paper bands, size of basket: 19 cm (L) x 13 cm (W) x 11 cm (H)

  		   8,5 m Papierband    8.5 m of paper band      		   4 m Papierband        4 m of paper band in
  		   in Natur hell,      in a light natural,      		   in Hellblau,          light blue, 12 strings
  		   12 Schnur breit     12 strings wide          		   12 Schnur breit       wide
                                                                                                               D
                                                                                                    untersch a jeder
                                                                                                             iedlic
                                                                                                     können M h fest flechtet,
                                                                                                                 aße variier
                                                                                                     Sizes can               en.
                                                                                                                vary beca
                                                                                                     everyone             us
  Zugeschnitten in folgende Abschnitte                                                                          weaves w e
                                                                                                        different          ith
  Cut into the following sections                                                                                 tension

  A: 6 x 12 Schnur breit, 19 cm lang     E:   4 x 6 Schnur breit, 67 cm lang        I:    4 x 2 Schnur breit, 75 cm lang
  		 6 x 12 strings wide, 19 cm long     		   4 x 6 strings wide, 67 cm long        		    4 x 2 strings wide, 75 cm long

  B:   5 x 6 Schnur breit, 44 cm lang    F:   2 x 12 Schnur breit, 67 cm lang       J:    28 x 2 Schnur breit, 14 cm lang
  		   5 x 6 strings wide, 44 cm long    		   2 x 12 strings wide, 67 cm long       		    28 x 2 strings wide, 14 cm long

  C:   9 x 6 Schnur breit, 38 cm lang    G: 2 Schnur breit, 130 cm lang             K:    2 x 12 Schnur breit, 19 cm lang
  		   9 x 6 strings wide, 38 cm long    		 2 strings wide, 130 cm long                   2 x 12 strings wide, 19 cm long

  D: 2 x 6 Schnur breit, 13 cm lang      H: 56 x 3 Schnur breit, 18 cm lang         L:    2 x 6 Schnur breit, 13 cm lang
  		 2 x 6 strings wide, 13 cm long      		 56 x 3 strings wide, 18 cm long         		    2 x 6 strings wide, 13 cm long

Werkzeuge zum Basteln               Lineal: zum Abmessen der Bänder                      Ruler: to measure the bands
Tools for crafting                  Bleistift: um Markierungen anzubringen               Pencil: to make marks
                                    Schere: zum Zuschneiden der Bänder                   Scissors: to cut the bands
                                    Cutter: zum Zerteilen der Bänder                     Cutter: to separate the bands
                                    Foldback-Klammern: zum Fixieren der Bänder           Foldback clips: to secure the bands
                                    Leim: zum Verkleben; am besten ist ein               Adhesive: for gluing; the best is an
                                    handelsüblicher Weiß- oder Holzleim                  off-the-shelf white craft or wood glue

                                                                                                                                   3
Anleitung / Instructions
         Einen Standardboden mit den Abschnitten A, B, C und D erstellen                           Min. 0:40
         Create a standard base with sections A, B, C and D

    1.                             Einen A-Abschnitt horizontal             Put an A section down in a
                    A              hinlegen, an den Ecken die beiden        horizontal position, place the two
                                   D-Abschnitte vertikal nach unten         D sections on the corners facing
                                   ausrichten. An den Ecken zusammen-       downward. Glue the corners
                                   kleben.                                  together.
                               D
          D

    2.                             Die restlichen A-Abschnitte in jeweils   Glue the remaining A sections each
                    A              einem Abstand, der ca. der Breite von    with a space that approx. corresponds
                                   Abschnitt B entspricht, ankleben.        to the width of section B.
                    A
                                   Die Breite der Bänder kann minimal       There can be a minimal deviation
                    A              abweichen. Wenn am Ende (D) ein Rest     between the width of bands. If D is
                                   übersteht, einfach abschneiden.          slightly bigger in the end, just cut it off.

    3.                             Je einen C- auf einen D-Abschnitt        Glue a D section in the centre of
            C              C
                                   zentriert ankleben, dabei werden         each C section; this will cover the
                                   Anfang und Ende der A-Abschnitte         two ends of the A sections.
                                   abgedeckt.

4
4. Alle B-Abschnitte, mittig in den Glue all B sections to the C sections
Zwischenräumen der A-Abschnitte in the centres of the spaces between
B ausgerichtet, an die C-Abschnitte the A sections.
kleben.
B
B
5. C
Die restlichen C-Abschnitte Weave in the remaining
einflechten. C sections.
6. Für ein gleichmäßiges Ergebnis am For an even result, it is always best
C C
besten immer zwei Abschnitte von to push two sections from the
der Mitte aus zur Seite schieben. middle to the side.
7. C C C Wenn alle C-Abschnitte eingefloch- When all C sections have been
ten sind, ist der Boden fertig. woven in, the base is complete.
58. Der Boden kann nun gewendet The base can now be turned over.
A werden.
Die C-Abschnitte zur besseren For better stability, also glue the
Fixierung noch an die A-Abschnitte C sections to the A sections.
kleben.
C
9. Die Seitenbänder aufstellen. Set up the side bands.
Die Seitenwände mit den Abschnitten E erstellen
Min. 3:53
Create the side panels with sections E
10. Die Seitenbänder aufstellen und die Set up the side bands and weave in
E vier E-Abschnitte mit 1,5 cm Abstand the four E sections in a straight line,
zueinander geradeaus einflechten. with a space of 1.5 cm between them.
E
An den Ecken festkleben, damit sie Glue to the corners, so they are secured.
E fixiert sind.
E
6Den oberen Rand mit einem F-Abschnitt fixieren
Min. 6:00
Secure the upper edge with an F section
11. Einen F-Abschnitt innen am oberen Glue an F section on the inside of
F Rand im gleichen Abstand zu den the top edge at the same distance
E-Abschnitten ankleben. as the E sections.
Falls nötig, die Seitenbänder auf If necessary, cut the side bands
gleicher Höhe abschneiden, dabei to the same height, while leaving
oben eine Breite von 3 Schnur für a width of 3 strings for the cover
das Deckband freilassen. band.
Mit den Abschnitten H, I und J ein Kreuzmuster in die Seitenwände einflechten
Min. 7:27
Weave a cross pattern into the side panels with sections H, I and J
12. Die H-Abschnitte unten, im Inneren Glue the H sections to the bottom of
des Körbchens, auf einer Länge von the inside of the basket, at a length of
H 5 mm ankleben. 5 mm.
713. Dann außen im 45-Grad-Winkel in Then pull it up on the outside at a 45
F beide Richtungen hinaufziehen. degree angle in both directions. Make
Darauf achten, dass diese schrägen sure that the slanting H sections
E
H-Abschnitte die annähernd diagonally cross the almost square
quadratischen Zwischenräume spaces between E and F.
H
zwischen E und F diagonal kreuzen.
Oben mit Foldback-Klammern fixieren. Secure with foldback clips at the top.
14. Zwischen den E- und den H-Ab- Weave the I sections in horizontally
I
schnitten die I-Abschnitte horizontal between the E and H sections. Use a
einflechten. Für jede Reihe einen separate section for each row.
I eigenen I-Abschnitt verwenden.
Auf diese Weise werden auch gleich die This also secures the H sections at the
I
H-Abschnitte fixiert. same time.
Die Schritte 12 und 13 wiederholen, Repeat steps 12 and 13 until the
15. bis die Seiten fertig sind. sides are completed.
16. Anfang und Ende der I-Abschnitte Glue the beginning and end of
I jeweils innen zusammenkleben. the I sections together on the
inside.
817. Die H-Abschnitte oben ungefähr Cut the H sections at the top
bündig mit den C-Abschnitten as flush with the C sections as
C abschneiden und ankleben. possible and glue.
H
18. Die J-Abschnitte vertikal einflechten. Weave the J sections in vertically.
Dann unten innen auf einer Länge Then glue them on the inside at a
J von 5 mm ankleben. length of 5 mm.
J Wenn nötig, oben außen auf gleicher If neceassary, cut the outside top to
Höhe wie die H-Abschnitte abschnei- the same height as the H sections
den und ankleben. and glue.
Klebestellen innen im Boden mit den Abschnitten K und L verdecken
Min. 13:19
Cover the glued sections on the inside base with sections K and L
19. Die Abschnitte K und L am Innen- Glue sections K and L to the inside
boden ankleben, um die Reste der of the base in order to cover the
Abschnitte H und J abzudecken. remains of sections H and J.
K
L
9Die Enden verdecken und den Rand gerade abschließen
Min. 13:41
Cover the ends and finish off the border with a straight edge
20. Dazu oberhalb der Seitenbänder For this, glue the G section (as
G den G-Abschnitt (als Deckband) in 2 cover band) to the inside band
Runden an das innere Band kleben. above the side bands in 2 rounds.
Die beiden Enden des Deckbands Join the two ends of the cover band
bündig aneinanderstoßen und nicht flush with each other and don’t
überlappen lassen. allow them to overlap.
21. Zum Schluss den verbliebenen At the end, glue the remaining
F-Abschnitt als äußeres Band F section as an outside band
F gegen das innere Band mit dem against the inner band with cover
Deckband (G-Abschnitt) kleben, band (G section), so that the
sodass der Rand schön verdeckt ist. edge is nicely covered.
22. In verschiedenen Bereichen Can be used in various areas and
einsetzbar und beliebig zu can be decorated as desired.
dekorieren.
10Wissenswertes /
Things worth knowing
Das Material Kamihimo
The material Kamihimo
Das Wort Kamihimo setzt sich aus den nachfolgen- Kamihimo is made up of the following two
den japanischen Worten zusammen Japanese words
“Kami” 紙 (= paper) & “Himo” 紐 (= string)
Farbige „Papierschnüre“ werden zu einem Band Colourful “paper strings” are glued together to
zusammengeklebt. form a band.
Ursprünglich – und auch heute noch – werden Originally - and still today - these Kamihimo
diese Kamihimo-Bänder für die Verpackung von bands were used to package rice sacks. Due to
Reissäcken verwendet. Aufgrund seiner Robustheit its strength, the product was used most often
fand das Produkt aber seine häufigste Anwendung to tie together packets. This changed with the
beim Zusammenschnüren von Paketen. Dies hat introduction of strapping tape for these packets
sich jedoch mit der Einführung von Umreifungs- and many producers stopped manufacturing it.
bändern für diese Pakete geändert, und viele Her- Today the bands are used mainly as a crafting
steller stellten ihre Produktion ein. Heute bekommt material.
man die Bänder vor allem als Bastelmaterial.
Do the Kamihimo bands break when they
Gehen die Kamihimo-Bänder kaputt, wenn sie get wet? No, they don’t dissolve if they become
nass werden? Nein, sie lösen sich bei Feuchtigkeit moist. It’s part of the weaving technique to
nicht auf! Es gehört sogar zur Flechttechnik, die moisten the bands every now and then, so
Bänder zwischendurch anzufeuchten, damit sie that they can be worked with more easily.
sich einfacher bearbeiten lassen.
11Hier scannen für mehr Informationen, Tipps
und diese Anleitung zum kostenlosen Download.
Scan here to download more information,
hints and these instructions for free.
Scannez ici pour obtenir davantage d’informations,
des astuces ainsi que cette notice en français à
télécharger gratuitement.
Scansionare qui per ottenere maggiori informazioni,
suggerimenti e per scaricare gratuitamente le presenti
istruzioni in lingua italiana.
Escanee este código para obtener más información y
consejos o para descargar estas instrucciones en español.
#ursusdiy www.ursus-basteln.deSie können auch lesen