Bedienungsanleitung Operating instructions - Rednerpult Excalibur Lectern Excalibur - Kindermann ...
←
→
Transkription von Seiteninhalten
Wenn Ihr Browser die Seite nicht korrekt rendert, bitte, lesen Sie den Inhalt der Seite unten
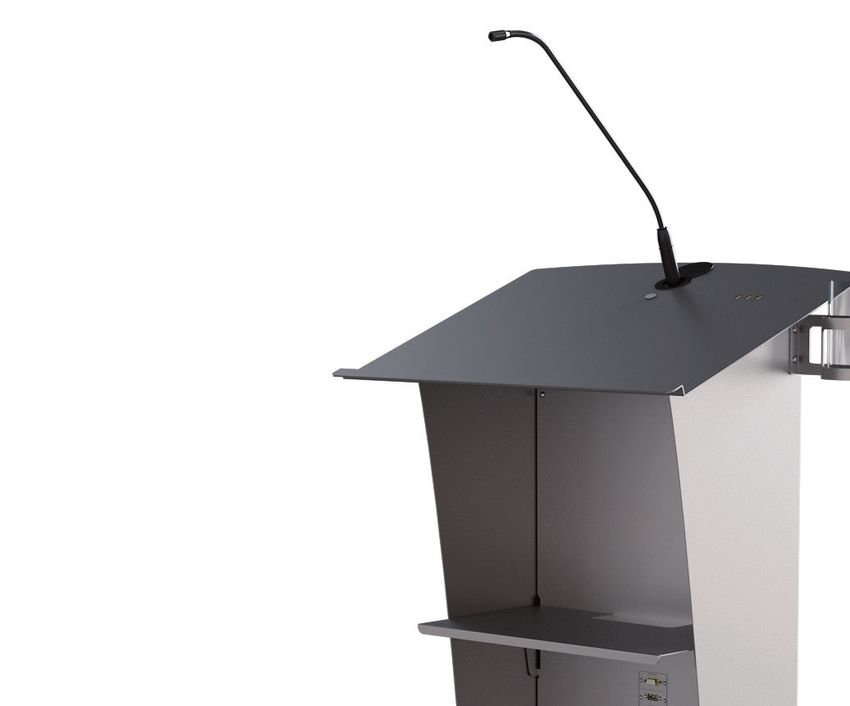
Rednerpult Excalibur
Lectern Excalibur
Art.-Nr./Ref. No. 5120 000 000 - Steel NG
Art.-Nr./Ref. No. 5120 000 010/-011/-012 - Wood
Art.-Nr./Ref. No. 5120 000 020/-021/-022 - Wood + Display

Bedienungsanleitung
Operating instructions

  D
 GB
01.2021
1. Sicherheitshinweise - Safety instructions
• Bitte diese Anleitung sorgfältig durchlesen und aufbewahren.
• Das Rednerpult wird mit 230 V, 50 Hz über einen Kaltgerätestecker betrieben.
Bitte geerdete Steckdose (SCHUKO) verwenden!
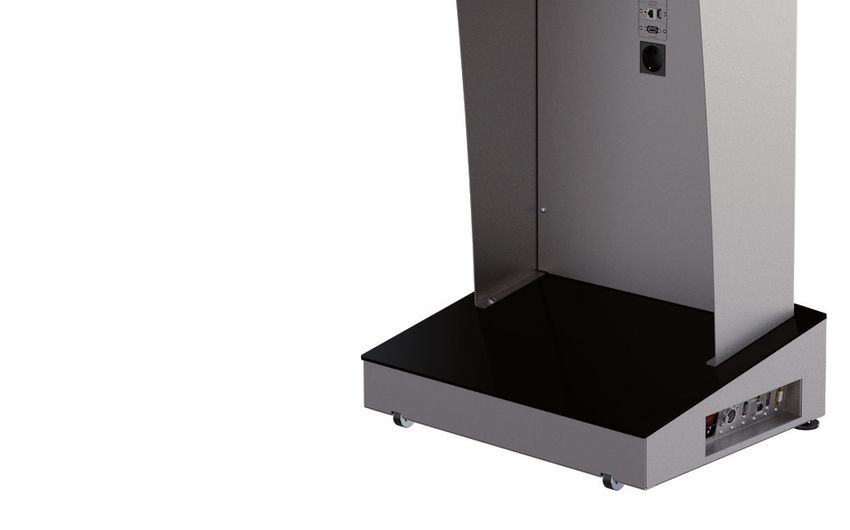
• Der Netzanschluss befindet sich im Sockelbereich auf der rechten Geräteseite.
Längere Lagerung in feuchten Räumen, Betrieb im Regen oder Einfluss von Spritzwasser kann
zu Schäden bzw. Fehlfunktion führen.
• Setzen Sie das Gerät keinesfalls Temperaturen über 50° C, einer Luftfeuchtigkeit von über
95 % oder Regen aus.
• Das Pult darf nur auf einem ebenen, festen und trockenen Untergrund aufgestellt werden!
(Evtl. nachjustieren mittels 17er Schraubenschlüssel).
• Die Inbetriebnahme und Einrichtung des Pultes sollte nur von geschultem Personal
durchgeführt werden! Wenden Sie sich dafür an den Hersteller oder an einen Vertriebspartner.
• Achtung: Bei Wartungsarbeiten am Gerät ist grundsätzlich der Netzstecker zu ziehen!
Wartungsarbeiten sind immer durch qualifiziertes Fachpersonal durchzuführen!
• Please read these instructions carefully and keep them for future reference.
• The lectern is operated with 230 V, 50 Hz with a power connector.
Please use an earthed socket outlet (SCHUKO)!
• The power supply is located in the base of the lectern on the right side. Prolonged storage in
humid conditions, operation in the rain or splashes of water can cause damage or malfunction.
• Do not expose the lectern to temperatures above 50 °C, humidity above 95 % or rain.
• The lectern may only be placed on a flat, firm and dry ground!
(If necessary, readjust using a 17 mm spanner).
• The lectern should only be set up and put into operation by trained personnel!
• Please contact the manufacturer or a distributor.
• Caution: Before carrying out any maintenance work on the lectern, always disconnect the
power supply! Maintenance work must always be carried out by qualified personnel!
2. Pflegehinweise - Care instructions
• Vor jedem Reinigen den Hauptschalter ausschalten und den Netzgerätestecker ziehen.
• Die Acrylglaskomponenten mit einem weichen, trockenen Tuch mit leichtem Druck reinigen.
• Die Edelstahlkomponenten mit einem weichen trockenen Tuch und Edelstahlreinigungsmittel säubern.
• Before cleaning, turn off the main switch and disconnect the power supply.
• Clean the acrylic glass components with a soft dry cloth, applying gentle pressure.
• Clean the stainless steel components with a soft dry cloth and cleaning agent for stainless steel surfaces.
2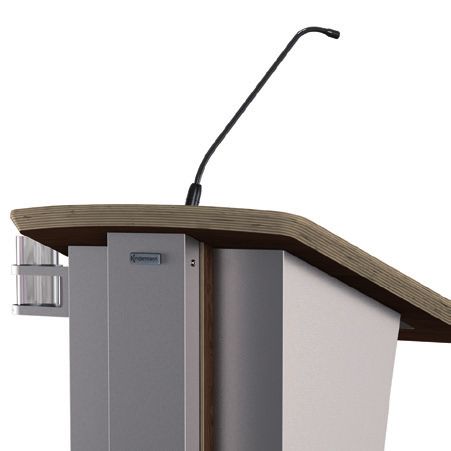
3. Lieferumfang - Scope of delivery
•   Rednerpult Excalibur
•   Steckbare Geräte-Netzanschlussleitung 5 m
•   Infrarotfernbedienung für die Frontbeleuchtung (nur Steel NG!)
    Batterie beiliegend – Typ CR 2025
•   Getränkehalter
•   Ablage
•   Trikot-Handschuhe

•   Lectern Excalibur
•   Plug-in power cable 5 m
•   IR remote control for the front illumination (only Steel NG!)
    Battery included – type CR 2025
•   Cup holder
•   Tray
•   Trikot gloves

4. Optionales Zubehör (empfohlen) - Optional accessories (recommended)
•   Schwanenhalsmikrofon, schwarz, 500 mm (5100 000 703)
•   Logoaufnahme drehbar RP Excalibur (5120 040 000)
•   Dimmbare Pultleuchte (5310000 000)

•   Swan neck microphone, black, 500 mm (5100 000 703)
•   Logo and name badge holder (5120 040 000)
•   Dimmable desk light (5310000 000)

                                                                     3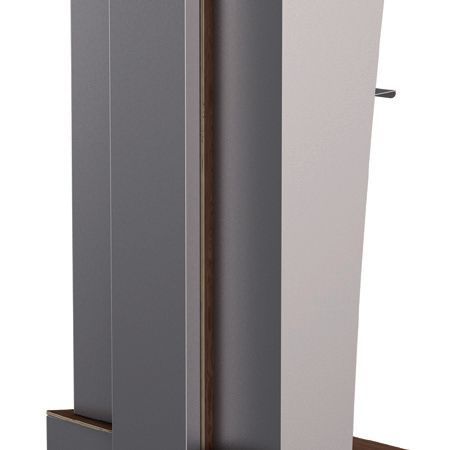
4.1 Ändern der Lichtfarbe (Front) - Changing the light color (front)

Die Infrarotfernbedienung a muss direkten
„Sichtkontakt“ zum Empfänger b haben
(Rückseite des Pultes)!
Maximaler Abstand zwischen Fernbedienung
und Empfänger 5 m!

The infrared remote control a must have
direct „visual contact“ with the receiver b
(rear side of the console)!
Maximum distance between remote control                                       b

and receiver 5 m!
                                                            a

5. Installation - Installation
➡   Pult nur auf festem, ebenem und trockenem Untergrund aufstellen und entsprechend nivelieren
➡   Im Lieferumfang enthaltendes Netzkabel anschließen (Anschluss rechts am Gerätesockel)
➡   Mikrofon (optional) in die Shockmount-Halterung stecken
➡   Hauptschalter am Sockel einschalten
➡   Frontbeleuchtung mittels beiliegender Fernbedienung einschalten
    (Infrarot-Empfänger befindet sich auf der Rednerseite des Pultes unter der Pultplatte)
➡   Gewünschte Farbsequenz und Farbton mittels Fernbedienung einstellen
➡   Lautstärkenregulierung erfolgt über einen externen Verstärker

➡   Set up the lectern only on a firm, even and dry surface and level it accordingly
➡   Connect the included power cable (connection at the base of the lectern, on the right side)
➡   Put the microphone (optional) into the shockmount holder
➡   Turn on the main switch at the base
➡   Switch on the front illumination with the included remote control
    (the infrared receiver is on the speaker’s side of the lectern under the lectern top)
➡   Adjust the desired colour sequence and colour shade with the remote control
➡   Volume control is done via an external amplifier

4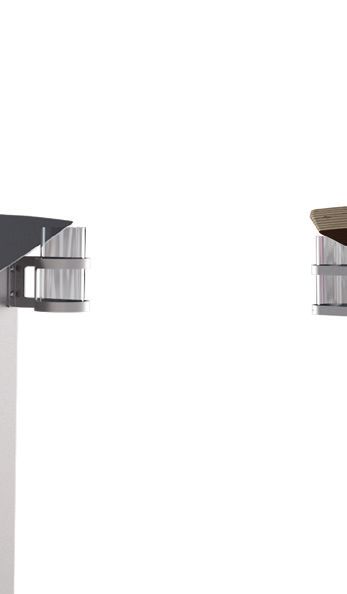
6. Anschlüsse - Connections

6.1 Anschlüsse Pult - Connections in the lectern
 1   Mikrofonhalterung mit Schwenkdeckel
     XLR-Anschluss 3-polig, schwarz                                                1
                                                                                            2
 2   3 x USB 3.0-Anschluss (aktiv)
     z. B. für USB-Datenstick, USB-Leseleuchte
     mit Schwanenhals (Nur Steel NG)
 3   Blindstopfen
                                                                               3
 4   Getränkehalter

 1   Microphone holder with swivel cover
     XLR connector 3-pin, black
                                                                                                   4
 2   3 x USB 3.0 connection (active)
     e. g. for USB stick, USB reading light
     with swan neck (only Steel NG)
 3   Dummy plug
 4   Cup holder

6.2 Anschlüsse Säule - Connections in the column
 5   VGA-Buchse
                                                            5
 6   HDMI-Buchse
 7   Audio-Klinke 3,5 mm
                                                            6
 8   Netzwerk (Cat-6, RJ45)
 9   USB 3.0 (aktiv)
                                                            7
10   230 V-Anschluss, z. B. für Laptop                                                  8

 5   VGA socket                                             9

 6   HDMI socket
 7   Audio jack 3.5 mm
 8   Network (Cat-6, RJ45)
                                                           10
 9   USB 3.0 (active)
10   230 V connection, e.g. for laptop

Die Anschlüsse in der Säule sind direkt mit den entsprechenden Anschlüssen im Sockel verbunden.

The connections in the column are directly connected with the corresponding connections in the base.

                                                                                                       5
6.3 Anschlüsse Sockel - Connections in the base
11 Kaltgerätestecker mit Hauptschalter
12 XLR-Stecker (Mikrofonausgang) 15
13 USB 3.0 (HUB-Eingang)
14 Netzwerk (Cat-6)
15 Audio Klinke 3,5 mm
16 HDMI-Buchse
17 VGA-Buchse
11 Power plug with main switch 11 12 13 14 16 17
12 XLR plug (microphone output)
13 USB 3.0 (HUB input)
14 Network (Cat-6)
15 Audio jack 3.5 mm
16 HDMI socket
17 VGA socket
6.4 Montage Getränkehalter - Installation of the cup holder
Den Getränkehalter 18 mit 2x Schraube 19 mit
Hilfe eines Torx-Schraubendrehers (Größe 20)
in die Gewindebohrungen rechtsseitig am Pult 19 5120 015 000
befestigen.
18 517080
Fix the cup holder 18 with 2x screw 19
by means of a torx screwdriver (size 20)
in the threaded holes on the right side
of the lectern.
6.5 Ablage - Tray
Die Ablage in die Aufnahmeschlitze einhängen.
Place the tray into the mounting slots.
67. Technische Daten - Technical data
• Abmessungen: 125 x 60 x 48 cm (HxBxT)
• Gewicht: ca. 49 kg
• Dimensions: 125 x 60 x 48 cm (HxBxD)
• Weight: approx. 49 kg
8. Anschlüsse - Connections
• Sockel: 230 V; HDMI; VGA; USB 3.0 (Eingang); Audio 3,5 mm; Netzwerk (Cat-6); XLR (Stecker)
• Säule: 230 V; HDMI; VGA; USB 3.0 (aktiv); Audio 3,5 mm; Netzwerk (Cat-6)
• Pultplatte: 3 x USB 3.0 (aktiv); 1 x Mikrofonanschluss XLR (Buchse)
• Base: 230 V; HDMI; VGA; USB 3.0 (input); audio 3.5 mm; network (Cat-6); XLR (male)
• Column: 230 V; HDMI; VGA; USB 3.0 (active); audio 3.5 mm; network (Cat-6)
• Lectern top: 3 x USB 3.0 (active); 1 x microphone connection XLR (female)
79. Einbau des Displays ELO 1502 L - Installation of the display ELO 1502 L
1 2
Befestigungsmaterial
für das Display ist
nicht im Lieferumfang enthalten.
Mounting material for the display
is not included in the scope of
delivery.
3
Zum Nivellieren des Displays,
verwenden Sie bitte die Schrauben
auf der Unterseite der Pultplatte.
To level the display, please use the
screws on the underside of the desk plate.
5
4
5120 000 000 D/GB 2021-01 842 044 Änderungen vorbehalten/Subject to alterations Printed in Germany
Kindermann GmbH · Mainparkring 3 · D-97246 Eibelstadt · E-Mail: info@kindermann.de · www.kindermann.comSie können auch lesen