50m Cat.6 4x4 HDMI & IR Matrix Extender - Deutsch Français Italiano - lindy.com
←
→
Transkription von Seiteninhalten
Wenn Ihr Browser die Seite nicht korrekt rendert, bitte, lesen Sie den Inhalt der Seite unten
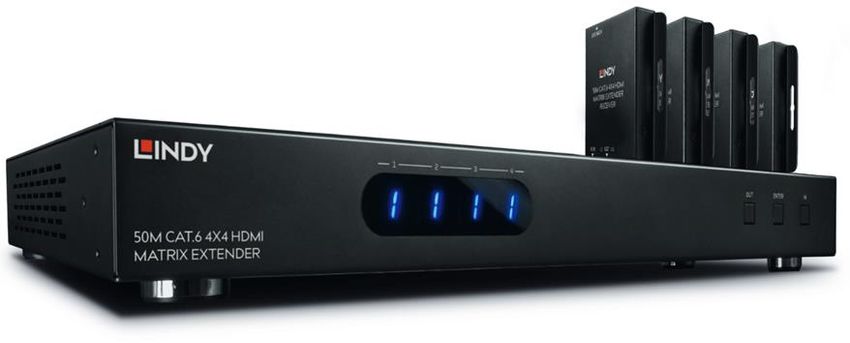
50m Cat.6 4x4 HDMI & IR Matrix
                             Extender
User Manual                                                  Eng li sh
Benutzerhandbuch                                             Deutsch
Manuel Utilisateur                                           Français
Manuale                                                      Italiano

                           No. 38154

                        lindy.com

             © LINDY Group – FOURTH EDITION (January 2021)
User Manual English
Introduction
Thank you for purchasing the Lindy 50m Cat.6 4x4 HDMI & IR Matrix Extender This product has been
designed to provide trouble free, reliable operation. It benefits from both a LINDY 2 year warranty and free
lifetime technical support. To ensure correct use, please read this manual carefully and retain it for future
reference.
The Lindy HDMI & IR Cat.6 Matrix Extender is a simple to use solution that allows users to extend four
independent HDMI signals up to 50m and then distribute those signals to four remote displays using low
cost Cat.6 U/UTP cable (not included). Each of the 4 outputs are also simultaneously mirrored to local
HDMI output ports, perfect for monitoring outputs or for the creation of a secondary local zone.
Package Contents
▪ 50m Cat.6 4x4 HDMI Matrix Extender
▪ 4 x HDMI & IR Cat.6 Receivers
▪ 12V DC 2.5A Multi County PSU (UK, EU, US & AUS), DC round plug: 5.5mm/2.1mm
▪ 4 x IR Emitter with 3.5mm connector, 1m
▪ 5 x IR Receiver with 3.5mm connector, 1m
▪ 4 x IR Remote Control (with CR2025 battery)
▪ RS-232 9 Pin M/F Cable, 1m
▪ Mounting Ears & Screws
▪ This Manual
Features
▪ HDMI 1.4, HDCP 1.4
▪ Supports resolutions up to 3840x2160@30Hz 4:4:4 8bit (Local HDMI), 1920x1080@60Hz (Receiver
Units)
▪ Extends HDMI & 20-60kHz IR signals up to 50m using the supplied receiver units via Cat.6 cable
▪ Pre-set EDIDs and EDID Cloning function for enhanced compatibility
▪ Power over Cat.6 cable, use a single power supply connected to the matrix to power the installation
▪ RS-232, IR, Push Button and IP Control
Specification
Matrix Input / Output Ports
▪ Input: 4 x HDMI Type A (Female), 3.5mm IR (Female)
▪ Output: 4 x HDMI Type A (Female), 4 x RJ-45 (Female), 4 x 3.5mm IR (Female)
Receiver Input / Output Ports:
▪ Input: RJ-45 (Female), 3.5mm IR (Female)
▪ Output: HDMI Type A (Female)
Bi-directional Ports:
▪ RJ-45 Telnet (Female), RS-232 9-Pin
▪ Operating Temperature: 0°C - 40°C (32°F - 104°F)
▪ Storage Temperature: -20°C - 60°C (-4°F - 140°F)
▪ Humidity: 20-90% RH (non-condensing)User Manual English
Installation
Front Panel
1. Front Panel Display: Indicates the active input port (1-4), when connected to each output port
IR: IR Receiver (Receivers the IR signal from the included IR remote Control)
2. Out / Enter / In: Push buttons to set the active Input or output
Out: Press once to select the output signal
In: Press once to select the input source
Enter: Press once to confirm and save the Input / Output setting
Rear Panel 9
1 2 3 1 4 5 6 7 8
1. Local HDMI and RJ-45 Cat.6 Output Ports: Connect to Local HDMI displays or connect to
one of the supplied Cat.6 Receiver units via Cat.6 cable.
2. HDMI Input Ports: Connect to a HDMI source device
3. IR Output Ports: Connect using the included IR Transmitter or Receiver Cables (For more detailed
information on IR control please see the IR Control section)
4. RJ-45 IP Port: Connect to an active Ethernet link for IP/Telnet control
5. RS-232 Port: Connect to a PC or control system with 9-Pin D-Sub cable to transmit RS-232
commands
6. IR Extension port: If the Matrix Transmitter is out of sight or the IR sensor on the front of the unit is
obstructed, please connect an included IR receiver to extend the range of the IR line of sight.
7. EDID Dipswitch: This dipswitch allows for full EDID Management. Please see the table below for
further information
8. Power: Connect the included 12V DC 2.5A Multi-country PSU
9. On/Off: Press to switch the Matrix transmitter On or OffUser Manual English
EDID Position Description
0000 1080p, 60Hz, RGB, 8-bit. 2Channel audio. No compressed audio formats.
0001 1080p, 60Hz, RGB, 8-bit. 5.1Channel audio. Dolby Digital and DTS Audio
0010 1080p, 60Hz, RGB, 8-bit. 7.1Channel audio. AAC, DTS Audio, Dolby Digital plus,
DTS-HD, Dolby TrueHD and Dolby Digital.
0011 1080i, 60Hz, RGB, 8-bit. 2Channel audio. No compressed audio formats.
0100 1080i, 60Hz, RGB, 8-bit. 5.1Channel audio. Dolby Digital and DTS Audio
0101 1080i, 60Hz, RGB, 8-bit. 7.1Channel audio. AAC, DTS Audio, Dolby Digital plus,
DTS-HD, Dolby TrueHD and Dolby Digital.
0110 1080p 3D, 60Hz, RGB, 8-bit. 2Channel audio. No compressed audio formats.
0111 1080p 3D, 60Hz, RGB, 8-bit. 5.1Channel audio. Dolby Digital and DTS Audio
1000 1080p 3D, 60Hz, RGB, 8-bit. 7.1Channel audio. AAC, DTS Audio, Dolby Digital plus,
DTS-HD, Dolby TrueHD and Dolby Digital.
1001 4K, 30Hz, RGB, 8-bit, 2Channel audio. No compressed audio formats.
1010 4k, 30Hz, RGB, 8-bit, 5.1Channel audio. Dolby Digital and DTS Audio
1011 4k, 30Hz, RGB, 8-bit, 7.1Channel audio. AAC, DTS Audio, Dolby Digital plus, DTS-
HD, Dolby TrueHD and Dolby Digital.
1100 1024x768, 60Hz - No audio
1101 1080p, 60Hz. No audio
1110 1200p, 60Hz. No audio
1111 PC software control mode - Control EDID from Software.
Cat.6 Receiver Units
1. IR In: Connect using the included IR Transmitter or Receiver Cable (For more detailed information on
IR control please see the IR Control section)
2. Power LED: Power can be supplied over Cat.6 cable from the Matrix. This LED will illuminate when a
connection is made and power is supplied.
3. CAT: Using Cat.6 cable, please connect the RJ-45 Input of the receiver to the RJ-45 Output of the
matrix Transmitter.
4. Lock LED: When a stable HDMI signal is provided this LED will illuminate.
5. HDMI Out: Using HDMI cable, please connect the receiver to a HDMI port of the display.User Manual English
IR Control
IR Remote
1. Press once to power on the Matrix Transmitter. Press again to set the
unit to standby mode.
2. Press the required number once to select the desired input port 1-4
corresponding with the desired Output display A-D.
IR Control from the display side
To control the source device from the display side of the installation,
please connect the IR transmitter cable to the IR Tx port of the Matrix.
Please ensure the transmitter is located in front of the IR eye of the
source device. Then connect the IR Receiver cable to the IR In port of the
Receiver unit. Please ensure the Receiver is located with or close to the
display.
IR Control from the source device side
To control the display from the source device side of the installation, please connect the IR transmitter
cable to the IR In port of the Receiver unit. Please ensure the IR transmitter is in front of the IR Eye of
the display. Then connect the IR receiver cable to the IR Rx port of the Matrix unit. Please ensure the
receiver is located in a suitable position for a clear line of sight.
Operation
Please ensure all Matrix and receiver units are switched off before installation.
1. Connect up to 4 source devices to the Matrix Transmitter’s HDMI input ports.
2. Connect up to 4 displays to the Matrix Transmitter’s Local HDMI Output ports. Connect up to 4 of
the receiver unit’s to the RJ-45 ports of the Matrix Transmitter using Cat.6 cable of up to 50m in
length.
3. Connect up to 4 displays to the HDMI port of the receiver units.
4. Connect all IR transmitters and receivers for the desired setup (For more detailed information on IR
control please see the IR Control section). Double sided adhesive tape is provided to ensure the
respective cable is fixed in place.
5. Connect the power supply to the Matrix Transmitter and power on all devices in the following
order: Source Device, Matrix, Receiver Unit’s, Output Displays.Benutzerhandbuch Deutsch
Einführung
Wir freuen uns, dass Ihre Wahl auf ein LINDY-Produkt gefallen ist und danken Ihnen für Ihr Vertrauen.
Sie können sich jederzeit auf unsere Produkte und einen guten Service verlassen. Dieser Lindy 50m
Cat.6 4x4 HDMI & IR Matrix Extender unterliegt einer 2-Jahres LINDY Herstellergarantie und
lebenslangem kostenlosen, technischen Support. Bitte lesen Sie diese Anleitung sorgfältig und
bewahren Sie sie auf.
Der Lindy HDMI & IR Cat.6 Matrix Extender ist eine einfache Lösung, um vier unabhängige HDMI-Signale
auf bis zu 50m zu verlängern und diese Signale dann auf vier entfernte (‘remote‘) Displays zu verteilen.
Zum Anschluss benötigen Sie nur ein günstiges Cat.6 U/UTP Kabel (nicht enthalten). Jeder der vier
Ausgänge wird simultan auf lokale HDMI-Ausgangsports gespiegelt, was sich perfekt zum Überwachen
der Ausgänge eignet oder zur Schaffung einer zweiten lokalen Zone.
Lieferumfang
▪ 50m Cat.6 4x4 HDMI Matrix Extender
▪ 4 x HDMI & IR Cat.6 Receiver
▪ 12V DC 2.5A Multi-County Netzteil (UK, EU, US & AUS), DC-Hohlstecker: 5.5mm/2.1mm
▪ 4 x IR-Emitter mit 3.5mm-Anschluss, 1m
▪ 5 x IR-Receiver mit 3.5mm-Anschluss, 1m
▪ 4 x IR-Fernbedienung (mit CR2025-Batterie)
▪ RS232-Kabel 9Pin (Stecker/Buchse), 1m
▪ Montagelaschen & Schrauben
Eigenschaften
▪ HDMI 1.4, HDCP 1.4
▪ Unterstützt Auflösungen bis 3840x2160@30Hz 4:4:4 8Bit (HDMI lokal), 1920x1080@60Hz (Receiver)
▪ Verstärkt HDMI- & 20-60kHz IR-Signale auf bis zu 50m bei Verwendung der im Lieferumfang
enthaltenen Receiver über Cat.6-Kabel
▪ Voreingestellte EDIDs und EDID-Klonfunktion für verbesserte Kompatibilität
▪ ,Power over Cat.6‘-Kabel; für die Stromversorgung ist nur ein Netzteil nötig, das an die Matrix
angeschlossen wird
▪ RS232, Infrarot, Drucktaste und IP-Steuerung
Spezifikationen
Matrix Eingangs-/ Ausgangsports:
▪ Eingang: 4 x HDMI Typ A (Buchse), 3.5mm Infrarot (Buchse)
▪ Ausgang: 4 x HDMI Typ A (Buchse), 4 x RJ45 (Buchse), 4 x 3.5mm Infrarot (Buchse)
Receiver Eingangs-/ Ausgangsports:
▪ Eingang: RJ45 (Buchse), 3.5mm Infrarot (Buchse)
▪ Ausgang: HDMI Typ A (Buchse)
Bidirektionale Ports:
▪ RJ45 Telnet (Buchse), RS232 9Pin
▪ Betriebstemperatur: 0°C - 40°C (32°F - 104°F)
▪ Lagertemperatur: -20°C - 60°C (-4°F - 140°F)
▪ Feuchtigkeit: 20-90% RH (nicht-kondensierend)Benutzerhandbuch Deutsch
Installation
Vorderseite
1. Display auf der Vorderseite: Zeigt den aktiven Eingangsport (1-4) beim Anschluss an jeden
Ausgangsport an
IR: IR Receiver (empfängt das IR-Signal von der im Lieferumfang enthaltenen IR-Fernbedienung)
2. Out / Enter / In: Drucktasten zum Einstellen des aktiven Ein- oder Ausgangs
Out: Einmal Drücken zum Auswählen des Ausgangssignals
In: Einmal Drücken zum Auswählen des Eingangssignals
Enter: Einmal Drücken zum Bestätigen und Speichern der Eingangs-/Ausgangseinstellungen
Rückseite 9
1 2 3 1 4 5 6 7 8
1. Lokale HDMI- und RJ45 Cat.6 Ausgangsports: Zum Anschluss lokaler HDMI Displays oder eines
der mitgelieferten Cat.6 Receiver über ein Cat.6 Kabel
2. HDMI-Eingangsports: Zum Anschluss eines HDMI-Quellgeräts
3. IR-Ausgangsports: Zum Anschluss der im Lieferumfang enthaltenen IR-Transmitter- oder IR-
Receiver-Augen (detaillierte Informationen finden Sie unter ‚IR-Steuerung‘)
4. RJ45 IP-Port: Zum Anschluss an eine aktive Ethernetverbindung zur IP/Telnet-Steuerung
5. RS232-Port: Zum Anschluss eines PCs oder Steuersystems mit Sub-D-Kabel (9Pin) zum
Übertragen von RS232-Befehlen
6. IR-Verlängerungsport: Wenn der Matrix-Transmitter außer Sichtweite des IR-Sensors ist oder der
IR-Sensor auf der Vorderseite verdeckt ist, schließen Sie bitte den mitgelieferten IR-Receiver an,
um den Bereich der IR-Sichtverbindung zu erweitern
7. EDID Dipswitch: Dieser Dipswitch ermöglicht das EDID Management. Weitere Informationen
dazu finden Sie unten in der Tabelle.
8. Power: Zum Anschluss des mitgelieferten 12V DC 2.5A Multi-Country Netzteils
9. On/Off: Drücken zum Ein- und Ausschalten des Matrix-TransmittersBenutzerhandbuch Deutsch
EDID-Position Beschreibung
0000 1080p, 60Hz, RGB, 8Bit. 2-Kanal-Audio. Keine komprimierten Audioformate.
0001 1080p, 60Hz, RGB, 8Bit. 5.1-Kanal-Audio. Dolby Digital und DTS Audio.
0010 1080p, 60Hz, RGB, 8Bit. 7.1-Kanal-Audio. AAC, DTS Audio, Dolby Digital plus, DTS-
HD, Dolby TrueHD and Dolby Digital.
0011 1080i, 60Hz, RGB, 8Bit. 2-Kanal-Audio. Keine komprimierten Audioformate.
0100 1080i, 60Hz, RGB, 8Bit. 5.1-Kanal-Audio. Dolby Digital und DTS Audio.
0101 1080i, 60Hz, RGB, 8Bit. 7.1-Kanal-Audio. AAC, DTS Audio, Dolby Digital plus, DTS-
HD, Dolby TrueHD und Dolby Digital.
0110 1080p 3D, 60Hz, RGB, 8Bit. 2-Kanal-Audio. Keine komprimierten Audioformate.
0111 1080p 3D, 60Hz, RGB, 8Bit. 5.1-Kanal-Audio. Dolby Digital and DTS Audio.
1000 1080p 3D, 60Hz, RGB, 8Bit. 7.1-Kanal-Audio. AAC, DTS Audio, Dolby Digital plus,
DTS-HD, Dolby TrueHD und Dolby Digital.
1001 4K, 30Hz, RGB, 8Bit, 2-Kanal-Audio. Keine komprimierten Audioformate.
1010 4k, 30Hz, RGB, 8Bit, 5.1-Kanal-Audio. Dolby Digital und DTS Audio.
1011 4k, 30Hz, RGB, 8Bit, 7.1-Kanal-Audio. AAC, DTS Audio, Dolby Digital plus, DTS-HD,
Dolby TrueHD und Dolby Digital.
1100 1024x768, 60Hz - Kein Audio
1101 1080p, 60Hz. Kein Audio
1110 1200p, 60Hz. Kein Audio
1111 PC-Softwaresteuerungsmodus – Steuern der EDID mit Software
Cat.6 Receiver
1. IR In: Zum Anschluss der mitgelieferten IR-Transmitter- oder Receiverkabel (detaillierte
Informationen finden Sie unter ‘IR-Steuerung’)
2. Power LED: Die Stromversorgung erfolgt über das mitgelieferte Cat.6 Kabel von der Matrix.
Diese LED leuchtet bei Anschluss und Stromversorgung.
3. CAT: Zur Verbindung des RJ45-Eingangs des Receivers mit dem RJ45-Ausgang des Matrix-
Transmitters bei Verwendung eines Cat.6 Kabels.
4. Lock LED: Die LED leuchtet, wenn ein stabiles HDMI-Signal zur Verfügung steht.
5. HDMI Out: Zum Anschluss des Receivers an einen HDMI Port des Displays mithilfe eines HDMI-
Kabels.Benutzerhandbuch Deutsch
IR-Steuerung
IR-Fernbedienung
1. Einmaliges Drücken schaltet den Matrix-Transmitter ein. Erneutes
Drücken für den Standby-Modus.
2. Drücken der Zahl des gewünschten Eingangsports 1-4
entsprechend der gewünschten Ausgangsdisplays A-D.
IR-Steuerung von der Displayseite
Zur Steuerung des Quellgeräts von der Displayseite aus schließen Sie
bitte das IR-Transmitterkabel am IR TX Port der Matrix an. Achten Sie
darauf, dass der Transmitter vor dem IR-Auge des Quellgeräts steht.
Schließen Sie dann das IR-Receiverkabel am IR-Eingangsport des
Receivers an. Achten Sie darauf, dass der Receiver nahe am Display
steht.
IR-Steuerung von Seiten des Quellgeräts
Zur Steuerung des Displays vom Quellgerät aus schließen Sie bitte dass IR-Transmitterkabel am IR-
Eingangsport des Receivers an. Achten Sie darauf, dass der IR-Transmitter vor dem IR-Auge des
Displays steht. Schließen Sie dann das IR-Receiverkabel am IR RX Port der Matrix an. Achten Sie
darauf, dass der Receiver eine direkte Sichtverbindung hat.
Betrieb
Beachten Sie bitte, dass Matrix und Receiver vor der Installation ausgeschaltet sind.
1. Schließen Sie bis zu 4 Quellgeräte an den HDMI-Eingangsports des Matrix-Transmitters an.
2. Schließen Sie bis zu 4 Displays an die lokalen HDMI-Ausgangsports des Matrix-Transmitters
an und bis zu 4 Receiver an die RJ45 Ports des Matrix-Transmitters, wozu Sie bitte ein bis zu
50m langes Cat.6-Kabel verwenden.
3. Schließen Sie bis zu 4 Displays am HDMI Port der Receiver an.
4. Schließen Sie alle IR-Transmitter und -Receiver für die gewünschte Installation an (detaillierte
Informationen finden Sie unter ‚IR-Steuerung‘). Doppelseitige Klebebänder zum Fixieren der
Kabel sind im Lieferumfang enthalten.
5. Schließen Sie das Netzteil am Matrix-Transmitter an und schalten Sie alle Geräte in dieser
Reihenfolge ein: Quellgerät, Matrix, Receiver, Ausgabedisplays.Manuel Utilisateur Français
Introduction
Nous sommes heureux que votre choix se soit porté sur un produit LINDY et vous remercions de votre
confiance. Vous pouvez compter à tout moment sur la qualité de nos produits et de notre service. Cet
Extender Matrix Cat.6 4x4 HDMI & IR 50m est soumis à une durée de garantie LINDY de 2 ans et d’une
assistance technique gratuite à vie. Merci de lire attentivement ces instructions et de les conserver pour
future référence.
L’Extender Matrix HDMI & IR Cat.6 de LINDY est une solution simple qui permet à l’utilisateur d’étendre
quatre signaux HDMI à une distance allant jusqu’à 50m et de les distribuer sur quatre écrans distants en
utilisant des câbles Cat.6 U/UTP (non fournis). Chacune des quatre sorties est également dupliquée sur
les ports de sorties HDMI locaux de la matrice, solution parfaite pour monitorer les sorties ou pour créer
une zone d’affichage secondaire.
Contenu de l’emballage
▪ Extender Matrix Cat.6 4x4 HDMI 50m
▪ 4 x récepteurs HDMI & IR Cat.6
▪ Alimentation multi-pays 12V DC 2.5A (UK, EU, US & AUS), prise ronde DC: 5.5mm/2.1mm
▪ 4 x émetteurs IR avec connecteur 3.5mm, 1m
▪ 5 x récepteurs IR avec connecteur 3.5mm, 1m
▪ 4 x télécommande IR (avec pile CR2025)
▪ Câble RS-232 9 broches M/F, 1m
▪ Equerres de montage & vis
▪ Ce manuel
Caractéristiques
▪ HDMI 1.4, HDCP 1.4
▪ Prend en charge les résolutions jusqu’à 3840x2160@30Hz 4:4:4 8bit (HDMI local), 1920x1080@60Hz
(unités réceptrices)
▪ Etend les signaux HDMI & 20-60kHz IR jusqu’à 50m en utilisant les récepteurs fournis via câble Cat.6
▪ Présélections EDID et fonction de clonage EDID pour un maximum de compatibilité
▪ Power over Cat.6 Cable, utilisation d’une seule alimentation connectée à la matrice pour alimenter
l’ensemble des appareils
▪ RS-232, IR, contrôle par boutons poussoirs et par IP
Spécifications
Ports Entrée / Sortie Matrix
▪ Entrée: 4 x HDMI Type A (femelle), 3.5mm IR (femelle)
▪ Sortie: 4 x HDMI Type A (femelle), 4 x RJ-45 (femelle), 4 x 3.5mm IR (femelle)
Ports entrée / Sortie Récepteurs:
▪ Entrée: RJ-45 (femelle), 3.5mm IR (femelle)
▪ Sortie: HDMI Type A (femelle)
Ports bidirectionnels:
▪ RJ-45 Telnet (femelle), RS-232 9 broches
▪ Température de fonctionnement: 0°C - 40°C (32°F - 104°F)
▪ Température de stockage: -20°C - 60°C (-4°F - 140°F)
▪ Humidité: 20-90% RH (sans condensation)Manuel Utilisateur Français
Installation
Panneau avant
1. Affichage panneau avant: indique les ports d’entrée actifs (1-4), lorsque connectés aux ports de
sortie
IR: récepteur IR (reçoit les signaux IR reçus de la télécommande fournie)
2. Out / Enter / In: boutons poussoirs pour sélectionner l’entrée ou la sortie active
Out: appuyez une fois pour sélectionner la sortie
In: appuyez une fois pour sélectionner la source en entrée
Enter: appuyez une fois pour confirmer et sauvegarder les réglages entrée/sortie
Panneau arrière
9
1 2 3 1 4 5 6 7 8
1. Ports de sorties HDMI et RJ45 Cat.6 locaux: Connecte les affichages HDMI locaux ou une des
unités réceptrices Cat.6 fournie via câble Cat.6.
2. Ports d’entrée HDMI: Connecte une source HDMI
3. Ports de sortie IR: Connecte les câbles d’extension IR fournis (pour plus de détails merci de vous
référer à la section Contrôle IR)
4. Port RJ-45 IP: Connecte une liaison Ethernet active pour les contrôles IP/Telnet
5. Port RS-232: Connecte un PC ou un système de contrôle avec un câble D-Sub 9 broches pour
transmettre les commandes RS-232
6. Ports d’extension IR: si la matrice est hors de vue ou si le capteur IR en façade est caché, veuillez
connecter un capteur IR fourni pour étendre la zone de réception IR.
7. Dipswitch EDID: ces dipswitch permettent un contrôle poussé de l’EDID. Voir le tableau ci-dessous
pour plus de détails
8. Power: Connecte l’alimentation multi-pays 12V DC 2.5A fournie
9. On/Off: appuyez pour mettre sous/hors tensionManuel Utilisateur Français
Position EDID Description
0000 1080p, 60Hz, RGB, 8-bit. Audio 2 canaux. Formats audio non compressés.
0001 1080p, 60Hz, RGB, 8-bit. Audio 5.1 canaux. Dolby Digital et DTS Audio
0010 1080p, 60Hz, RGB, 8-bit. Audio 7.1 canaux. AAC, DTS Audio, Dolby Digital plus,
DTS-HD, Dolby TrueHD et Dolby Digital.
0011 1080i, 60Hz, RGB, 8-bit. Audio 2 canaux. Formats audio non compressés.
0100 1080i, 60Hz, RGB, 8-bit. Audio 5.1 canaux. Dolby Digital and DTS Audio
0101 1080i, 60Hz, RGB, 8-bit. Audio 7.1 canaux. AAC, DTS Audio, Dolby Digital plus,
DTS-HD, Dolby TrueHD et Dolby Digital.
0110 1080p 3D, 60Hz, RGB, 8-bit. Audio 2 canaux. Formats audio non compressés.
0111 1080p 3D, 60Hz, RGB, 8-bit. Audio 5.1 canaux. Dolby Digital et DTS Audio
1000 1080p 3D, 60Hz, RGB, 8-bit. Audio 7.1 canaux. AAC, DTS Audio, Dolby Digital plus,
DTS-HD, Dolby TrueHD et Dolby Digital.
1001 4K, 30Hz, RGB, 8-bit, audio 2 canaux. Formats audio non compressés.
1010 4k, 30Hz, RGB, 8-bit, audio 5.1 canaux. Dolby Digital et DTS Audio
1011 4k, 30Hz, RGB, 8-bit, audio 7.1 canaux. AAC, DTS Audio, Dolby Digital plus, DTS-
HD, Dolby TrueHD et Dolby Digital.
1100 1024x768, 60Hz – Pas d’audio
1101 1080p, 60Hz. Pas d’audio
1110 1200p, 60Hz. Pas d’audio
1111 Mode de contrôle par logiciel PC - Contrôle EDID par logiciel.
Unités réceptrices Cat.6
1. IR In: Connecte les câbles émetteur ou récepteur IR (pour plus de détails merci de vous référer à la
section Contrôle IR)
2. Power LED: l’alimentation est fournie via le câble Cat.6 raccordé à la matrice. Cette LED s’allume
lorsque la connexion est établie et que l’alimentation est fournie.
3. CAT: en utilisant du câble Cat.6, reliez le port d’entrée RJ-45 du récepteur au port de sortie RJ-45 de
la matrice.
4. Lock LED: cette LED s’allume lorsqu’un signal HDMI stable est fourni.
5. HDMI Out: en utilisant un câble HDMI, connectez le port HDMI du récepteur à l’entrée HDMI de votre
affichage.Manuel Utilisateur Français
Contrôle IR
Télécommande IR
1. Appuyez une fois pour démarrer la matrice. Appuyez une seconde fois
pour mettre l’unité en veille.
2. Appuyez sur la touche requise pour sélectionner le port d’entrée
désiré 1-4 correspondant avec l’affichage en sortie A-D.
Contrôle IR à partir de l’affichage
Pour contrôler l’appareil source à partir de l’affichage, veuillez connecter
le câble émetteur IR au port IR Tx de la matrice. Veuillez-vous assurer
que l’émetteur IR est placé en face du capteur IR de l’appareil source.
Connectez ensuite le câble récepteur IR au port IR In de l’unité réceptrice.
Assurez-vous de placer le récepteur à proximité de l’affichage.
Contrôle IR à partir de la source
Pour contrôler l’affichage à partir de la source, veuillez connecter le câble émetteur IR au port IR In de
l’unité réceptrice. Veuillez-vous assurer que l’émetteur IR est placé en face du capteur IR de l’affichage.
Connecter ensuite le câble récepteur IR au port IR Rx de la matrice. Assurez-vous que le récepteur IR
est placé dans un endroit visible.
Utilisation
Veuillez-vous assurer que la matrice et les récepteurs sont hors tension avant de débuter l’installation.
1. Connectez jusqu’à 4 sources aux ports d’entrée HDMI de la matrice.
2. Connectez jusqu’à 4 affichages aux ports de sorties HDMI locaux de la matrice. Connectez
jusqu’à 4 unités réceptrices aux ports RJ-45 de la matrice en utilisant des câbles Cat.6 d’une
longueur pouvant aller jusqu’à 50m.
3. Connectez jusqu’à 4 affichages aux ports HDMI des unités réceptrices.
4. Connectez tous les émetteurs et récepteurs IR en fonction de la configuration souhaitée (pour
plus de détails à propos du contrôle IR, merci de vous référer à la section Contrôle IR). Des
adhésifs double face sont fournis pour assurer la fixation des câbles.
5. Connectez l’alimentation à la matrice et mettez sous tensions tous les appareils dans l’ordre
suivant: appareil source, Matrice, Unités Réceptrices, Affichages en Sorties.Manuale Italiano
Introduzione
Vi ringraziamo per aver acquistato la Matrice Extender HDMI & IR Cat.6 50m. Questo prodotto è stato
progettato per garantirvi la massima affidabilità e semplicità di utilizzo ed è coperto da 2 anni di garanzia
LINDY oltre che da un servizio di supporto tecnico a vita. Per assicurarvi di farne un uso corretto vi
invitiamo a leggere attentamente questo manuale e a conservarlo per future consultazioni.
La Matrice Extender HDMI & IR Cat.6 Lindy è una soluzione semplice da utilizzare che consente agli
utenti di estendere quattro segnali HDMI indipendenti fino a 50m di distanza e distribuire questi segnali
su quattro schermi remoti utilizzando del comune cavo Cat.6 U/UTP (non incluso). Ciascuno delle 4
uscite sono replicate simultaneamente su porte HDMI locali rendendo immediato anche il monitoraggio
dei segnali sorgente o per creare un secondo ambiente di fruizione locale.
Contenuto della confezione
▪ Matrice Extender HDMI 4x4 Cat.6 50m
▪ 4 x Ricevitori HDMI & IR Cat.6
▪ Alimentatore 12V DC 2.5A Multi County (UK, EU, US & AUS), connettore DC: 5.5mm/2.1mm
▪ 4 x Emettitore IR con connettore da 3.5mm, 1m
▪ 5 x Ricevitore IR con connettore da 3.5mm, 1m
▪ 4 x Telecomando IR (con batteria CR2025)
▪ Cavo RS-232 9 Pin M/F, 1m
▪ Staffe di montaggio e viti
▪ Questo manuale
Caratteristiche
▪ HDMI 1.4, HDCP 1.4
▪ Supporta risoluzioni fino a 3840x2160@30Hz 4:4:4 8bit (HDMI Locale), 1920x1080@60Hz (Unità
riceventi)
▪ Estende segnali HDMI & IR 20-60kHz fino a 50m utilizzando i ricevitori forniti a corredo da collegare
via cavo Cat.6
▪ Pre-set EDID e funzione di clonazione EDID per una compatibilità estesa
▪ Funzione Power over Cat.6 che consente di utilizzare un singolo alimentatore per l’intera installazione
▪ Controllo via RS-232, IR, pulsanti integrati e IP
Specifiche
Porte di Input (ingresso) / Output (uscita) della matrice
▪ Input: 4 x HDMI Tipo A (Femmina), IR 3.5mm (Femmina)
▪ Output: 4 x HDMI Tipo A (Femmina), 4 x RJ-45 (Femmina), 4 x IR 3.5mm (Femmina)
Porte di Input (ingresso) / Output (uscita) dei ricevitori
▪ Input: RJ-45 (Femmina), IR 3.5mm IR (Femmina)
▪ Output: HDMI Tipo A (Femmina)
Porte Bi-direzionali:
▪ RJ-45 Telnet (Femmina), RS-232 9-Pin
▪ Temperatura operativa: 0°C - 40°C (32°F - 104°F)
▪ Temperatura di immagazzinamento -20°C - 60°C (-4°F - 140°F)
▪ Umidità: 20-90% RH (senza condensa)Manuale Italiano
Installazione
Pannello Frontale
1. Schermo del pannello frontale: indica l’ingresso (input) attivo (1-4) connesso a ciascuna porta in
uscita (output)
IR: Ricevitore IR (Riceve i segnali IR dal telecomando IR incluso)
2. Out / Enter / In: Pulsanti per impostare l’ingresso o uscita attivi
Out: Premete una volta per selezionare il segnale in uscita
In: Premete una volta per selezionare la sorgente in ingresso
Enter: Premete una volta per confermare la scelta dell’ingresso/uscita selezionate
Pannello Posteriore 9
2 3 1 4 5 6 7 8
1
1. Uscite (Output) Locali HDMI e RJ-45 Cat.6: Collegatele agli schermi HDMI locali o ad uno dei
ricevitori forniti a corredo con un cavo Cat.6.
2. Ingressi (Input) HDMI: Collegateli alle sorgenti HDMI
3. Porte IR Output: Collegate qui i trasmettitori e ricevitori IR inclusi (per maggiori dettagli sui controlli IR
vedete la sezione “Controllo IR”)
4. Porta IP RJ-45: Collegate questa porta ad una rete Ethernet attiva per utilizzare le funzioni di
controllo IP/Telnet
5. Porta RS-232: Collegate questa porta ad un PC o sistema di controllo con il cavo Seriale D-Sub 9
Pin fornito a corredo per trasmettere comandi RS232
6. Porta IR Extension: Se la matrice non è in vista o il sensore IR del pannello frontale è ostruito vi
preghiamo di utilizzare il ricevitore IR incluso per poter utilizzare il telecomando.
7. Selettori (Dipswitch) EDID: Questi selettori consentono la gestione completa dei segnali EDID. Fate
riferimento alla tabella nella sezione seguente per ulteriori informazioni.
8. Power: Collegate qui l’alimentatore DC 12V 2.5A Multi-country incluso
9. On/Off: utilizzate questo interruttore per accendere e spegnere la matriceManuale Italiano
Posizione Descrizione
Switch EDID
0000 1080p, 60Hz, RGB, 8-bit. 2 canali audio. Solo formati audio non compressi.
0001 1080p, 60Hz, RGB, 8-bit. 5.1 canali audio. Dolby Digital e DTS Audio
0010 1080p, 60Hz, RGB, 8-bit. 7.1 canali audio. AAC, DTS Audio, Dolby Digital plus, DTS-
HD, Dolby TrueHD e Dolby Digital.
0011 1080i, 60Hz, RGB, 8-bit. 2 canali audio. Solo formati audio non compressi.
0100 1080i, 60Hz, RGB, 8-bit. 5.1 canali audio. Dolby Digital e DTS Audio
0101 1080i, 60Hz, RGB, 8-bit. 7.1 canali audio. AAC, DTS Audio, Dolby Digital plus, DTS-
HD, Dolby TrueHD e Dolby Digital.
0110 1080p 3D, 60Hz, RGB, 8-bit. 2 canali audio. Solo formati audio non compressi.
0111 1080p 3D, 60Hz, RGB, 8-bit. 5.1 canali audio. Dolby Digital and DTS Audio
1000 1080p 3D, 60Hz, RGB, 8-bit. 7.1 canali audio. AAC, DTS Audio, Dolby Digital plus,
DTS-HD, Dolby TrueHD e Dolby Digital.
1001 4K, 30Hz, RGB, 8-bit, 2 canali audio. Solo formati audio non compressi.
1010 4k, 30Hz, RGB, 8-bit, 5.1 canali audio. Dolby Digital e DTS Audio
1011 4k, 30Hz, RGB, 8-bit, 7.1 canali audio. AAC, DTS Audio, Dolby Digital plus, DTS-HD,
Dolby TrueHD e Dolby Digital.
1100 1024x768, 60Hz - Senza audio
1101 1080p, 60Hz. Senza audio
1110 1200p, 60Hz. Senza audio
1111 Modalità controllo via software PC - Controllo EDID via software.
Unità Riceventi Cat.6
1. IR In: Collegate qui i cavi trasmettitori o ricevitori IR inclusi (Per maggiori dettagli sul controllo IR vi
preghiamo di far riferimento alla sezione “Controllo IR”)
2. LED Power: l’alimentazione è fornita dalla matrice tramite il cavo Cat.6. Questo LED si illuminerà
quando la connessione è stabilità e l’alimentazione è fornita correttamente.
3. CAT: Utilizzando un cavo Cat.6 collegate questo ingresso RJ-45 all’uscita RJ-45 della Matrice.
4. LED Lock: Questo LED si illumina quando al ricevitore arriva un segnale HDMI stabile.
5. HDMI Out: Collegate a questo porta il vostro schermo utilizzando un cavo HDMI.Manuale Italiano
Controllo IR
Telecomando IR
1. Premete una volta per accendere la matrice e premetelo nuovamente
per metterla in modalità standby.
2. Premete il numero dell’ingresso (input 1-4) desiderato da visualizzare
sull’uscita (Output A-D) corrispondente.
Controllo IR dal lato schermo
Per controllare il dispositivo sorgente dal luogo dove è installato lo
schermo vi preghiamo di connettere il cavo trasmettitore IR alla porta IR
Tx della matrice. Assicuratevi che il trasmettitore sia posizionate di fronte
all’ “occhio” IR del dispositivo sorgente. Collegate poi il cavo ricevitore IR
alla porta IR In dell’unità ricevente. Assicuratevi quindi che l’unità sia
posizionata vicino allo schermo.
Controllo IR da lato sorgente
Per controllare lo schermo dal lato dal luogo dove è installata la sorgente vi preghiamo di collegare il
cavo trasmettitore IR alla porta IR In dell’unità ricevente. Assicuratevi che il trasmettitore sia posizionato
di fronte all’ “occhio” IR dello schermo. Collegate poi il cavo ricevitore IR alla porta IR Rx della matrice.
Assicuratevi che l’”occhio” del ricevitore sia posizionato ben in vista.
Utilizzo
Vi preghiamo di assicurarvi che la matrice e le unità riceventi siano spenti prima di effettuare i
collegamenti.
1. Collegate fino a 4 sorgenti agli ingressi (Input) HDMI della matrice.
2. Collegate fine a 4 schermi alle uscite (Output) HDMI locali della matrice. Collegate fino a 4 unità
riceventi alle uscite (Output) RJ45 della matrice utilizzando cavi Cat.6 lunghi fino a 50m.
3. Collegate fino a 4 schermi alle uscite (Output) HDMI delle unità riceventi.
4. Collegate tutti i ricevitori e trasmettitori IR richiesti dalla vostra installazione. (Per maggiori
dettagli sul controllo IR vi preghiamo di far riferimento alla sezione “Controllo IR”). Sull’estremità
di ciascun cavo è posizionato del nastro biadesivo per facilitarne il posizionamento.
5. Collegate l’alimentatore alla matrice e accendete tutti i dispositivi nel seguente ordine: sorgenti,
matrice e unità riceventi, schermi.CE/FCC Statement
CE Certification
LINDY declares that this equipment complies with relevant European CE requirements.
CE Konformitätserklärung
LINDY erklärt, dass dieses Equipment den europäischen CE-Anforderungen entspricht
UKCA Certification
LINDY declares that this equipment complies with relevant UKCA requirements.
FCC Certification
This equipment has been tested and found to comply with the limits for a Class B digital device, pursuant
to part 15 of the FCC Rules. These limits are designed to provide reasonable protection against harmful
interference in a residential installation.
You are cautioned that changes or modification not expressly approved by the party responsible for
compliance could void your authority to operate the equipment.
This device complies with part 15 of the FCC Rules.
Operation is subject to the following two conditions:
1. This device may not cause harmful interference, and
2. This device must accept any interference received, including interference that may cause undesired
operation.
The enclosed power supply has passed Safety test requirements, conforming to the US American versions
of the international Standard IEC 60950-1 or 60065 or 62368-1.
LINDY Herstellergarantie – Hinweis für Kunden in Deutschland
LINDY gewährt für dieses Produkt über die gesetzliche Regelung in Deutschland hinaus eine zweijährige
Herstellergarantie ab Kaufdatum. Die detaillierten Bedingungen dieser Garantie finden Sie auf der LINDY
Website aufgelistet bei den AGBs.
Hersteller / Manufacturer (EU): Manufacturer (UK):
LINDY-Elektronik GmbH LINDY Electronics Ltd
Markircher Str. 20 Sadler Forster Way
68229 Mannheim Stockton-on-Tees, TS17 9JY
Germany England
Email: info@lindy.com , T: +49 (0)621 470050 sales@lindy.co.uk, T: +44 (0)1642 754000Recycling Information
WEEE (Waste of Electrical and Electronic Equipment),
Recycling of Electronic Products
Europe, United Kingdom
In 2006 the European Union introduced regulations (WEEE) for the collection and recycling of all waste electrical
and electronic equipment. It is no longer allowable to simply throw away electrical and electronic equipment. Instead,
these products must enter the recycling process.
Each individual EU member state has implemented the WEEE regulations into national law in slightly different ways.
Please follow your national law when you want to dispose of any electrical or electronic products. More details can
be obtained from your national WEEE recycling agency.
Battery Remark:
Do not put empty batteries in your domestic waste bin as they will not be recycled. Empty batteries can be returned
for recycling at our trade counter or at your local household recycling centre.
The raw materials enclosed in batteries such as Zinc, Iron and Nickel can be reused to a very large proportion. The
recycling of batteries and disused/obsolete electronic equipment is one of the most efficient environment protection
actions you can easily take.
Germany / Deutschland Rücknahme Elektroschrott und Batterie-Entsorgung
Die Europäische Union hat mit der WEEE Direktive Regelungen für die Verschrottung und das Recycling von Elektro-
und Elektronikprodukten geschaffen. Diese wurden im Elektro- und Elektronikgerätegesetz – ElektroG in deutsches
Recht umgesetzt. Das Entsorgen von Elektro- und Elektronikgeräten über die Hausmülltonne ist verboten! Diese
Geräte müssen den Sammel- und Rückgabesystemen zugeführt werden! Dort werden sie kostenlos entgegen
genommen. Die Kosten für den weiteren Recyclingprozess übernehmen die Gerätehersteller.
LINDY bietet deutschen Endverbrauchern ein kostenloses Rücknahmesystem an, beachten Sie bitte, dass Batterien
und Akkus den Produkten vor der Rückgabe an das Rücknahmesystem entnommen werden müssen und über die
Sammel- und Rückgabesysteme für Batterien separat entsorgt werden müssen. Ausführliche Informationen zu
diesen Themen finden Sie stets aktuell auf der LINDY Webseite im Fußbereich.
France
En 2006, l'union Européenne a introduit la nouvelle réglementation (DEEE) pour le recyclage de tout équipement
électrique et électronique.
Chaque Etat membre de l’ Union Européenne a mis en application la nouvelle réglementation DEEE de manières
légèrement différentes. Veuillez suivre le décret d’application correspondant à l’élimination des déchets électriques
ou électroniques de votre pays.
Remarque sur les piles et batteries
En tant que consommateur final, vous êtes tenus de restituer toutes les piles et batteries usagées. Il est clairement
interdit de les jeter avec les ordures ménagères ! Les piles et batteries contenant des substances nocives sont
marquées par le symbole ci-dessus. Vous pouvez déposer gratuitement vos piles ou batteries usagées dans les
centres de collecte de votre commune, dans nos succursales ou dans tous les points de vente de piles ou batteries.
Vous respecterez ainsi la loi et contribuerez à la protection de l'environnement !
Italy
Nel 2006 l’unione europea ha introdotto regolamentazioni (WEEE) per la raccolta e il riciclo di apparecchi elettrici ed
elettronici. Non è più consentito semplicemente gettare queste apparecchiature, devono essere riciclate. Ogni stato
membro dell’ EU ha tramutato le direttive WEEE in leggi statali in varie misure. Fare riferimento alle leggi del proprio
Stato quando si dispone di un apparecchio elettrico o elettronico.
Per ulteriori dettagli fare riferimento alla direttiva WEEE sul riciclaggio del proprio Stato.
No. 38154
4th Edition, January 2021
Tested to comply with
FCC Standards
For Home and Office Use! lindy.comSie können auch lesen