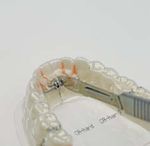
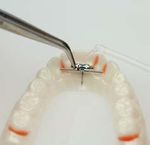
Anleitung zur Herstellung einer CA CLEAR ALIGNER Unterkiefer-schiene mit der VECTOR 40 Dehnschraube nach Prof. Hinz How to fabricate a CA CLEAR ...
←
→
Transkription von Seiteninhalten
Wenn Ihr Browser die Seite nicht korrekt rendert, bitte, lesen Sie den Inhalt der Seite unten
Anleitung zur Herstellung einer CA® CLEAR ALIGNER Unterkiefer-
schiene mit der VECTOR® 40 Dehnschraube nach Prof. Hinz

How to fabricate a CA® CLEAR ALIGNER lower splint
using the VECTOR® 40 expansion screw acc. to Prof. Hinz
REF 2486
Anleitung zur Herstellung einer CA® CLEAR ALIGNER Unterkiefer-
schiene mit der VECTOR ® 40 Dehnschraube nach Prof. Hinz
Spezialschraube in Micro-Bauweise mit gelasertem Drehrichtungspfeil zur Herstellung von aktivierbaren
CA® Schienen, die schnelle transversale Dehnungen (bis 3 mm) gewährleistet. Der Retentionsarm ermöglicht
eine sichere Verankerung auf der CA® Schiene.
Durch die Einarbeitung von VECTOR® Spezialschrauben in CA® CLEAR ALIGNER Schienen wird die Behandlung
von Zahnfehlstellungen (Eng- und Drehstände einzelner Zähne oder ganzer Zahngruppen) im Vergleich zur
klassischen CA® Set-Up Technik noch wirtschaftlicher, schneller und effektiver. Die Transparenz und die Ästhetik
der Schienen bleiben dabei erhalten.

Wir empfehlen folgende Fachliteratur:
CA® Fachbuch Band 2 Advanced
Englisch: REF 5309 / Deutsch: REF 5307

Wichtig:
Bitte beachten Sie die maximalen Zahnbewegungen für CA® CLEAR ALIGNER nach Dr. Pablo Echarri
(siehe CA® Fachbuch Band 2 Advanced, S. 52/53).

                                                                         VECTOR® 40 REF 2486
                                                                         • 10 Stück
                                                                         • B x H 3,6 x 2,5 mm, Länge 19,0 mm
                                                                         • Dehnung 3,0 mm
                                                                         • Aktivierungshinweis:
                                                                            pro 1/1 Umdrehung = 0,7 mm
                                                                         • 10 pieces
                                                                         • W x H 3.6 x 2.5 mm, length 19.0 mm
                                                                         • Expansion 3.0 mm
                                                                         • Activation note: per 1/1 turn = 0.7 mm

How to fabricate a CA® CLEAR ALIGNER lower splint using a
VECTOR® 40 expansion screw acc. to Prof. Hinz
Special miniaturised screw with black directional arrow for fabrication of CA® splints, allowing expansions in the
lower jaw (up to 3 mm). The retention arms allow safe anchorage using cold curing resin.
By incorporating specific VECTOR® expansion screws in CA® CLEAR ALIGNER splints, treatment of mal-
occlusions such as crowdings or rotations of single teeths or groups of teeths gets even quicker and more
efficient and economical in comparison with the conventional CA® set-up technique. Aesthetic qualities and
transparency of the splints remain unchanged.

We recommend the following specialized literature for further information:
CA® Book Volume 2 Advanced
English: REF 5309 / German: REF 5307

Important:
Make sure not to exceed the maximal tooth movement in the CA® CLEAR ALIGNER technique acc. to
Dr. Pablo Echarri (CA® Book volume 2, Advanced, pages 52/53).

2
Tiefziehverfahren Arbeitsmaterial: Zusätzlich verwendete Materialien:
REF 2486 VECTOR 40
®
REF 3442 SIL-KITT rot
REF 3207 ISOFOLAN® REF 5288 Diamant Trennscheibe
REF 3407 CA® Folie hard (0,75mm) REF 5372 Set-Up Handsäge
REF 3218 BIOCRYL®-Resin Monomer REF 3265 LC-Fräse C
REF 3221 BIOCRYL®-Resin Polymer REF 3460 SD-Folienschere A
REF 3701 SD-Cyano Veneer Fast REF 3461 SD-Folienschere B
REF 3703 SD-Pipette REF 3226 BIOPERM®-Trimmer
Druckformgerät REF 3381 DIMO® PRO
REF 3710 SD-Polierpaste A
REF 3711 SD-Polierpaste B
REF 3712 SD-Polierbürste
REF 3713 SD-Filzrad
REF 3714 SD-Hochglanzschwabbel
REF 3372 POLYFIX Scheibe
Skalpell
Working material for pressure moulding: Additionally recommended material:
REF 2487 VECTOR 40
®
REF 3442 SIL-KITT red
REF 3207 ISOFOLAN® REF 5288 Diamond separating disc
REF 3407 CA® Foil hard (0.75mm) REF 2041 CARAT® Flat pliers
REF 3218 BIOCRYL®-Resin monomer REF 5372 Set-up manual saw
REF 3221 BIOCRYL®-Resin polymer REF 3606 SD Separating disc, serrated
REF 3701 SD Cyano Veneer Fast REF 3265 LC bur C
REF 3703 SD Pipette REF 3460 SD Foil scissors A
Pressure moulding device REF 3461 SD Foil scissors B
REF 3226 BIOPERM® Trimmer
REF 3382 DIMO® brown, coarse
REF 3381 DIMO® PRO
REF 3710 SD Polishing paste A
REF 3711 SD Polishing paste B
REF 3712 SD Polishing brush
REF 3713 SD Felt wheel
REF 3714 SD High gloss polishing disc
REF 3372 POLYFIX disc
Scalpel
3Unterkiefermodell im Bereich von Block out the lower jaw model in the area
1
Engständen und untersichgehenden of crowdings and undercuts using
Stellen mit SIL-KITT ausblocken. SIL-KITT. Mark the midline.
Die Mittellinie wird angezeichnet.
Das Modell auf die Modellstütz- Place the model on the model
2
platte stellen. ISOFOLAN® platform. Thermoform
Folie nach Herstellerangaben ISOFOLAN® according to the
tiefziehen, am Modellrand kürzen manufacturer‘s instructions,
und interdental Einschnitte reduce the model at the model
vornehmen. rim and make interdental
incisions.
Wachsplatzhalter der VECTOR® 40 Remove VECTOR® 40 wax space
3
oberflächlich entfernen. holder at the surface.
VECTOR® 40 Dehnschraube Fix VECTOR® 40 expansion screw
4
mit einem Tropfen CA® CYANO with a drop of CA® CYANO VENEER
VENEER FAST auf der ISOFOLAN® FAST on ISOFOLAN® prior to
Folie fixieren und ausrichten. positioning.
Fixierte VECTOR® 40 Fixed VECTOR® 40 expansion
5
Dehnschraube. screw.
Wenn nötig, kann der If necessary, adapt guiding pins to
Führungsstift an die Kieferbreite jaw width.
angepasst werden.
Note:
Hinweis: Reducing the guiding pins affects
Das Kürzen hat Einfluss auf die expansion width!
Dehnweite!
Der Zahnkranz wird mit der Front The dental arcade is placed on the
6 vorzugsweise zur Verschlusswelle model platform preferably with the
auf der Modellstützplatte front facing the locking shaft.
positioniert (Vollmodelle müssen im (Full models should be embedded in
Granulat eingebettet werden). the granules).
4Die CA® Folie hard einspannen und Fix a CA® foil hard and mix BIOCRYL®
7
BIOCRYL® -Resin cremig-sahnig Resin until it has a creamy consistency.
anrühren. Während der Heizzeit der Apply a few drops of BIOCRYL® Resin to
Folie die Metallteile mit ein paar the metal parts during the heating time
Tropfen BIOCRYL®-Resin unterlegen. of the CA® foil.
In den letzten 5 Sekunden der During the last 5 seconds of the heating
Heizzeit BIOCRYL®-Resin großzügig time more resin should be added
nachtragen. Nach Ablauf der Heizzeit generously. Once the heating time has
Druckkammer schließen ended, close the pressure chamber and
und tiefziehen. thermoform.
Während dieses Zeitraums alle Ignore any acoustic signals during
8
akustischen Signale ignorieren und this period, making sure not to
das Gerät weder entlüften noch evacuate or to switch off the
ausschalten. machine.
Wichtig: Important:
Das Modell sollte mindestens The model should stay under
10 Minuten unter Druck im Gerät pressure in the unit for at least
bleiben. 10 minutes.
Die Folie grob mit SD-Folienschere B Roughly reduce material using SD Foil
9
reduzieren. scissors B.
Folie entlang der Mittellinie Cut material along the midline, with
10
trennen. Aus Stabilitätsgründen the splint remaining on the model for
sollte die Schiene auf dem Modell stability reasons.
bleiben.
Mittels Fräse die Folie vorsichtig The area around the screw is
11
an der Schraube ausdünnen. carefully thinned out using a bur.
Die Freilegung der Schrauben- Expose the screw spindle using a
12
spindel erfolgt mit einem Skalpell. scalpel.
5Folie auf ihre endgültige Länge Reduce material to required length
13
bringen und lingual vorsichtig and separate it carefully from the
separieren. lingual side.
Übergang zur Schraube mit dem Expose the transition to the screw
14
Skalpell freischneiden. using a scalpel.
Lochbohrungen mittels Remove wax residues from the
15
Aktivierungsschlüssel von bore holes using an activation key.
Wachsrückständen befreien.
Schiene wie gewohnt ausarbeiten Finish and polish the splint as
16
und polieren. usual.
Wir empfehlen das auf Seite 3 We recommend using the material
17
aufgeführte Zubehör. listed on page 3.
Fertiger Einbau der VECTOR® 40 Inserted VECTOR® 40 expansion
18
Dehnschraube. screw.
6Aktivierungshinweis Activation hint
für VECTOR® 40 Schrauben: for VECTOR® 40 screw:
1x 1/4 Umdrehung: 0,175 mm 1x 1/4 rotation: 0.175 mm
1/ 1/
4 4
4x
1/
4/4 Umdrehung: 0,7 mm 4x
1/
4/4 rotation: 0.7 mm
4 4
Aktivierung: ca. 3,0 mm Activation: approx. 3.0 mm
Vor Aktivierung Nach Aktivierung
Before activation After activation
Hinweis:
Diese Anleitung ersetzt nicht die Teilnahme an unseren technischen CA® Kursen.
Wir empfehlen zusätzlich folgenden Kurs:
„Kurs Nr. 23 - Modul 5 - CA® CLEAR ALIGNER Schienen mit speziellen VECTOR®-Dehnschrauben“.
Weitere Informationen und Kursdetails finden Sie auf unserer Internetseite:
➔ www.scheu-dental.com ➔ SCHEU-ACADEMY ➔ Seminar ➔ Themen: CA® CLEAR ALIGNER
Hint:
Please note this instruction does not replace attending our technical CA® courses.
We also recommend participating in the following additional course:
„Course No. 17 - module 5: CA® CLEAR ALIGNER splints with specific VECTOR® expansion screws“.
For further information and details on the course please visit our website:
➔ www.scheu-dental.com ➔ SCHEU-ACADEMY ➔ Seminar ➔ Topics: CA® CLEAR ALIGNER
7Weitere Herstellanleitungen zum Einbau von speziellen VECTOR®
Schrauben in Aligner und Schienen:
More instructions on how to fabricate aligners and splints with
different VECTOR® screws:
CA® CLEAR ALIGNER mit CA® CLEAR ALIGNER CA® CLEAR ALIGNER
VECTOR® 30 Schrauben und mit mit VECTOR® 45 Schraube
CA® Bogen CHROMIUM VECTOR® 40 Schraube nach Prof. Hinz
REF 2484, REF 5317 REF 2486 REF 2487
CA® CLEAR ALIGNER CA® CLEAR ALIGNER CA® CLEAR ALIGNER
with VECTOR® 30 screws with with VECTOR® 45 screw
and CA® Arch CHROMIUM VECTOR® 40 screw acc. to Prof. Hinz
TFA Schiene Schiene mit CA® CLEAR ALIGNER
mit TFA Kit VECTOR® mit CA® Distalizer Kit
nach Dr. Echarri Federbolzenschrauben nach Dr. Echarri
REF 5329 REF 2477-2482 REF 5319
TFA Splint Splint with CA® CLEAR ALIGNER
with TFA Kit VECTOR® Piston screws with CA® Distalizer Kit
acc. to Dr. Echarri acc. to Dr. Echarri
DE/GB 500/06/20 G REF PM0307.01
SCHEU-DENTAL GmbH Am Burgberg 20 phone +49 2374 9288-0
www.scheu-dental.com 58642 Iserlohn · Germany fax +49 2374 9288-90Sie können auch lesen


