MONTAGEANLEITUNG ASSEMBLY INSTRUCTIONS INSTRUCTIONS DE MONTAGE
←
→
Transkription von Seiteninhalten
Wenn Ihr Browser die Seite nicht korrekt rendert, bitte, lesen Sie den Inhalt der Seite unten
MONTAGEANLEITUNG
                                                     ASSEMBLY INSTRUCTIONS
                                                   INSTRUCTIONS DE MONTAGE
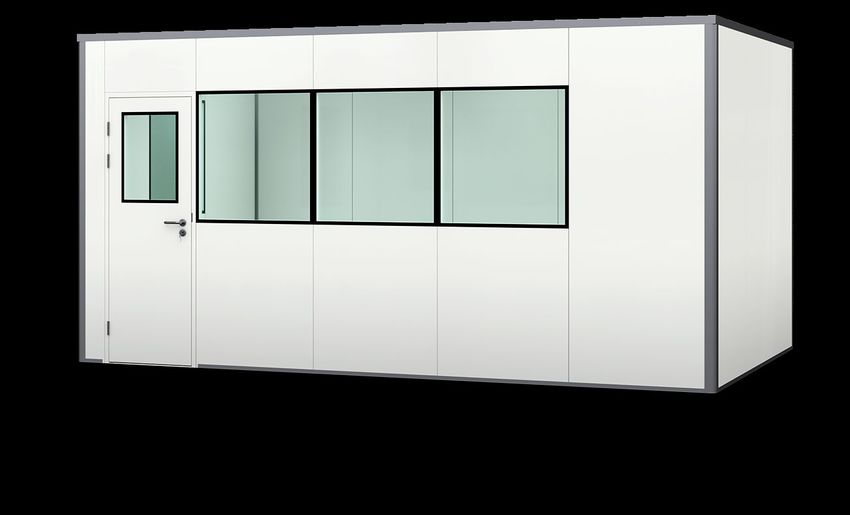
                                                                                                       Hallenbüro
                                                                                                    Prefab offices
                                                                                                  Bureau d'atelier
                                                                                                                 PREFAB

Bitte lesen Sie vor der Verwendung des Produktes unbedingt dieses Handbuch und folgen den darin enthaltenen Anweisungen!

Please read this manual before using the product and follow the instructions it contains!

Veuillez lire ce manuel avant d‘utiliser le produit et suivre les instructions qu‘il contient !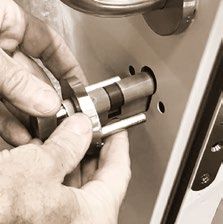
TOPREGAL

     ALLGEMEINE HINWEISE

     GEFAHREN VORBEUGEN
DE
     Das von Ihnen erworbene Hallenbüro PREFAB ist dem heutigen Stand der Technik entsprechend hergestellt und entspricht
     den geltenden Vorschriften und Regeln. Trotzdem kann es eine Gefahr für Personen und Sachwerte darstellen, wenn:
EN
     • Das Hallenbüro nicht ordnungsgemäß aufgebaut, unsachgemäß verändert oder umgebaut wird.
     • Keine Original-Teile verwendet werden.
FR   • Die Sicherheitsbestimmungen nicht beachtet werden.

     Daher muss jede Person, welche die Montage durchführt, die Sicherheitsbestimmungen lesen und befolgen, gegebenenfalls
     lassen Sie sich dies durch eine Unterschrift bestätigen.

     UNFALLVERHÜTUNGSVORSCHRIFTEN
     Es gelten alle einschlägigen Unfallverhütungsvorschriften:

     • Allgemein anerkannte sicherheitstechnische Regeln.
     • Länderspezifische Bestimmungen.
     • Richtlinien für Lagereinrichtungen und Geräte des jeweiligen Landes.

     BITTE BEACHTEN
     Vor der Montage, Inbetriebnahme oder Nutzung sind die in dieser Anleitung enthaltenen Hinweise zwingend zu beachten,
     um Gefahren zu vermeiden. Falls Sie fachliche Unterstützung benötigen, setzen Sie sich mit uns in Verbindung.

     Um Personen und Sachschäden zu vermeiden, beachten Sie bitte:

     • Die einschlägigen Arbeitsstättenrichtlinien und -Verordnungen.
     • Die Hinweise Ihres Sicherheitsbeauftragten.
     • Die baulichen Gegebenheiten, insbesondere die Beschaffenheit und Tragfähigkeit des Fußbodens.
     • Dass sich die Einrichtungen in einwandfreiem Zustand befinden.
     •	Der Austausch beschädigter oder deformierter Bauteile ist zwingend sofort notwendig. Im Zweifelsfall unterbrechen
        Sie die Montage bzw. Nutzung, sichern den Aufstellbereich und verständigen Ihren Sicherheitsbeauftragten.
     • Dass die Nutzung erst nach Abschluss aller Montagearbeiten vorgenommen werden darf.
     • Der Aufbau des Hallenbüro sollte mit mindestens 2 Personen durchgeführt werden. Die Einhaltung Reihenfolge
        der Aufbauanleitung ist zwingend einzuhalten.
     • Dass beim Auf- und Umbau Schutzkleidung wie Helm, Handschuhe, Sicherheitsschuhe etc. zu tragen sind.
     • Dass das Meisterbüro wirksam gegen das Anfahren von Staplern oder anderen Fahrzeugen zu schützen ist.
     • Wir empfehlen die Sicherung der Eckbereiche durch einen, nicht mit dem Hallenbüro verbundenen, Anfahrschutz mit
        gelb-schwarzer Gefahrenkennzeichnung.

     INSPEKTION
     Je nach Intensität der Nutzung empfehlen wir in regelmäßigen Abständen eine allgemeine Sicht- und
     Funktionskontrolle durchzuführen.

     PFLEGEHINWEIS
     Wand-, Decken- und Fensterpaneele mit Wasser und, falls erforderlich, ein wenig verdünnte, milde Seifenlösung reinigen.
     Achten Sie darauf, dass die Pulverbeschichtung nicht verkratzt, sonst besteht Korrosionsgefahr. Verkratzte Stellen
     müssen mit einem Lackstift nachbehandelt werden. Bitte achten Sie darauf, keine unzulässige Oberflächenbehandlung zu
     verwenden, wie z. B. chemische Lösungsmittel, Ammoniak oder Salmiak.

      2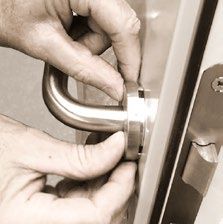
TOPREGAL

VORBEREITUNG DER MONTAGE

Alle original PREFAB Bauteile, die der Stabilisierung dienen, sind uneingeschränkt anzubringen. Darunter fallen vor allem
Rahmenbauteile, Verbindungsstreben, Schrauben sowie Befestigungsprofile. Generell ist bei der Montage darauf zu achten,     DE
dass die Schrauben nicht überdreht werden. Die Schrauben sind handfest vorzumontieren und später mit passendem
Werkzeug, wie z. B. Akkuschrauber oder Schraubenschlüssel nachzuziehen.
                                                                                                                            EN
Ein ebener Boden ist für das Aufstellen des Hallenbüros maßgebend. Schneiden Sie die U-Bodenschienen entsprechend
der gewünschten Maße zu. Achten Sie auf die Positionierung der Türaussparung ihres PREFAB-Hallenbüros (S. 8, Abb. 1).
                                                                                                                            FR
AUFBAU
Das Hallenbüro PREFAB darf nur unter Beachtung der von uns mitgelieferten Aufbau- und Betriebsanleitungen
aufstellt und umgebaut werden.

SCHUTZFOLIE
Die einzelnen Paneele sind mit einer transparenten Schutzfolie versehen, welche nach erfolgter Montage rückstandslos
entfernt werden kann. Ein Abziehen der Folie vor der Montage wird nicht empfohlen, um eventuelle Kratzer während der
Montage zu vermeiden. Die Paneele können Sie bei Verschmutzung mit einem Seifengemisch und einem Mikrofasertuch
leicht und schonend reinigen.

MATERIALIEN

NUTZUNG DES PRODUKTS
In allen Räumen mit normalen, trockenen klimatischen Bedingungen verwendbar. Beispielsweise Produktions- und
Lagerhallen, Büros und Sauberräumen ohne Klassifizierung. Kann auch auf Lagerbühnen montiert werden (Statik beachten).

BRANDSCHUTZ
Erhöhter Brandschutz durch Verwendung nicht-brennbarer Materialien, die keine zusätzliche Brandlast darstellen.

ELEKTROSTATIK
Alle metallischen Trennwandkomponenten sind elektrisch leitend miteinander verbunden.

SCHALLDÄMMUNG
45 dB

        +49 (0)7158 9181 500                 info @ topregal.com                www.topregal.com                        3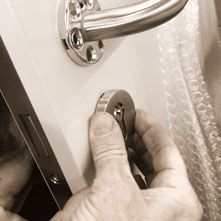
TOPREGAL

     WANDPANEELE
      Typ            Einheit                                       Wert
DE    Farbe                                                RAL 9002 grauweiß

                                  Aus elektrolytisch verzinkten Stahlblechen, zweischalig. Zwischenraum
      Brandschutz                 vollflächig ausgefüllt mit Mineralwolle zur Schall- und Wärmedämmung.
EN                                                    Baustoffklasse A1 nicht brennbar.

                                 Zweischalige Sandwichfüllplatte mit Stahlblechschale, beidseitig flächen-
      Füllplatte
FR                                 bündig im Ständerwerk eingesetzt. (Kann nicht demontiert werden)

                                           Schalldämmung 45 dB, Flächengewicht ca. 12 kg/qm,
      Füllmaterial
                                   A1 (nicht brennbar) nach EN 12501-1 der Trennwandhauptmaterialien

      Blechdicke      mm                                           0,45

                                                 Elektrolytische Polyesterbeschichtung
      Oberfläche
                                    (bandbeschichtet), mindestens 25 μm, glattflächig, mit Schutzfolie.

      Dämmeinlage                         Hoch-druckfeste Mineralwolleinlage (Basalt Steinwolle)
      Wanddicke       mm                                            50
      Wandhöhe        mm                                          2.500
      Wandbreite      mm                               980, Polyester-Beschichtung

     DECKENPANEELE
      Typ            Einheit                                      Wert
      Farbe                                                RAL 9002 grauweiß
                                Zweischalige Sandwichfüllplatte mit Stahlblechschale, beidseitig flächen-
      Füllplatte
                                  bündig im Ständerwerk eingesetzt. (Kann nicht demontiert werden)

                                          Schalldämmung 45 dB, Flächengewicht ca. 12 kg/qm,
      Füllmaterial
                                  A1 (nicht brennbar) nach EN 12501-1 der Trennwandhauptmaterialien
      Blechdicke      mm                                          0,45
                                        Elektrolytische Polyesterbeschichtung (bandbeschichtet),
      Oberfläche
                                            mindestens 25 μm, glattflächig, mit Schutzfolie.
      Dämmeinlage                        Hochdruckfeste Mineralwolleinlage (Basalt Steinwolle)
      Deckentiefe     mm                                          3.008
      Deckenbreite    mm                                          980

     VERBINDUNGSELEMENTE
      Typ                               Wert
                           Aluminium, Brandschutzklasse A2,
      Eckprofile
                                 Materialstärke: 1 mm
      Verbindungs-    Aluminium X-Profil, Brandschutzklasse A2,
      stücke                   Materialstärke 1 mm
                           Aluminium, Brandschutzklasse A2,
      L-Profil
                                Materialstärke 0,9 mm
                           Aluminium, Brandschutzklasse A2,
      U-Profil
                                Materialstärke 0,9 mm

      4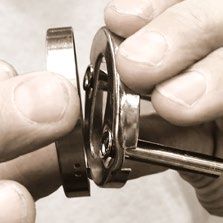
TOPREGAL

FENSTERPANEELE
 Typ                   Einheit                Fenster                       Studiofenster
 Farbe                                                  RAL 9002 grauweiß                                                           DE
                                  Zweischalige Sandwichfüllplatte mit Stahlblechschale,
 Füllplatte                         beidseitig flächenbündig im Ständerwerk eingesetzt.
                                               (Kann nicht demontiert werden)                                                       EN
                                  Schalldämmung 45 dB, Flächengewicht ca. 12 kg/qm,
 Füllmaterial                              A1 (nicht brennbar) nach EN 12501-1                                                      FR
                                             der Trennwandhauptmaterialien

 Blechdicke             mm                                       0,45

                                            Elektrolytische Polyesterbeschichtung
 Oberfläche                            (bandbeschichtet), mindestens 25 μm, glattflächig,
                                                         mit Schutzfolie.

 Dämmeinlage                          Hochdruckfeste Mineralwolleinlage (Basalt Steinwolle)
 Brandschutzklasse                                                A1
 Biegefestigkeit        Mpa                                      150
 Dichte                kg/m³                                     2.500
 Elastizität            Mpa                                  72.000
 Druckfestigkeit       kg/cm²                                     1,5
 Wanddicke              mm                                        50
 Wandhöhe               mm                                       2.500
 Wandbreite             mm                                       980

                                           5 x 980 x 1.000,                 5 x 980 x 2.000,
 Fenster                mm             ESG Doppelverglasung,            ESG Doppelverglasung,
                                        inkl. Lüftungsschlitze           inkl. Lüftungsschlitze

TÜRPANEELE
 Typ                   Einheit                                Wert
 Farbe                                                  RAL 9002 grauweiß
                                  Zweischalige Sandwichfüllplatte mit Stahlblechschale,
 Füllplatte                         beidseitig flächenbündig im Ständerwerk eingesetzt.
                                               (Kann nicht demontiert werden)
                                      Schalldämmung 45 dB, Flächengewicht ca. 12 kg/qm,
 Füllmaterial                                 A1 (nicht brennbar) nach EN 12501-1
                                                der Trennwandhauptmaterialien
 Blechdicke             mm                                       0,45
                                            Elektrolytische Polyesterbeschichtung
 Oberfläche                            (bandbeschichtet), mindestens 25 μm, glattflächig,
                                                         mit Schutzfolie.
 Dämmeinlage                          Hochdruckfeste Mineralwolleinlage (Basalt Steinwolle)
                                            5 x 980 x 1.000, ESG Doppelverglasung,
 Fenster                mm
                                                     inkl. Lüftungsschlitze
 Brandschutzklasse                                                A1
 Biegefestigkeit        Mpa                                      150
 Dichte                kg/m³                                     2.500
 Elastizität            Mpa                                  72.000
 Druckfestigkeit       kg/cm²                                     1,5
 Wanddicke              mm                                        50
 Wandhöhe               mm                                       2.500
 Wandbreite             mm                                       980

           +49 (0)7158 9181 500                           info @ topregal.com                     www.topregal.com              5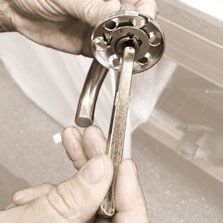
TOPREGAL

     TÜRPANEELE VORBEREITEN UND MONTAGEAUFBAU

     TÜRRAHMEN VORBEREITEN
DE
      1                                                                      2
EN    Kunststoffeinsatz in die vorbereitete Aussparung am Rahmen             Schließblech auf den Kunststoffeinsatz legen und mit drei Senkkopf-
      einsetzen.                                                             schrauben M4 x 12 festschrauben.

FR

      3
      Scharniere mit 4 Senkkopfschrauben M5 x 8 an Türrahmen fest-
      schrauben.

     TÜRKLINKE EINBAUEN

      1                                                                      2
      Vierkantbolzen in eine der Türklinken einstecken und durch die Tür     Trägerplatten für Blenden mit zwei Hülsenschrauben / Hülsenmuttern
      stecken. Zweite Türklinke auf der anderen Seite auf den Vierkantbol-   M5 x 45 an der Tür festschrauben. Blenden über die Türklinken strei-
      zen stecken.                                                           fen und mit leichtem Druck auf die Trägerplatten aufstecken.

      6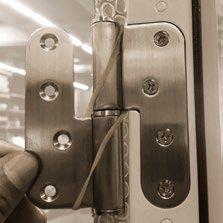
TOPREGAL

SCHLIESSZYLINDER EINBAUEN
                                                                                                                                                      DE
 1                                                                           2
 Zwei Hülsenschrauben in die Trägerplatte stecken und Blende mit             Schließzylinder mit dem Knauf von der Türinnenseite in die Tür mit       EN
 leichtem Druck auf die Trägerplatten aufstecken. Den Schließzylinder        vormontiertem Schloss einstecken. Schließzylinder mit Schraube
 durch die Öffnung führen.                                                   M5 x 60 festschrauben.
                                                                                                                                                      FR

 3
 Hülsenmuttern mit zwei Schrauben M5 x 45 an der Tür festschrau-
 ben. Blende mit leichtem Druck auf die Trägerplatten aufstecken.

        +49 (0)7158 9181 500                           info @ topregal.com                       www.topregal.com                                 7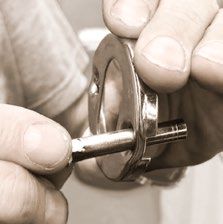
TOPREGAL

     1                                                                    2
DE
     Zunächst Position der Türpaneel-Aussparung bestimmen und die         Startpunkt ist das erste Eckelement. Hierfür benötigen Sie ein
     Bodenschienen (U-Schiene) entsprechend zusägen.                      Wandpaneel, welches in die U-Schiene eingesetzt wird Seite A.
EN                                                                        Dann die Eckverbindung mit der einsetzten Wand verbinden.
                                                                          Als nächstes ein weiteres Wandpaneel an die andere Seite der
                                                                          Eckverbindung positionieren Seite B.
FR                                                                        Beide Paneele mit den mitgelieferten Schrauben am Eckprofil
                                                                          fixieren ( 3 Schrauben 4 x 15 pro Eckprofilseite – 6 pro Ecke ).

                                                                                                Eckprofil

     Es empfiehlt sich die auf Ihren Bedarf zugesägten Schienen auf
     dem Boden so zu positionieren (jedoch nicht fest zu verschrauben),
     wie das Hallenbüro später errichtet werden soll.

                                                                                 Seite B                            Seite A

     3                                                                    4
     Als nächstes die 2 weiteren Wandpaneele auf der 3 m tiefen           Das erste Deckenelement wird auf die Seite A + C positioniert.
     Seite B anbringen inkl. der 2. Eckverbindung und einem
     weiteren Wandpaneel Seite C.
                                                                                                                    Seite A
     2. Eckverbindung

                                                                                 Seite C

                              Seite B

              Seite C

                                                                          Das Abschlussprofil der Deckenpaneele anbringen und
     Nun die oberen U-Schienen auf allen drei Seiten befestigen.          das Deckenpaneel mit den Seite A + C von oben verschrauben
                                                                          ( 2 Schrauben 12 x 17 pro Meter bzw Deckenpaneel ) .

                                                  U-Schienen                                                                     Seite A

                                                                                                                  Seite C
                                                                              Abschlußprofil

     8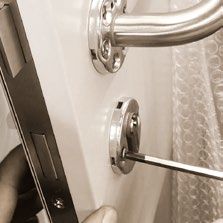
TOPREGAL

5                                                                           6
                                                                                                                                              DE
Für jeden weiteren Meter / weiteres Paneel-Set                              Abschluss bilden zwei Eckelemente und drei Wandpaneele,
immer zunächst zwei Seitenpaneele                                           die ganz zum Schluss Ihr Hallenbüro komplettieren.
und ein Deckenpaneel anbringen.                                                                                                               EN

A) Fensterpaneele einsetzen                                                                                                                  FR
1.	Zunächst Teil F1 am Boden und am
    angrenzenden Paneel/Element einsetzen.
2.	Nun die erste Verbindungsschiene auf F1 legen, damit das
    Fensterelement sicheren Halt findet.
3. Als nächstes das Fenster F2 auf die Schiene und F1
    positionieren und mit einem Verbindungsstück oben ergänzen.
4.	Zum Schluss Teil F3 des Fensterpaneels auf das Fenster mit
    der Verbindungschiene setzen.

INFO: W
       enn zwei Fensterpaneele nebeneinander positioniert
      werden sollen, muss eine weitere Verbindungsschiene
      an das Fenster F2 angebracht werden.
                            F3      F3

                            F2      F2

                            F1      F1

INFO: Bei Studio Fenstern werden auf der vertikalen Seite
       2 Verbindungsschienen verwendet.
B)   Türpaneel anbringen
1.   Zunächst das schmale Stück T1 anbringen.
2.   Zargenstück T2 anbringen, dann T3 auf das Zargenende aufsetzen.
3.   T2 mit 9 selbstschneidenden Schrauben M5 x 48 an den Paneelen
     festschrauben und Abdeckkappe auf Schraublöcher kleben.

INFO: Beachten Sie den Türaufschlag und positionieren Sie
       die Scharniere nach Ihren Wünschen.
                                                      T3
                      T2
                 T1

                                                                            8
                                                                            Tür anhalten und Scharniere in den Aussparungen der Tür mit
                                                                            jeweils vier Senkkopfschrauben M5 x 8 festschrauben.

7
Zum Schluss die Abschlusswinkel von innen anbringen
und verschrauben.

        +49 (0)7158 9181 500                          info @ topregal.com                      www.topregal.com                           9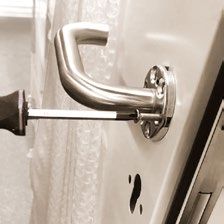
TOPREGAL

     GENERAL INFORMATION

     PREVENT RISKS
DE
     The PREFAB hall office you have purchased is manufactured according to the current state of the art and complies
     with the applicable regulations and rules. Nevertheless, it may pose a danger to persons and property if:
EN
     • The hall office is not set up properly, or is improperly altered or converted.
     • No original parts are used.
FR   • The safety regulations are not observed.

     Therefore, every person included in the installation must read and follow the safety regulations, if necessary have this
     confirmed by a signature.

     ACCIDENT PREVENTION REGULATIONS
     All relevant accident prevention regulations apply:

     • Generally accepted safety rules.
     • Country specific regulations.
     • Guidelines for storage facilities and equipment of the respective country.

     PLEASE NOTE
     Before installation, commissioning or use, the instructions contained in this manual must be strictly observed to avoid
     hazards. If you need technical support, please contact us.

     To avoid personal injury and damage to property, please note:

     • The relevant workplace guidelines and regulations.
     • The instructions from your security officer.
     • The structural conditions, especially the quality and load-bearing capacity of the floor.
     • That the facilities are in perfect condition.
     •	It is absolutely necessary to replace damaged or deformed components immediately. In case of doubt interrupt
        you are responsible for installation or use, secure the installation area and inform your safety officer.
     • That the use may only be carried out after completion of all assembly work.
     • The hall office should be set up with at least 2 persons. Compliance with the sequence of the assembly instructions
        must be observed.
     • That protective clothing such as helmet, gloves, safety shoes etc. must be worn during assembly and conversion.
     • That the foreman's office must be effectively protected against the impact of forklift trucks or other vehicles.
     • We recommend securing the corner areas with a collision guard not connected to the hall office with
        yellow-black danger marking.

     INSPECTION
     Depending on the intensity of use, we recommend a general visual and to carry out a function check.

     CARE INSTRUCTIONS
     Clean wall, ceiling and window panels with water and, if necessary, a slightly diluted mild soap solution. Take care not
     to scratch the powder coating, otherwise there is a risk of corrosion. Scratched areas must be re-treated with a touch-
     up pencil. Please be careful not to use any impermissible surface treatment, such as: chemical solvents, ammonia or
     ammonium chloride.

      10
TOPREGAL
PREPARATION FOR MOUNTING
All original PREFAB components used for stabilisation must be fitted without restriction. These include, above all, frame
components, connecting struts, screws and fastening profiles. In general, care must be taken during assembly to ensure DE
that the screws are not overtightened. The screws are to be pre-assembled hand-tight and later tightened with suitable
tools, such as cordless screwdriver or wrench.
EN
A level floor is essential for setting up the hall office. Cut the U-floor rails accordingly to the desired dimensions.
Pay attention to the positioning of the door recess of your PREFAB hall office (P. 16, Figure 1).
FR
STRUCTURE
The PREFAB hall office may only be used in accordance with the assembly and operating instructions supplied by us.
can be set up and converted.
PROTECTIVE FILM
The individual panels are provided with a transparent protective film, which can be removed without residue after
installation. It is not recommended to peel off the film before installation to avoid possible scratches during installation.
The panels can be easily and gently cleaned with a soap mixture and a microfibre cloth if they are dirty.
MATERIALS
USE OF THE PRODUCT
Can be used in all rooms with normal, dry climatic conditions. For example production and storage halls, offices and clean
rooms without classification. Can also be mounted on storage platforms (observe statics).
FIRE PROTECTION
Increased fire protection by using non-combustible materials that do not represent an additional fire load.
ELECTROSTATICS
All metallic partition wall components are electrically connected to each other.
SOUND INSULATION
45 dB
+44 (0)20 78941516 info @ topregal.com www.topregal.com 11TOPREGAL
WALL PANELS
Type Unit Value
DE Colour RAL 9002 grey white
Made of electrolytically galvanized sheet steel, double shell. Interspace
Fire protection completely filled with mineral wool for sound and heat insulation. Building
EN material class A1 non-combustible.
Double-shell sandwich panel with sheet steel shell, flush with the
Filler plate
FR stud frame on both sides. (Cannot be dismantled)
Sound insulation 45 dB, weight per unit area approx. 12 kg/qm,
Filling
A1 (non-combustible) according to EN 12501-1 of the main partition
material
wall materials
Plate thickness mm 0,45
Electrolytic polyester coating (coil-coated), at least 25 μm,
Surface
smooth surface, with protective foil.
Insulation insert High-pressure-resistant mineral wool insert (basalt rock wool)
Wall thickness mm 50
Wall height mm 2.500
Wall width mm 980, Polyester-Beschichtung
CEILING PANELS
Type Unit Value
Colour RAL 9002 grey white
Double-shell sandwich panel with sheet steel shell, flush with the stud
Filler plate
frame on both sides. (Cannot be dismantled)
Sound insulation 45 dB, weight per unit area approx. 12 kg/qm,
Filling material A1 (non-combustible) according to EN 12501-1 of the main
partition wall materials
Plate thickness mm 0,45
Electrolytic polyester coating (coil-coated), at least 25 μm,
Surface
smooth surface, with protective film.
Insulation insert High-pressure resistant mineral wool insert (basalt rock wool)
Ceiling depth mm 3.008
Ceiling width mm 980
FASTENERS
Type Value
Aluminium, fire protection class A2,
corner profiles
material thickness: 1 mm
Aluminium X-profile, fire protection class A2,
Connectors
material thickness 1 mm
Aluminium, fire protection class A2,
L-Profil
material thickness 0,9 mm
Aluminium, fire protection class A2,
U-Profil
material thickness 0,9 mm
12TOPREGAL
WINDOW PANELS
Type Unit Window Studio window
Colour RAL 9002 grey white DE
Double-shell sandwich panel with sheet steel
Filler plate shell, flush with the stud frame on both sides.
(Cannot be dismantled) EN
Sound insulation 45 dB, weight per unit area approx.
Filling material 12 kg/qm, A1 (non-combustible) according to EN FR
12501-1 of the main partition wall materials
Plate thickness mm 0,45
Electrolytic polyester coating (coil-coated), at
Surface
least 25 μm, smooth surface, with protective foil.
High-pressure-resistant mineral wool insert
Insulation insert
(basalt rock wool)
Fire protection class A1
Flexural Strength Mpa 150
Density kg/m³ 2.500
Elasticity Mpa 72.000
Compressive strength kg/cm² 1,5
Wall thickness mm 50
Wall height mm 2.500
Wall width mm 980
5 x 980 x 1.000, 5 x 980 x 2.000,
Window mm ESG double glazing, ESG double glazing,
incl. ventilation slots incl. ventilation slots
DOOR PANELS
Type Unit Value
Colour RAL 9002 grey white
Double-shell sandwich panel with sheet steel shell,
Filler plate flush with the stud frame on both sides.
(Cannot be dismantled)
Sound insulation 45 dB, weight per unit area approx.
Filling material 12 kg/qm, A1 (non-combustible) according to EN
12501-1 of the main partition wall materials
Plate thickness mm 0,45
Electrolytic polyester coating (coil-coated), at least 25
Surface
μm, smooth surface, with protective foil.
High-pressure-resistant mineral wool insert
Insulation insert
(basalt rock wool)
5 x 980 x 1.000,
Window mm
ESG double glazing, incl. ventilation slots
Fire protection class A1
Flexural Strength Mpa 150
Density kg/m³ 2.500
Elasticity Mpa 72.000
Compressive strength kg/cm² 1,5
Wall thickness mm 50
Wall height mm 2.500
Wall width mm 980
+44 (0)20 78941516 info @ topregal.com www.topregal.com 13TOPREGAL
PARATION OF DOOR PANELS AND ASSEMBLY
PREPARING THE DOOR FRAME
DE
1 2
EN Insert the plastic insert into the prepared recess in the frame. Place the strike plate on the plastic insert and fix it with three
M4 x 12 countersunk screws.
FR
3
Screw hinges to door frames with 4 countersunk screws M5 x 8.
BUILDING A DOOR HANDLE
1 2
Insert the square bolt into one of the door handles and push it Screw the support plates for panels to the door with two M5 x 45
through the door. Put the second door handle on the other side of sleeve screws / nuts. Slide the panels over the door handles and
the square bolt. push them onto the support plates with light pressure.
14TOPREGAL
INSTALLING THE LOCKING CYLINDER
DE
1 2
Insert two sleeve screws into the support plate and push the panel Insert the locking cylinder with the knob from the inside of the door EN
onto the support plates with light pressure. Guide the lock cylinder into the door with pre-assembled lock. Locking cylinder with screw
through the opening. M5 x 60 tight.
FR
3
Screw sleeve nuts to the door with two M5 x 45 screws.
Apply a light pressure to the support plates.
+44 (0)20 78941516 info @ topregal.com www.topregal.com 15TOPREGAL
1 2
DE
First determine the position of the door panel recess and Starting point is the first corner element. For this you need a
Saw the floor rails (U-rail) accordingly. Wall panel which is inserted into the U-rail side A.
EN Then connect the corner joint to the inserted wall.
Next, attach another wall panel to the other side of the Position
corner connection side B.
FR Attach both panels to the corner profile with the screws supplied
(3 screws 4 x 15 per corner profile side - 6 per corner).
corner profile
It is recommended that the rails cut to your requirements are mounted
on the floor, as the hall office is to stand later (but do not screw it
down tightly).
Side B Side A
3 4
Next the 2 further wall panels on the 3 m deep The first ceiling element is positioned on side A + C.
Attach side B incl. the 2nd corner connection and a
additional wall panel side C.
Side A
2nd corner connection
Side C
Side B
Side C
Attach the end profile of the ceiling panels and
Now fix the upper U-rails on all three sides. screw the ceiling panel to sides A + C from above
( 2 screws 12 x 17 per meter or ceiling panel).
U-rails Side A
Side C
End profile
16TOPREGAL
5 6
DE
For each additional meter / panel set Two corner elements and three wall panels form the end,
always first two side panels and which complete your hall office right at the end.
attach a ceiling panel. EN
A) Insert window panels FR
1. First part F1 on the ground and
insert adjacent panel/element.
2. Now place the first connecting rail on F1 so that the window
element finds a secure hold.
3. Next, place window F2 on the rail and F1 position and complete
with a connecting piece at the top.
4. Finally, move part F3 of the window panel to the window with
of the connecting rail.
INFO: W hen two window panels are positioned next to each
other to be installed, a further connecting rail must be
can be attached to the window F2.
F3 F3
F2 F2
F1 F1
INFO: Studio windows use 2 connecting rails
on the vertical side.
B) Mount door panel
1. First attach the narrow piece T1.
2. Attach frame piece T2, then place T3 on the end of the frame.
3. Screw T2 to the panels with 9 self-tapping screws M5 x 48 and
glue the cover cap to the screw holes.
INFO: O bserve the door swing and position the hinges
according to your wishes.
T3
T2
T1
8
Stop the door and fix the hinges in the recesses of the door
with four countersunk screws M5 x 8 each.
7
Finally, attach the end brackets from the inside
and screw it together.
+44 (0)20 78941516 info @ topregal.com www.topregal.com 17TOPREGAL
NOTES GÉNÉRALES
PRÉVENIR LES RISQUES
DE
Le bureau d'atelier PREFAB que vous avez acheté est fabriqué selon l'état actuel de la technique et respecte les
réglementations et règles applicables. Néanmoins, elle peut constituer un danger pour les personnes et les biens si :
EN
• Le bureau d'atelier n'est pas installé correctement, ou est modifié ou transformé de manière inappropriée.
• Aucune pièce d'origine n'est utilisée.
FR • Les règles de sécurité ne sont pas respectées.
Par conséquent, toute personne faisant partie de l'installation doit lire et suivre les règles de sécurité, le cas échéant en
faire la confirmation par une signature.
RÈGLEMENTS SUR LA PRÉVENTION DES ACCIDENTS
Toutes les réglementations pertinentes en matière de prévention des accidents s'appliquent :
• Règles de sécurité généralement acceptées.
• Dispositions spécifiques à chaque pays.
• Lignes directrices pour les installations et équipements de stockage du pays concerné.
VEUILLEZ NOTER QUE
Avant l'installation, la mise en service ou l'utilisation, les instructions contenues dans ce manuel doivent être strictement
respectées pour éviter tout risque. Si vous avez besoin d'une assistance technique, veuillez nous contacter.
Pour éviter les dommages corporels et matériels, veuillez respecter les points suivants :
• Les directives et règlements pertinents sur le lieu de travail.
• Les instructions de votre agent de sécurité.
• Les conditions structurelles, en particulier l'état et la capacité portante du plancher.
• Que les installations sont en parfait état.
• Il est absolument nécessaire de remplacer immédiatement les composants endommagés ou déformés. En cas de doute,
interrompre vous êtes responsable de l'installation ou de l'utilisation, sécurisez la zone d'installation et informez votre
responsable de la sécurité.
• Que l'utilisation ne peut être effectuée qu'après l'achèvement de tous les travaux de montage.
• Le bureau du hall doit être installé avec au moins 2 personnes. Le respect de l'ordre des instructions de montage
doivent être respectées.
• Que des vêtements de protection tels que casque, gants, chaussures de sécurité, etc. doivent être portés lors de
l'assemblage et de la transformation.
• Que le bureau d'atelier doit être efficacement protégé contre les chocs des chariots élévateurs à fourche ou
d'autres véhicules.
• Nous recommandons de sécuriser les coins avec un garde-corps non relié au bureau du hall avec un marquage
de danger jaune-noir.
INSPECTION
En fonction de l'intensité de l'utilisation, nous recommandons un visuel général et pour effectuer un contrôle de
fonctionnement.
INSTRUCTIONS D'ENTRETIEN
Nettoyez les murs, les plafonds et les fenêtres avec de l'eau et, si nécessaire, une solution de savon doux légèrement
diluée. Veillez à ne pas rayer le revêtement en poudre, sinon il y a un risque de corrosion. Les zones rayées doivent être
traitées à nouveau avec un crayon de retouche. Veillez à ne pas utiliser de traitement de surface inadmissible, tel que :
solvants chimiques, ammoniac ou chlorure d'ammonium.
18TOPREGAL
PRÉPARATION DU MONTAGE
Tous les composants PREFAB d'origine utilisés pour la stabilisation doivent être montés sans restriction. Il s'agit notamment
des éléments du cadre, des entretoises de liaison, des vis et des profils de fixation. En général, il faut veiller, lors du DE
montage, à ce que les vis ne soient pas trop serrées. Les vis doivent être prémontées à la main et ensuite serrées avec des
outils appropriés, tels que un tournevis ou une clé sans fil.
EN
Le niveau du sol est décisif pour l'installation du bureau d'atelier. Coupez les rails du plancher en U en conséquence
aux dimensions souhaitées. Faites attention à la position de l'encoche de la porte de votre bureau du hall PREFAB (p. 24,
illustration 1). FR
STRUCTURE
Le bureau du hall PREFAB ne peut être utilisé que conformément aux instructions de montage et d'utilisation fournies par
nos soins.
FILM DE PROTECTION
Les panneaux individuels sont munis d'un film de protection transparent, qui peut être retiré sans résidus après
l'installation. Il n'est pas recommandé de décoller le film avant l'installation afin d'éviter d'éventuelles rayures pendant
l'installation. Les panneaux peuvent être facilement et doucement nettoyés avec un mélange de savon et un chiffon en
microfibre s'ils sont sales.
MATÉRIEL
UTILISATION DU PRODUIT
Peut être utilisé dans toutes les pièces dont le climat est normal et sec. Par exemple, les halls de production et de
stockage, les bureaux et les salles blanches sans classification. Peut également être monté sur des plates-formes de
stockage (observer la statique).
PROTECTION CONTRE L'INCENDIE
Protection accrue contre l'incendie par l'utilisation de matériaux non combustibles qui ne représentent pas une charge
d'incendie supplémentaire.
ÉLECTROSTATIQUE
Tous les éléments métalliques des cloisons de séparation sont reliés électriquement entre eux.
ISOLATION ACOUSTIQUE
45 dB
+33 (0)1 70700496 info @ topregal.com www.topregal.com 19TOPREGAL
PANNEAU MURAL
Type Unité Valeur
DE Couleur RAL 9002 gris blanc
En tôle d'acier galvanisée par électrolyse, double coque. L'espace intérieur
Protection contre
est entièrement rempli de laine minérale pour l'isolation acoustique et
EN l'incendie
thermique. Matériaux de construction de classe A1 non combustibles.
Plaque de Panneau sandwich à double coque avec coque en tôle d'acier, affleurant
remplissage le cadre des montants des deux côtés. (Ne peut être démonté)
FR Isolation acoustique 45 dB, poids par unité de surface environ
Matériel de
12 kg/m², A1 (non combustible) selon EN 12501-1 des matériaux
remplissage
principaux de la cloison
Épaisseur de la
mm 0,45
plaque
Revêtement en polyester électrolytique (coil-coated), au moins 25 μm,
Surface
surface lisse, avec une feuille de protection.
Insert Insert en laine minérale résistant à la haute pression
d'isolation (laine de roche basaltique)
Épaisseur
mm 50
de la paroi
Hauteur du mur mm 2.500
Largeur du mur mm 980, Revêtement en polyester
PANNEAUX DE PLAFOND
Type Unité Valeur
Couleur RAL 9002 gris blanc
Plaque de Panneau sandwich à double coque avec coque en tôle d'acier, affleurant
remplissage le cadre des montants des deux côtés. (Ne peut être démonté)
Matériel de Isolation acoustique 45 dB, poids par unité de surface environ 12 kg/m², A1
remplissage (non combustible) selon EN 12501-1 des matériaux principaux de la cloison
Épaisseur de
mm 0,45
la plaque
Revêtement en polyester électrolytique (coil-coated), au moins 25 μm,
Surface
surface lisse, avec un film protecteur.
Insert Insert en laine minérale résistant à la haute pression
d'isolation (laine de roche basaltique)
Profondeur
mm 3.008
du plafond
Largeur
mm 980
du plafond
ÉLÉMENTS DE FIXATION
Type Valeur
aluminium, classe de protection contre
Profils d'angle
l'incendie A2, épaisseur du matériau : 1 mm
Profil en X en aluminium, classe de
Connecteurs protection contre l'incendie A2, épaisseur du
matériau 1 mm
aluminium, classe de protection contre
Profilé en L
l'incendie A2, épaisseur du matériau 0,9 mm
aluminium, classe de protection contre
Profilé en U
l'incendie A2, épaisseur du matériau 0,9 mm
20TOPREGAL
PANNEAUX DE FENÊTRES
Type Unité Fenêtre Fenêtres de studio
Couleur RAL 9002 gris blanc DE
Panneau sandwich à double coque avec coque en tôle
Plaque
d'acier, affleurant le cadre des montants des deux
de remplissage
côtés. (Ne peut être démonté) EN
Isolation acoustique 45 dB, poids par unité de surface
Matériel
environ 12 kg/m², A1 (non combustible) selon EN
de remplissage
12501-1 des matériaux principaux de la cloison FR
Épaisseur de la plaque mm 0,45
Revêtement en polyester électrolytique (coil-coated),
Surface au moins 25 μm, surface lisse, avec une feuille de
protection.
Insert en laine minérale résistant à la haute pression
Insert d'isolation
(laine de roche basaltique)
Classe de protection
A1
contre l'incendie
Résistance à la flexion Mpa 150
Densité kg/m³ 2.500
Élasticité Mpa 72.000
Résistance à la
kg/cm² 1,5
compression
Épaisseur de la paroi mm 50
Hauteur du mur mm 2.500
Largeur du mur mm 980
5 x 980 x 1.000, 5 x 980 x 2.000,
Fenêtre mm Double vitrage ESG, Double vitrage ESG,
avec fentes d'aération avec fentes d'aération
PANNEAUX DE PORTE
Type Unité Valeur
Couleur RAL 9002 gris blanc
Panneau sandwich à double coque avec coque en tôle
Plaque
d'acier, affleurant le cadre des montants des deux
de remplissage
côtés. (Ne peut être démonté)
Isolation acoustique 45 dB, poids par unité de surface
Matériel
environ 12 kg/m², A1 (non combustible) selon EN
de remplissage
12501-1 des matériaux principaux de la cloison
Épaisseur de la plaque mm 0,45
Revêtement en polyester électrolytique (coil-coated),
Surface au moins 25 μm, surface lisse, avec une feuille de
protection.
Insert en laine minérale résistant à la haute pression
Insert d'isolation
(laine de roche basaltique)
5 x 980 x 1.000,
Fenêtre mm
Double vitrage ESG, avec fentes d'aération
Classe de protection
A1
contre l'incendie
Résistance à la flexion Mpa 150
Densité kg/m³ 2.500
Élasticité Mpa 72.000
Résistance
kg/cm² 1,5
à la compression
Épaisseur de la paroi mm 50
Hauteur du mur mm 2.500
Largeur du mur mm 980
+33 (0)1 70700496 info @ topregal.com www.topregal.com 21TOPREGAL
PRÉPARATION DES PANNEAUX DE PORTE ET DE LA STRUCTURE DE MONTAGE
PRÉPARER LE CADRE DE LA PORTE
DE
1 2
EN Insérez l'insert en plastique dans l'évidement préparé Placez la gâche sur l'insert en plastique et vissez-la avec trois vis à
dans le cadre. tête fraisée M4 x 12.
FR
3
Visser les charnières aux cadres de porte avec 4 vis à tête
fraisée M5 x 8.
POIGNÉE DE PORTE DE BÂTIMENT
1 2
Insérez le pêne carré dans l'une des poignées de porte et poussez-le Fixez les plaques de support des panneaux à la porte à l'aide de
à travers la porte. Insérez la deuxième poignée de porte de l'autre deux boulons / écrous à douille M5 x 45. Faites glisser les couvercles
côté sur le pêne carré. sur les poignées de porte et poussez-les sur les plaques de support
avec une légère pression.
22TOPREGAL
INSTALLATION DU CYLINDRE DE FERMETURE
DE
1 2
Insérez deux vis à douille dans la plaque de support et poussez le Insérez le cylindre de fermeture avec le bouton de l'intérieur de la EN
couvercle sur les plaques de support avec une légère pression. Guidez porte dans la porte avec la serrure prémontée. Cylindre de fermeture
le cylindre de fermeture à travers l'ouverture. avec vis Visser M5 x 60.
FR
3
Vissez les écrous à douille à la porte avec deux vis M5 x 45. Appli-
quer une légère pression sur les plaques de support.
+33 (0)1 70700496 info @ topregal.com www.topregal.com 23TOPREGAL
1 2
DE
Déterminez d'abord la position de l'encoche du panneau de porte et Le point de départ est le premier élément d'angle. Pour cela, vous
Il a scié les rails au sol (profilé en U) en conséquence. avez besoin d'un panneau mural, qui est inséré dans le profilé en U
EN Mur A.
Ensuite, raccordez le joint d'angle à la paroi insérée.
Ensuite, fixez un autre panneau mural de l'autre côté de la
FR connexion d'angle, Mur B.
Les deux panneaux au profilé d'angle avec les vis fournies
fixer ( 3 vis 4 x 15 par côté de profilé d'angle - 6 par angle).
Profilé d'angle
Il est recommandé de monter les rails coupés selon vos besoins sur
sur le sol (mais ne le vissez pas trop fort), comme le bureau du hall
doit être debout plus tard.
Mur B Mur A
3 4
Ensuite, placez les deux autres panneaux muraux sur le côté B L'élément du premier étage est positionné sur le mur A + C.
de 3 m de profondeur, y compris la deuxième connexion d'angle
et un autre panneau mural côté C.
Mur A
2. Profilé d'angle
Mur C
Mur B
Mur C
Fixez le profilé d'extrémité des panneaux de plafond et
Fixez maintenant les profilé en U supérieurs sur les trois côtés. visser le panneau de plafond aux côtés A + C par le haut
(2 vis 12 x 17 par mètre ou panneau de plafond).
Profilé en U Mur A
Mur C
Profil final
24TOPREGAL
5 6
DE
Pour chaque mètre / panneau supplémentaire fixez Deux éléments d'angle et trois panneaux muraux forment l'extrémité,
toujours les deux premiers panneaux qui complètent le bureau de votre hall au bout.
láteraux et fixez un panneau de plafond. EN
A) Insérer des panneaux de fenêtre FR
1. Première partie F1 sur le terrain et
insérer le panneau / élément adjacent.
2. Placez maintenant le premier rail de liaison sur la F1 de manière
à ce que la L'élément de fenêtre trouve une prise sûre.
3. Ensuite, placez la fenêtre F2 sur le rail et F1
et complétez par une pièce de liaison en haut.
4. Enfin, déplacez la partie F3 du panneau de la fenêtre vers la
fenêtre avec la voie de raccordement.
INFO: Lorsque deux panneaux de fenêtre sont placés l'un à côté
de l'autre pour être installé, un autre profilé de liaison
doit être fixé à la fenêtre F2.
F3 F3
F2 F2
F1 F1
INFO: Les fenêtres Studio utilisent 2 profils de liaison
sur le côté vertical.
B) Montage du panneau de porte
1. Attachez d'abord la pièce étroite T1.
2. Fixez le morceau de cadre T2, puis placez le T3 à l'extrémité du cadre.
3. Visser T2 aux panneaux avec 9 vis autotaraudeuses M5 x 48 et
coller le couvercle aux trous de vis.
INFO: Observez l'ouverture et la position de la porte
les charnières selon vos souhaits.
T3
T2
T1
8
Arrêtez la porte et fixez les charnières dans les évidements de la
porte avec quatre vis à tête fraisée M5 x 8 chacune.
7
Enfin, fixez les supports d'extrémité par l'intérieur et assemblez-les.
+33 (0)1 70700496 info @ topregal.com www.topregal.com 25TOPREGAL GmbH, Industriestr. 3, 70794 Filderstadt
Deutschland | Germany | Allemagne
V 07.05.21
+49 (0)7158 9181 500 | +44 (0)20 78941516 | +33 (0)1 70700496
info@topregal.com | www.topregal.comSie können auch lesen


