RELA NOW VTX450 DE EN ES FR IT NL - SPORTSTECH CARE
←
→
Transkription von Seiteninhalten
Wenn Ihr Browser die Seite nicht korrekt rendert, bitte, lesen Sie den Inhalt der Seite unten
RELA   NOW
   VTX450

               Turmventilator     DE

                    Tower fan     EN

            Ventilador de pie     ES

              Ventilateur tour    FR

            Ventilatore a torre   IT

               Torenventilator    NL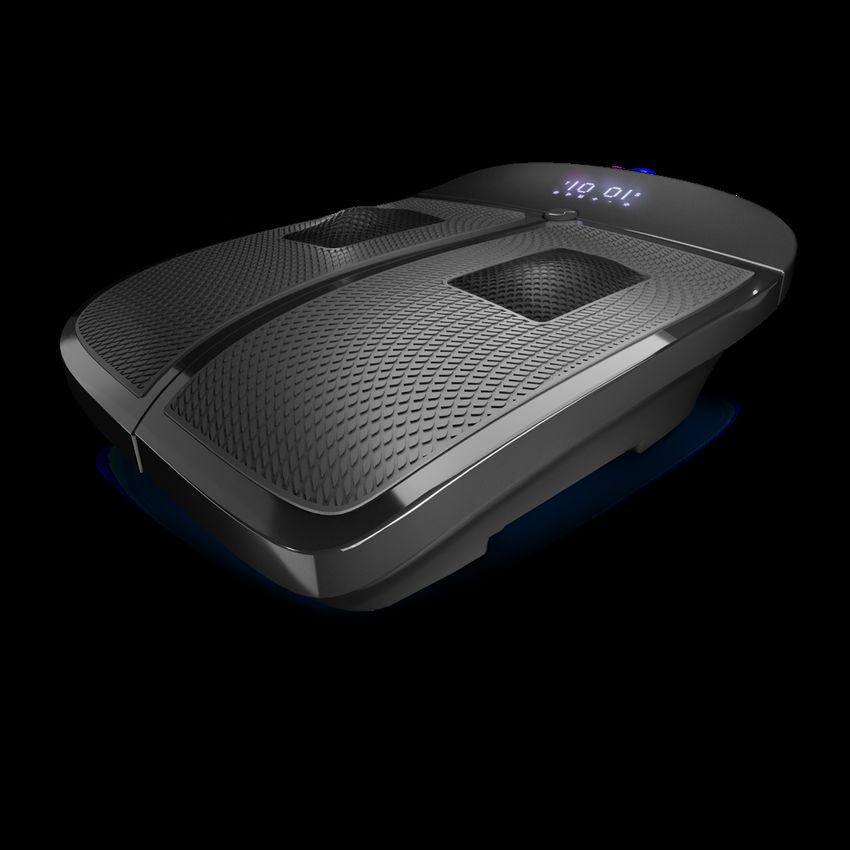
2 RELA NOW
Sehr geehrter Kunde,

wir freuen uns, dass Sie sich für ein Gerät aus der RELAXXNOW Produktpalette entschieden haben.
RELAXXNOW Geräte bieten Ihnen höchste Qualität und neueste Technologie.
Um die Leistungsfähigkeit des Gerätes voll ausnutzen zu können und viele Jahre Freude an Ihrem Gerät
zu haben, lesen Sie bitte vor der Inbetriebnahme und dem Beginn des Trainings dieses Benutzerhandbuch
sorgfältig durch und verwenden Sie das Gerät den Anweisungen entsprechend. Die Betriebssicherheit
und die Funktion des Gerätes können nur dann gewährleistet werden, wenn sowohl die allgemeinen
Sicherheits- und Unfallverhütungsvorschriften des Gesetzgebers als auch die Sicherheitshinweise in
diesem Benutzerhandbuch beachtet werden. Wir übernehmen keine Haftung für Schäden, die durch
unsachgemäßen Gebrauch bzw. fehlerhafte Bedienung entstehen.

     i
                 Bitte stellen Sie sicher, dass alle Personen, die das Gerät verwenden, das Be-
                 nutzerhandbuch gelesen und verstanden haben.
                 Bewahren Sie das Benutzerhandbuch an einem sicheren Ort auf, um im Be-
                 darfsfall jederzeit darauf zurückgreifen zu können.

                                                                            Stand: 28.05.2020

                                                                                   RELA       NOW       3
Unsere Video Tutorials für Dich!
In 3 einfachen Schritten
zum schnellen und sicheren Start:
Aufbau
Benutzung
Abbau
1. QR-Code scannen
2. Videos anschauen
3. schnell und sicher starten
Link zu den Videos:
https://service.innovamaxx.de/vtx450_video
4 RELA NOWINHALT
1. TECHNISCHE ANGABEN............................................................................................ 6
2. LIEFERUMFANG....................................................................................................... 6
3. ALLGEMEINE HINWEISE............................................................................................ 7
4. WICHTIGE SICHERHEITSHINWEISE............................................................................. 8
5. DIES KÖNNTE SIE AUCH INTERESSIEREN.................................................................... 10
6. MONTAGE............................................................................................................... 11
7. INBETRIEBNAHME.................................................................................................... 12
8. DAS BEDIENFELD.................................................................................................... 13
9. DIE FERNBEDIENUNG............................................................................................... 14
10. BATTERIEWECHSEL............................................................................................... 15
11. TRANSPORT UND LAGERUNG................................................................................. 16
12. REINIGUNG UND WARTUNG.................................................................................... 16
13. FEHLERBEHEBUNG................................................................................................ 17
14. ENTSORGUNG....................................................................................................... 18
15. DECLARATION OF CONFORMITY.............................................................................. 99
RELA NOW 51. TECHNISCHE ANGABEN
GERÄTEMERKMALE
• 50 W Motorleistung
• 60° Oszillation für schnelles und effizientes Kühlen
• 3 Geschwindigkeitsstufen (Langsam | Mittel | Hoch)
• 3 Modi (Normal | Nature | Sleep)
• integriertes Ablagefach für die Fernbedienung
• 1 - 15 h | Timer-Zeitschaltuhr
• modernes Touchdisplay mit Fernbedienung
• sehr geringe Geräuschentwicklung
• kompakt und platzsparend
• flexible Anwendung für die Wohnung und den Arbeitsplatz
WICHTIG
Das Gerät ist zur Luftumwälzung ausschließlich von Innenräumen geeignet.
DATENBLATT
Abmessungen: 107 x 31 x 13,5 cm
Netzspannung: 220-240 V | 50 / 60 Hz
Leistung: 50 W
Geschwindigkeiten: 3 Stufen
Lüftungsgeschwindigkeit: 4,6 m/s
Geräuschpegel: max. 50,3 dB
Netzkabellänge: 1,2 m
Schwenkwinkel: 60°
Gewicht: 3,6 kg
2. LIEFERUMFANG
• 1x Standventilator VTX450
• 1x Fernbedienung (inklusive Batterie)
• 1x Handbuch
6 RELA NOW3. ALLGEMEINE HINWEISE
Bitte lesen Sie diese Bedienungsanleitung sorgfältig vor Gebrauch des Gerätes und bewahren Sie sie an einem sicheren
Ort auf. Benutzen Sie das Gerät nur wie beschrieben und machen Sie sich vor dem Benutzen des Produktes mit allen
Bedien- und Sicherheitshinweisen vertraut.
Entfernen Sie die Verpackung und prüfen Sie, ob das Produkt unbeschädigt ist. Wenn an der Unversehrtheit Zweifel
besteht, verwenden Sie das Produkt nicht und treten Sie mit Ihrem Verkäufer in Kontakt.
• Stecken Sie niemals fremde Objekte wie Finger, Stifte etc. durch das Schutzgitter, während das Gerät in Betrieb ist.
• Schließen Sie das Gerät vom Strom ab, wenn Sie es verstellen oder sauber machen wollen.
• Stellen Sie sicher, dass das Gerät auf einem stabilen, ebenen Untergrund steht, wenn es in Gebrauch ist, damit es
nicht umkippt.
• Stellen Sie das Gerät NICHT an ein Fenster. Regen kann einen elektrischen Schlag verursachen. Tauchen Sie das
Gerät, den Stecker oder das Kabel nicht in Wasser und besprühen Sie es nicht mit Flüssigkeiten.
• Lassen Sie Kinder und Tiere nicht unbeaufsichtigt mit dem aktiven Gerät.
Lassen Sie das Netzkabel nicht vom Tisch oder einer Theke herunterhängen.
• Verwenden Sie das Gerät nicht, wenn Kabel oder Stecker beschädigt sind, wenn das Gerät defekt ist oder
heruntergefallen ist oder auf andere Art und Weise beschädigt worden ist. Wenden Sie sich in diesem Fall an einen
qualifizierten Elektriker.
• Verwenden Sie den Ventilator nicht ohne den mitgelieferten Standfuß.
Das Gerät muss bei Betrieb IMMER aufrecht stehen.
• Verlegen Sie das Netzkabel nicht unterirdisch (z.B. unter einem Teppich).
Decken Sie das Netzkabel nicht mit Teppichen, Läufern oder ähnlichem ab. Verlegen Sie das Netzkabel so, dass
niemand darüber stolpern kann.
• Gebrauchen Sie den Ventilator nur so, wie in der Anleitung beschrieben.
• Verwenden Sie den Ventilator nicht in der Nähe von Vorhängen, Pflanzen Fensterdekorationen oder anderen Dingen,
die in den Propeller gelangen können.
• Um das Gerät vom Strom zu trennen, ziehen Sie den Stecker aus der Steckdose. Ziehen Sie dafür am Netzstecker,
NIEMALS am Kabel.
RELA NOW 74. WICHTIGE SICHERHEITSHINWEISE
ACHTUNG
Lesen Sie diese Sicherheitshinweise und Anweisungen vollständig durch.
• Versäumnisse oder Verstöße gegen diese Sicherheitshinweise können unter Umständen zu elektrischen
Stromschlägen, Bränden und / oder schweren Verletzungen führen.
• Das Gerät darf von Kindern bis 14 Jahren nur unter Aufsicht benutzt werden.
• Der Turmventilator darf NICHT als Spielzeug verwendet werden und gehört nicht in Kinderhände.
• Eine Reinigung / Wartung darf von Kindern nur unter AUFSICHT durchgeführt werden.
• Stellen Sie das Gerät IMMER AUFRECHT und STANDSICHER auf.
• Das Gerät DARF NICHT in einer explosionsgefährdeten Umgebung betrieben werden.
• Verwenden Sie das Gerät NICHT in einer übermäßig feuchten oder staubigen Umgebung, da dies zu
Funktionsstörungen oder elektrischen Schlägen führen kann.
• Vermeiden Sie Orte mit Feuchtigkeit, um die Entstehung von Rost zu verhindern.
• Nach einer Feuchtreinigung, lassen Sie das Gerät vollständig trocknen.
Aktivieren / Betreiben Sie den Turmventilator NIEMALS im nassen Zustand.
• Berühren Sie das Gerät nicht mit nassen oder feuchten Händen.
• Vermeiden Sie, dass das Gerät in direkten Kontakt mit Wasser kommt.
• Überprüfen Sie das Gerät VOR jeder Nutzung auf mögliche Beschädigungen.
Bei Auffälligkeiten nehmen Sie das Gerät nicht in Betrieb. Wenden Sie sich an Ihren Hersteller oder Verkäufer.
Defekte Netzkabel stellen eine ernsthafte Gefahr dar.
• Der Stromanschluss MUSS den technischen Angaben entsprechen.
• Wenn Sie das Gerät nicht verwenden, ziehen Sie den Netzstecker aus der Steckdose.
• Beachten Sie bei der Installation stets die Mindestabstände zu Wänden und Gegenständen.
• Der Luftein- und Luftauslass MUSS IMMER freigehalten werden und frei von
losen Gegenständen, Schmutz sein.
• Das Gerät DARF NICHT im UNMONTIERTEN ZUSTAND betrieben
oder AN DAS STROMNETZ ANGESCHLOSSEN werden.
• Eine UNSACHGEMÄSSE INSTALLATION kann zu einem Brand, Stromschlag oder schweren Verletzungen führen.
• Stellen Sie das Gerät NIEMALS auf nassem Untergrund auf.
• Legen Sie keine Gegenstände auf das Gerät (z. B. Kleidungsstücke).
• Eigenmächtige bauliche Veränderungen, An- und Umbauten sind verboten.
• Ein anderer Betrieb als der in dieser Anleitung beschriebene ist verboten.
• Bei Nichtbeachtung erlischt jegliche Haftung und Gewährleistungsanspruch.
• Personen, die dieses Gerät benutzen, müssen die Hinweise zur Sicherheit in diesem Handbuch vollständig gelesen
und verstanden haben.
• Dieses Gerät besitzt einen gepolten Stecker. Um das Risiko eines elektrischen Schlages zu verringern, ist dieser
Stecker nur für eine gepolte Steckdose vorgesehen. Wenn der Stecker nicht vollständig in die Steckdose passt,
drehen Sie den Stecker um. Wenn er danach immer noch nicht passt, wenden Sie sich an einen qualifizierten
Elektriker. Versuchen Sie nicht, diese Sicherheitsfunktion zu umgehen.
• Nicht in der Gegenwart von explosiven und/oder brennbaren Dämpfen arbeiten.
• Stellen Sie den Ventilator oder andere Teile nicht in die Nähe einer offenen Flamme, eines Koch- oder anderen
Heizgerätes.
• Benutzen Sie diesen Ventilator nicht im Freien oder an Gewässern, wie z.B. im Badezimmer oder in der
Waschküche.
HINWEIS:
• In diesem Gerät sind keine zu wartenden Teile vorhanden. Versuchen Sie nicht, das Gerät zu zerlegen.
8 RELA NOWWARNUNG:
Um das Risiko eines Brandes oder elektrischen Schlages zu verringern, darf dieser Ventilator nicht mit einem Festkörper-
Drehzahlregler verwendet werden.
ERSTICKUNGSGEFAHR
• Lassen Sie das Verpackungsmaterial und Batterien nicht achtlos herumliegen.
Es könnte für Kinder zu einem lebensgefährlichen Spielzeug werden.
VERHALTEN IM NOTFALL
• Schalten Sie das Gerät sofort aus.
Trennen Sie den Ventilator vom Stromnetz, indem Sie den Netzstecker herausziehen.
• Schließen Sie ein defektes Gerät NIEMALS WIEDER an das Stromnetz an.
HINWEIS
• Verwenden Sie zur Reinigung des Gerätes keine aggressiven Reinigungs-,
Scheuer- oder Lösungsmittel.
WARNHINWEISE
• Jede Wartung, die über die normale Pflege und den normalen Gebrauch hinaus geht, sollte von einem autorisierten
Fachmann vorgenommen werden
• Tauchen Sie das Gerät nicht in Wasser.
• Entnehmen Sie keine Teile und nehmen Sie das Gehäuse nicht ab,
um das Risiko eines Feuers oder von Elektroschocks zu vermeiden.
• Lassen Sie das Gerät nur von einem autorisierten Fachmann reparieren.
• Wenn der Netzanschluss dieses Gerätes beschädigt wird, muss es vom Hersteller oder dem zuständigen
Kundendienst oder einer ähnlich qualifizierten Person ersetzt werden, um Gefährdungen zu vermeiden.
• Bitte versuchen Sie nicht, den Ventilator selbstständig zu öffnen oder zu reparieren.
ACHTUNG
• Das Gerät ist ausschließlich für den privaten Heimgebrauch und nicht
für kommerzielle Zwecke bestimmt.
• Platzieren und verwenden Sie das Gerät auf einer trockenen, ebenen und rutschfesten Fläche, mit mindestens 2,5m
Abstand drumherum.
• Platzieren Sie das Gerät keinesfalls auf einer Oberfläche, wenn dadurch Belüftungsöffnungen blockiert würden.
RELA NOW 95. DIES KÖNNTE SIE AUCH INTERESSIEREN
SPORTSTECH – VX350
MODERNER ARBEITSPLATZ
Der Arbeits-Stress sowie andere tägliche
Belastungen
setzen sich buchstäblich in den Knochen fest.
Dies äußert sich nicht selten in
Verspannungen und Schmerzen
da besonders die Rückenmuskulatur
verkrampft.
Sie können dieses Produkt über folgenden
QR-Code oder Link käuflich erwerben.
https://www.sportstech.de/vibrationsplatte-vx350
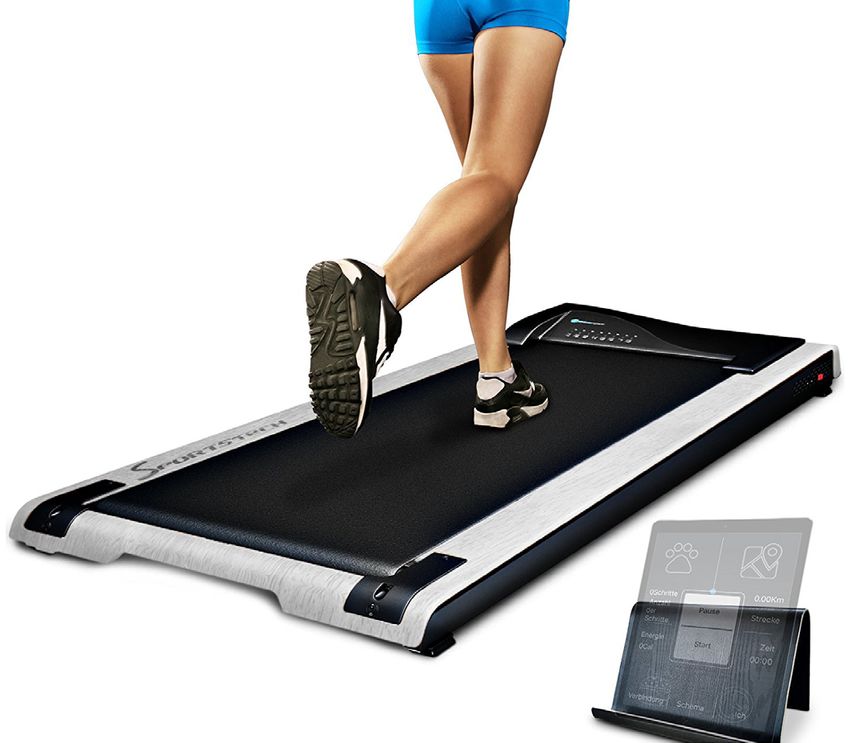
SPORTSTECH - DFT200
FITNESS REVOLUTION
Bringen Sie Bewegung in Ihren Arbeitsalltag
und machen Sie Ihren Arbeitsplatz zu Ihrem
Trainingsplatz,
der Ihren Alltag revolutionieren wird.
BESSER ARBEITEN
Regelmäßige Bewegung während der
Arbeit verstärkt die Durchblutung des
Gehirns und die Sauerstoffaufnahme.
Konzentrationssteigerung, Stressreduktion
und Verbesserung
des Schlafs durch Fitness im Office.
Sie können dieses Produkt über folgenden
QR-Code oder Link käuflich erwerben.
https://www.sportstech.de/laufband-deskfit-dft200-silber
10 RELA NOW6. MONTAGE
• Entfernen Sie die Verpackung vollständig vom Gerät.
• Wickeln Sie das Netzkabel vollständig ab.
• Achten Sie darauf, dass Sie das Netzkabel nicht beschädigen bzw.
dieses nicht beschädigt ist.
• Alle Bauteile und Vormontierten Teile sind fest anzuziehen!
Stecken Sie die beiden Hälften des
Standfusses zusammen. Achten Sie
darauf, dass die Stifte an der Unterseite
der einen Hälfte auf die seitlichen Ösen an
der anderen Hälfte ausgerichtet sind. Beim
Einrasten ist ein deutliches Klicken zu hören.
Stecken Sie den Standfuss an der
Unterseite des Ventilatorturmes über das
Gewinde. Schrauben Sie danach die Mutter
im Uhrzeigersinn auf das Gewinde und
klemmen Sie so den Standfuss fest.
ACHTEN SIE DARAUF DAS KABEL NICHT
EINZUKLEMMEN!
An der Oberseite des Standfusses befindet
sich eine Aussparung in die Sie das Kabel
legen, um ein Quetschen des Kabels
zwischen Standfuss und Turmunterseite zu
vermeiden.
RELA NOW 117. INBETRIEBNAHME
Elektrischer Anschluss
• Bevor Sie den Netzstecker in die Steckdose stecken, stellen Sie sicher, dass die Spannung Ihrer
Hauptversorgung mit der Spannung auf dem Etikett des Produkts übereinstimmt.
• Schließen Sie den Ventilator nur an eine vorschriftsmäßig installierte Kontaktsteckdose an.
WICHTIG
1. Bitte beachten Sie bei der Inbetriebnahme des Gerätes die Mindestabstände zu Wänden und
Gegenständen (30cm in ALLE Richtungen).
2. Vor Inbetriebnahme überprüfen Sie den einwandfreien Zustand des Netzkabels. Wenn Sie
Zweifel am Zustand haben, wenden Sie sich an den Hersteller.
3. Positionieren Sie das Gerät in aufrechter UND standfester Position.
4. Vermeiden Sie beim Verlegen des Netzkabels (bei Positionierung in der Raummitte) s. g.
„Stolperstellen“. Wir empfehlen die Verwendung von Kabelbrücken.
5. Achten Sie darauf, dass das Netzkabel vollständig abgerollt ist.
6. Stellen Sie sicher, dass mögliche Gegenstände (z.B. Vorhänge, Kleidung o. ä.) den Luftstrom
nicht behindern.
7. Setzen Sie die Batterien in die Fernbedienung ein. Sind die Batterien ab Werk bereits in die
Fernbedienung eingelegt, so müssen Sie noch die Schutzfolie entfernen.
12 RELA NOW8. DAS BEDIENFELD
Dieser Ventilator ist mit 3 Geschwindigkeitsstärken, 3 Modi, einem Timer und einer Fernbedienung
ausgestattet. Die Knöpfe auf der Schaltfläche haben dieselbe Funktion wie die auf der
Fernbedienung. Alle Einstellungen des Gerätes können auch mit der mitgelieferten Fernbedienung
vorgenommen werden.
TASTE FUNKTION ANZEIGE
Mit diesem Knopf
TIMER können Sie den Timer
auf 1h bis zu 15 h einstellen.
Nachdem der Timer abge-
laufen ist, schaltet sich der
Ventilator automatisch aus.
Mit diesem Knopf können Sie NATURE: Variiertes Durchlaufen aller
WIND durch die 3 verschiedenen Geschwindigkeitsstufen für ein natur-
Modi schalten. nahes Winderlebnis
Wenn keines der folgenden
SLEEP: Absenken der Geschwindig-
Icons leuchtet ist der NOR-
keit für eine leise und sanfte Brise
MAL-Modus aktiviert.
Mit diesem Knopf wird der Diese Icons zeigen die ausgewählten
SPEED Ventilator durch 3 Komfort Geschwindigkeitsstufen an.
Geschwindigkeiten geleitet
(Normal | Medium | High).
Dieser Knopf kann in jedem
Modus benutzt werden. Normal Medium High
Um eine breite Brisenver- Das Oszillationslicht am Lüfter leuchtet, wenn die Funk-
OSZILLATION teilung zu aktivieren, drücken tion aktiviert ist. Um die Funktion wieder auszuschalten,
Sie die Oszillationstaste drücken Sie diese Taste erneut. Die Oszillation kann ge-
einmal. steuert werden, während der Lüfter in Betrieb ist.
Mit diesem Knopf schalten
ON/OFF Sie den Ventilator an und aus.
RELA NOW 139. DIE FERNBEDIENUNG
HINWEIS:
Entfernen Sie die Plastikisolierfolie unter der Batterie, bevor Sie die Fernbedienung
verwenden.
Der Betrieb unterliegt den folgenden beiden Bedingungen:
1. Dieses Gerät darf nicht zu Interferenzen führen.
2. Dieses Gerät muss alle Interferenzen akzeptieren, einschließlich Interferenzen,
die möglicherweise zu unerwünschtem Betrieb des Gerätes führen können.
• Die Fernbedienung muss auf den Receiver auf dem Ventilator gerichtet sein,
um zu funktionieren.
• Die Reichweite der Fernbedienung beträgt 5 Meter. Wenn die Fernbedienung
nicht auf den Receiver gerichtet ist, verringert sich die Reichweite.
• Die Fernbedienung darf nicht in Räumen verwendet werden, in denen schwere
Maschinen in Betrieb sind.
• Die Sichtlinie zwischen Fernbedienung und Receiver darf nicht blockiert sein.
• Gehen Sie vorsichtig mit der Fernbedienung um. Lassen Sie diese nicht fallen und schlagen
Sie damit nicht gegen harte Gegenstände.
Richtlinien für die Verwendung der Batterien der Fernbedienung
• Wenn die Fernbedienung über einen längeren Zeitraum nicht benutzt wird,
entfernen Sie die Batterien aus der Fernbedienung.
• Reinigen Sie die Batteriekontakte und die des Gerätes, bevor Sie
die Batterie in die Fernbedienung legen.
• Vergewissern Sie sich, dass die Batterien korrekt eingelegt wurden,
in Bezug auf die Polarität (Anpassung der +/- Seiten der Batterie).
• Entfernen Sie gebrauchte und beschädigte / entladene Batterien sofort.
14 RELA NOW10. BATTERIEWECHSEL
Die Vorgehensweise des Batteriewechsels ist auf der Rückseite der Fernbedienung abgebildet. Bitte
befolgen Sie die dargestellten Schritte:
1. Drücken Sie den Verriegelungshebel leicht nach innen
und lösen Sie die seitliche Verriegelung.
2. Öffnen Sie nun das Batteriefach:
Ziehen Sie dazu gleichzeitig den Schlitten heraus.
3. Tauschen Sie die Batterie aus (achten Sie auf die korrekte Polarität).
4. Schließen Sie durch Schieben das Batteriefach.
5. Bitte wechseln Sie die Batterie nur mit den Händen.
Benutzen Sie keine Werkzeuge oder Hilfsmittel. Sonst könnte die Fernbedienung oder der
Mechanismus irreparabel beschädigt werden.
ON / OFF SPEED
WIND
TIMER
OSCILLATION
RELA NOW 1511. TRANSPORT UND LAGERUNG
Bei unsachgemäßer Lagerung könnte das Gerät beschädigt werden.
Bitte beachten Sie dringend die folgenden Hinweise.
• Achten Sie darauf, den Ventilator vor der Lagerung zu zerlegen und zu reinigen.
• Bewahren Sie die Originalverpackung für die Lagerung des Ventilators auf.
• Bewahren Sie den Ventilator immer an einem trockenen Ort auf.
• Lagern Sie den Ventilator niemals, wenn dieser noch an den Strom
angeschlossen ist.
• Wickeln Sie das Kabel nie eng um den Lüfter.
• Belasten Sie das Kabel niemals an der Stelle, an der es in den Ventilator eintritt,
da es sonst ausfransen oder reißen könnte.
VOR dem Transport / VOR der Lagerung:
1. Schalten Sie das Gerät aus und ziehen Sie den Netzstecker aus der Steckdose.
2. Ziehen Sie immer direkt am Netzstecker, nicht am Netzkabel.
NACH dem Transport:
3. Stellen Sie das Gerät immer aufrecht auf.
12. REINIGUNG UND WARTUNG
• Bevor Sie den Ventilator reinigen, sollte unbedingt darauf geachtet werden, dass das Gerät
ausgeschaltet und der Netzstecker aus der Steckdose gezogen ist!
• Reinigen Sie das Gerät in regelmäßigen Abständen.
• Reinigen Sie den Propeller und die Schutzgitter mit einem weichen, feuchten, fusselfreien
Tuch und trocknen Sie diese anschließend ab.
• Verwenden Sie zum Reinigen des Ventilators keine aggressiven Reinigungsmittel
(z. B. Verdünner, Alkohol oder andere chemische Flüssigkeiten).
• Ziehen Sie sichtbare Schrauben in regelmäßigen Zeitabständen nach.
VORSICHT:
ES DARF KEIN WASSER IN DAS INNERE DES VENTILATORS GELANGEN.
DIES KANN ZU EINEM BRAND ODER STROMSCHLÄGEN FÜHREN.
DER LÜFTERMOTOR IST WERKSEITIG AUF DIE GESAMTE LEBENSDAUER GESCHMIERT
UND BENÖTIGT KEINE WEITERE SCHMIERUNG. ES IST KEINE WEITERE WARTUNG DURCH
DEN BENUTZER ERFORDERLICH ODER EMPFOHLEN.
16 RELA NOW13. FEHLERBEHEBUNG
Wenn der Ventilator nicht mehr funktionieren sollte,
befolgen Sie bitte die folgenden Schritte, bevor Sie den Kundenservice kontaktieren:
MÖGLICHE
PROBLEM LÖSUNG
URSACHE
Der Ventilator Ventilator ist nicht an Schließen Sie Ihn an die entsprechende Steck-
geht nicht an. eine 220-240V AC, dose an und schalten Sie Ihn erneut an.
50 / 60 Hz Steckdose
angeschlossen.
Der Ventilator Der Timer ist abgelau- Vergewissern Sie sich, dass alle Timer Lichter
ist plötzlich ausgegangen. fen und der Ventilator am Kontrollschalter aus sind. Wenn eines der
hat sich automatisch Lichter leuchtet, drücken Sie den „Timer- Knopf“
ausgeschaltet. bis alle LEDs aus sind.
Die Oszillation-Funktion funk- Die Oszillations-Funk- Stellen Sie sicher, dass die entsprechende LED
tioniert nicht. tion wurde nicht an- für die Oszillations-Funktion leuchtet. Wenn
geschaltet. nicht, drücken Sie den Knopf, um die Funktion
zu starten. Das kann auch getan werden,
während der Ventilator in Betrieb ist.
Der Ventilator ist an, Es hat sich hinten am Schalten Sie den Ventilator aus und ziehen Sie
aber der Wind nicht stark Ventilator Staub ab- den Stecker. Säubern Sie das hintere Schutzgit-
genug. gelegt. ter mit einem weichen, trockenen Tuch. Stecken
Sie den Stecker wieder an und schalten Sie das
Gerät wieder ein.
Die Fernbedienung Die Batterien sind zu Folgen Sie den Richtlinien für die Verwendung
funktioniert nicht. schwach. der Batterien und der Fernbedienung.
Die Fernbedienung
ist zu weit vom Gerät
entfernt.
RELA NOW 1714. ENTSORGUNG
Hinweise gemäß Elektro- und Elektronikgerätegesetz (ElektroG)
Wir weisen Besitzer von Elektro- und Elektronikaltgeräten darauf hin, dass Elektroaltgeräte gemäß den geltenden ge-
setzlichen Vorschriften, einer vom Siedlungsabfall getrennten Erfassung zuzuführen sind. Das nachfolgend dargestellte
und auf Elektro- und Elektronikaltgeräten aufgebrachte Symbol einer durchgestrichenen Abfalltonne weist zusätzlich
auf die Pflicht zur getrennten Erfassung hin.
Hinweis gemäß Batteriegesetz (BattG)
Batterien können nach Gebrauch auch im Handelsgeschäft unentgeltlich zurückgegeben werden.Batterien und Akkus
dürfen nicht im Hausmüll entsorgt werden. Unabhängig davon weisen wir auf Folgendes hin: Altbatterien können
Schadstoffe enthalten, die bei nicht sachgemäßer Lagerung oder Entsorgung die Umwelt oder Ihre Gesundheit
schädigen können. Batterien enthalten aber auch wichtige Rohstoffe wie z.B. Eisen, Zink, Mangan oder Nickel und
können verwertet werden. Das Zeichen mit der durchgekreuzten Abfalltonne bedeutet, dass Batterien und Akkus nicht
im Hausmüll entsorgen dürfen. Unter diesem Zeichen müssen bei Vorliegen der gesetzlichen Voraussetzungen nach-
stehende Symbole mit folgender Bedeutung bei der Kennzeichnung der Batterien verwendet werden.
Recyclingkreislauf
Verpackungsmaterialien können wieder dem Rohstoffkreislauf zugeführt werden.
Entsorgen Sie die Verpackung gemäß den aktuellen Bestimmungen. Informationen erhalten Sie bei den Rückgabe-
und Sammelsystemen Ihrer Gemeinde.
18 RELA NOWDear customer,
We are pleased you chose a device from the RELAXXNOW product range. With equipment from RELAX-
XNOW you get the highest quality and latest technology.
In order to fully use the potential of your device and be able to enjoy it for many years, please read this
manual carefully before starting up and beginning of training, and use the device according to the instruc-
tions. The operational safety and function of the device can only be guaranteed if the legal provisions on
general safety and accident prevention as well as the safety instructions in this user manual are observed.
We shall not assume any liability for damages resulting from improper use or incorrect operation.
i
Please ensure that all persons using the device have read and understood the user
manual.
Keep the user manual in a safe place to be able to access it at any time
if needed.
RELA NOW 19Our video tutorials for you!
3 simple steps
for a fast and safe start:
construction
use
reduction
1. scan the QR code
2. watch videos
3. start fast and safely
https://service.innovamaxx.de/vtx450_video
20 RELA NOWINDEX
1. TECHNICAL INFORMATION........................................................................................ 22
2. SCOPE OF DELIVERY................................................................................................ 22
3. GENERAL INFORMATION........................................................................................... 23
4. IMPORTANT SAFETY INSTRUCTIONS.......................................................................... 24
5. THIS MIGHT ALSO INTEREST YOU.............................................................................. 26
6. ASSEMBLY.............................................................................................................. 27
7. COMMISSIONING..................................................................................................... 28
8. CONTROL PANEL..................................................................................................... 29
9. REMOTE CONTROL.................................................................................................. 30
10. BATTERY REPLACEMENT........................................................................................ 31
11. TRANSPORT AND STORAGE.................................................................................... 32
12. CLEANING AND MAINTENANCE............................................................................... 32
13. TROUBLESHOOTING............................................................................................... 33
14. DISPOSAL............................................................................................................. 34
15. DECLARATION OF CONFORMITY.............................................................................. 99
RELA NOW 211. TECHNICAL INFORMATION
Device Features
• 50 W motor power
• 60° oscillation for fast and efficient cooling
• 3 speed levels (slow | medium | high | eco)
• 3 modes (normal | natural)
• Integrated storage compartment for the remote control device
• 1-15 h timer
• modern touch display with remote control
• very low noise level
• compact and space-saving
• flexible application for both the home and the workplace
IMPORTANT
The device is suitable for circulating air only indoors.
2. SCOPE OF DELIVERY
• 1x pedestal fan VTX450
• 1x remote control (batteries included)
• 1x manual pedestal fan VTX450
TECHNICAL DATA
Dimensions: 107 x31 x13,5 cm
Power supply: 220-240 V | 50 / 60 Hz
Power: 50 W
Speeds: 3 Stufen
Fan speed: 4,6 m/s
Noise level: max. 50,3 dB
Cable length: 1,2 m
Rotation: 60°
Weight: 3,6 kg
22 RELA NOW3. GENERAL INFORMATION
Please read this manual carefully before using the device and keep it in a safe place. Only use the device as described
and familiarize yourself with every aspect of the operating and safety instructions before using the product.
Remove the packaging and check that the product is undamaged. If in doubt, do not use the product and contact your
seller.
• Never insert foreign objects such as fingers, pins, etc. through the protective grille while the device is in operation.
• Disconnect the device from power if you want to adjust or clean it.
• Make sure that the device is placed on a stable, level surface when it is in use so that it is perfectly stable does not
tip over.
• DO NOT place the unit near a window. Rain can cause an electric shock. Do not immerse the device, the plug or the
cable in water and do not spray it with any liquids.
• Do not leave children and animals unattended with the active device. Do not leave the power cord hanging from a
table or counter surface.
• Do not use the device if the cable or plug is damaged, if the device is broken, dropped or damaged in any way. In
such cases, contact a qualified electrician.
• Do not use the fan without the supplied stand. The appliance must ALWAYS stand upright during operation.
• Do not lay the power cord underground (for example under a carpet). Do not cover the power cord with rugs,
runners or similar. Lay the power cord so that nobody can trip over it.
• Use the fan only as described in the instructions.
• Do not use the fan near curtains, plants, window decorations or other things that may get into the propeller. To
disconnect the device from the mains, disconnect the plug from the socket. NEVER pull on the mains plug and
NEVER pull on the cable.
RELA NOW 234. IMPORTANT SAFETY INSTRUCTIONS
WARNING
Read these safety instructions and instructions completely.
• Failure to comply with this Safety Notice may result in electric shock,
fire and / or serious injury.
• The device may be used by children 8 years of age, but only under supervision.
• The tower fan must NOT be used as a toy and should not be operated by children.
• Cleaning / maintenance must only be carried out by children under supervision.
• ALWAYS set up the unit FULLY UPRIGHT and STANDING SAFE.
• The device MUST NOT be operated in a potentially explosive atmosphere.
• DO NOT use the unit in an excessively humid or dusty environment, as this result in malfunction or electric
shock.
• Avoid places with moisture to prevent the formation of rust.
• After a wet cleaning, allow the device to dry completely.
NEVER activate / operate the tower fan when wet or even damp.
• Do not touch the device with wet or damp hands.
• Avoid the device coming into direct contact with water.
• Check the device for possible damage BEFORE each use. In case of abnormalities, do not operate the device.
Contact your manufacturer or seller. Broken power cords pose a serious danger.
• The power connection MUST comply with the technical specifications.
• If you are not using the device, unplug the power cord from the wall outlet.
• Always observe the minimum distances to walls and objects during installation.
• The air inlet and outlet MUST ALWAYS be kept clear and free from loose objects, foreign objects and dirt.
• The unit MUST NOT be operated in a PARTIALLY ASSEMBLED CONDITION or CONNECTED TO THE POWER
SUPPLY.
• IMPROPER INSTALLATION can cause a fire, electric shock, or serious injury.
• NEVER place the unit on a wet surface.
• Do not place objects on the device (eg clothing).
• DO NOT use the device outdoors.
• Unauthorized structural changes, extensions and conversions are prohibited.
• Operation other than that described in this manual is prohibited.
• Failure to comply will void all liability and warranty.
• Persons using this device must have read and understood the safety instructions in this manual.
• This device has a polarized plug. To reduce the risk of electric shock, this plug is only intended for a polarized
socket. If the plug does not fit fully into the socket, turn the plug over. If it still does not fit afterwards, contact
a qualified electrician. Do not try to bypass this security feature.
• Do not operate in the presence of explosive and / or flammable vapors.
• Do not place the fan or any parts near an open flame, a cooker or other heating device.
• Do not use this fan outdoors or on water, e.g. in the bathroom or in the laundry room.
NOTE
• There are no serviceable parts in this device. Do not try to disassemble the device.
• Do not use aggressive detergents, abrasives or solvents to clean the device.
24 RELA NOWSUFFOCATION HAZARD:
• Do not leave the packaging material lying around carelessly.
• It could become a life-threatening toy for children.
ACTION IN CASE OF EMERGENCY:
• Turn off the power immediately.
• Disconnect the fan from the mains by pulling out the mains plug.
• NEVER reconnect a defective device to the mains.
ATTENTION
• Any maintenance beyond normal care and use should be performed by an authorized professional.
• Do not immerse the device in water.
• Do not remove parts or remove the case to avoid the risk of fire or electric shock.
• Only have the device repaired by an authorized specialist.
• If the mains connection of this device is damaged, it must be replaced by the manufacturer or the responsible
customer service agent or a similarly qualified person in order to avoid hazards.
• Please do not try to open or repair the fan yourself.
• To reduce the risk of fire or electric shock, this fan must not be used with a solid-state speed controller.
IMPORTANT
1. The device is intended for home use only and not for commercial purposes.
2. Place and use the device on a dry, level and non-slip surface with at least 2.5m space around it.
3. Never place the unit on a surface if it blocks ventilation openings.
RELA NOW 255. THIS MIGHT ALSO INTEREST YOU
SPORTSTECH – VX350
MODERN WORKPLACE
The work stress as well as other daily
stress
literally get stuck in the bones.
This is often expressed in tension and
pain
because the back muscles in particular
are cramped.
You can buy this product via
the following QR-Code or link.
https://www.sportstech.de/vibrationsplatte-vx350
SPORTSTECH - DFT200
FITNESS REVOLUTION:
Bring movement into your daily work and make
your workplace your own training ground to
revolutionize your everyday life.
WORK BETTER:
Regular exercise during work enhances
cerebral blood flow and oxygen uptake.
Increased concentration, reduced stress and
improved sleep - all through fitness in the
office.
You can buy this product via
the following QR-Code or link.
https://www.sportstech.de/laufband-deskfit-dft200-silber
26 RELA NOW6. ASSEMBLY
• Remove the packaging completely from the device.
• Unwind the power cord completely.
• Be careful not to damage the power cord.
• Firmly tighten all component parts and pre-assembled parts!
Put the two halves of the stand together.
Make sure the pins on the bottom of one
half are aligned with the side eyelets on the
other half. A clear click is heard when the
two components snap into place.
Put the stand on the underside of the fan
tower over the thread. Then screw the nut
clockwise onto the thread and clamp the
stand.
BE CAREFUL NOT TO PINCH TRAP THE
CABLE!
At the top of the stand there is a recess
facility for you put the cable to avoid
catching the cable between the stand and
the underside of the tower stand.
RELA NOW 277. COMMISSIONING
Electrical connection
• Before plugging the power plug into the power outlet, make sure that the voltage of your
main power supply matches the voltage on the product label.
• Only connect the fan to a properly installed contact socket.
IMPORTANT
1. Please observe the minimum surrounding distances to walls and objects when installing
the device (30cm in ALL directions).
2. Before startup, check the condition of the power cord. If in doubt about the condition,
contact the manufacturer.
3. Position the device in an upright AND stable position.
4. Avoid laying the power cord (when positioning in the center of the room). Avoid the cable
beng a „tripping hazard“ of any kind. We recommend the use of cable bridges/covers.
5. Make sure the power cord is fully unrolled.
6. Make sure that possible objects (such as curtains, clothing, etc.) do not obstruct the airflow.
7. Insert the batteries into the remote control. If the batteries are already inserted into the
remote control ex works, you must remove the protective foil.
28 RELA NOW8. CONTROL PANEL
This fan is equipped with 4 speeds, 2 modes, a timer and a remote control.
The buttons have the same function as those on the remote control.
All settings of the device can also be accessed with the remote control supplied.
BUTTON FUNKTION DISPLAY
With this button you can set
TIMER the timer between 1 and 15
hours.
After the timer has expired,
the fan switches off automa-
tically.
With this button you can NATURE: Variable through all speed
MODE switch through the different levels for a natural wind experience
modes.
If no icon is illuminated
SLEEP: Reduce the speed for a quiet
(NATURE / SLEEP), it means
and gentle breeze
NORMAL mode is activated.
With this button, the fan is These icons show the selected speed levels.
SPEED guided through 4 comfort
speeds:
(Low | Medium | High).
This button can be used in
any mode. Low Medium High
To activate a wide breeze dis- The oscillation light on the fan lights up when the func-
OSCILLATION tribution, press the oscillation tion is activated.
button once. To switch the function off, press this button again. The
oscillation can be controlled while the fan is being used.
This button turns the fan on
ON/OFF and off.
RELA NOW 299. REMOTE CONTROL
Note:
Remove the plastic insulation tab under the battery before using the remote con-
trol.
Operation is subject to the following two conditions:
1. This device does not encounter transmission interference, and
2. this device necessarily picks up any interference, including interference that may result
in the compromised performance of the device.
• The remote control must be pointed at the receiver on the fan in order to work.
• The range of the remote control is 5 meters. If the remote control is not aimed at the
receiver, the range will be reduced.
• The remote control should not be used in rooms where heavy machinery is in opera-
tion.
• The line of sight between the remote control and the receiver must not be blocked.
• Carefully handle the remote control. Do not drop it and do not collide it against hard
objects.
Guidelines for Using the Batteries of the Remote Control
• If the remote control will not be used for an extended period of time,
remove the batteries from the remote control.
• Clean the battery contacts and the device before putting the battery
in the remote control.
• Make sure that the batteries are inserted correctly, especially with regard to polarity,
by adjusting the +/- sides of the battery to the corresponding indicators on the remote
control.
• Remove used and damaged / discharged batteries immediately.
Battery Replacement
To change the remote control battery, insert the tip of a pen into the hole on the back
of the remote control while gently pulling on the battery compartment cover. Once the
battery cover is removed, remove and replace the battery. When inserting the battery
again, please observe the polarity placement, which is indicated on the back of the
remote control.
30 RELA NOW10. BATTERY REPLACEMENT
The procedure for changing the battery is shown on the reverse of the remote control. Please care-
fully follow the steps as shown:
1. Push the locking lever slightly inwards and release the side lock.
2. Now open the battery compartment: To do this, simply pull out the slide at the same time.
3. Replace the battery (making sure the polarity positioning is correct).
4. Close the battery compartment by sliding it.
5. Please only change the battery with your hands. Do not use any tools or aids, otherwise the
remote control or the mechanism itself could be irreparably damaged.
ON / OFF SPEED
WIND
TIMER
OSCILLATION
RELA NOW 3111. TRANSPORT AND STORAGE
Improper storage could damage the device.
Please note the following important warnings.
• Be sure to disassemble and clean the fan before storage.
• Retain the original packaging for storing the fan.
• Always keep the fan in a dry place.
• Never store the fan when it is still connected to the power.
• Never wrap the cable tightly around the fan.
• Never strain the cable at the point where it connects to the fan, otherwise it could fray or
tear.
BEFORE transportation / BEFORE storage:
1. Turn off the power and unplug the power cord from the wall outlet.
2. Always pull directly on the mains plug, not on the mains cable.
AFTER relocation of the device:
3. ALWAYS position the device upright.
12. CLEANING AND MAINTENANCE
• Before you clean the fan, it is important to make sure that the device is switched off and
the adapter is unplugged from the socket!
• Clean the device at regularly.
• Clean the propeller and protective grids with a soft, damp, lint-free cloth and then dry.
• Do not use aggressive cleaning agents (such as thinner, alcohol or other chemical
liquids) to clean the fan.
• Tighten visible screws at regularly.
ATTENTION:
DO NOT ALLOW WATER INTO THE FAN. THIS CAN CAUSE A FIRE OR ELECTRIC SHOCK.
THE FAN MOTOR IS FACTORY LUBRICATED FOR ITS ENTIRE LIFETIME AND DOES NOT
NEED ANY LUBRICATION. NO ADDITIONAL MAINTENANCE BY THE USER IS EITHER
REQUIRED OR RECOMMENDED.
32 RELA NOW13. TROUBLESHOOTING
If the fan stops working, please follow these steps before contacting customer service:
PROBLEM POSSIBLE CAUSE SOLUTION
Fan is not connected
Plug it into the appropriate outlet and turn it
The fan does not turn on. to a 220-240V AC,
on again.
50/60 Hz outlet.
The timer has expi-
Make sure all the timer lights on the control
The fan has stopped sud- red and the fan has
switch are off. When one of the lights is lit,
denly. switched off automa-
press the „Timer“ button until all LEDs are off.
tically.
Make sure that the corresponding Oscillating
The oscillation func-
The oscillation function does function LED is lit. If not, press the button to
tion was not switched
not work. start the function. This can also be done while
on.
the fan is in operation.
Turn off the fan and pull out the plug. Clean
The fan is on, but the air Dust has collected on
the rear grille with a soft, dry cloth. Plug in the
power is not strong enough. the back of the fan.
plug and turn it back on.
The batteries are too
weak. Follow the operation of the remote control and
The remote control
The remote is too the guidelines for using the remote control
does not work.
far away from the batteries.
device.
RELA NOW 3314. DISPOSAL
Instructions According to the Electrical and Electronic Equipment Act (ElektroG)
We would like to point out to the owners of waste and unwanted electrical and electronic equipment that, accor-
ding to the applicable legal regulations, such electrical items must be collected separately from other municipal
waste. The symbol of a crossed-out waste bin shown on the electrical and electronic equipment shown below
also indicates the obligation to separate it and dispose of it seperately and in accordance with all local regulations.
Notice according to the Battery Act (BattG)
Batteries can also be returned free of charge to retailers after use. Batteries and battery cells must not be
disposed of in household waste. Additionally, we would like to point out the following: Used batteries can contain
pollutants that, if not properly stored or disposed of, can damage the environment or your health. Batteries also
contain important raw materials such as Iron, zinc, manganese or nickel and can be re-used. The symbol with
the crossed-out waste bin means that batteries and battery cells must not be disposed of with household waste.
Under this symbol, the following symbols with the following meaning must be used when labeling the batteries in
accordance with legal requirements.
Recycling loop
Packaging material can be conveyed back to the raw material cycle. Dispose of packaging material in accordance
with legal provisions. Information can be retrieved from the return or collections systems of your community.
34 RELA NOWEstimado cliente,
Nos complace que haya elegido un dispositivo de la línea de productos RELAXXNOW. Los dispositivos
RELAXXNOW le ofrecen la más alta calidad y la última tecnología.
Con el fin de usar todo el potencial de su dispositivo y para que pueda disfrutarlo durante muchos años,
por favor lea este manual cuidadosamente antes de comenzar a ejercitarse, y use el dispositivo de acuer-
do a las instrucciones. La seguridad y funcionamiento operativos del dispositivo solo puede garantizarse
si se tienen presentes las disposiciones legales sobre seguridad general y prevención de accidentes así
como también las instrucciones de seguridad en este manual de usuario. Nosotros no asumimos ninguna
responsabilidad por daños resultantes del uso inadecuado o incorrecto del dispositivo.
i
Por favor asegúrese de que todas las personas que usen el dispositivo hayan leído y
entendido este manual de usuario.
Mantenga el manual de usuario en un lugar seguro para poder acceder
a él cuando sea necesario.
RELA NOW 35Nuestros tutoriales en video para usted!
En 3 sencillos pasos para
un arranque rápido y seguro:
Construcción
Utilizar
Reducción
1. Escanear el código QR
2. Ver vídeos
3. Comienza rápido y seguro
Enlace a los videos:
https://service.innovamaxx.de/vtx450_video
36 RELA NOWCONTENIDOS
1. DATOS TÉCNICOS.................................................................................................... 38
2. CONTENIDO............................................................................................................ 38
3. INFORMACIÓN GENERAL.......................................................................................... 39
4. CONSEJOS DE SEGURIDAD IMPORTANTES................................................................. 40
5. TAMBIÉN LE PUEDE INTERESAR................................................................................ 42
6. MONTAJE................................................................................................................ 43
7. PUESTA EN MARCHA............................................................................................... 44
8. EL PANEL DE CONTROL .......................................................................................... 45
9. EL CONTROL REMOTO............................................................................................. 46
10. CAMBIO DE PILA.................................................................................................... 47
11. TRANSPORTE Y ALMACENAJE................................................................................. 48
12. LIMPIEZA Y MANTENIMIENTO.................................................................................. 48
13. SOLUCIÓN DE PROBLEMAS.................................................................................... 49
14. OPCIONES DE RECICLAJE....................................................................................... 50
15. DECLARATION OF CONFORMITY.............................................................................. 99
RELA NOW 371. DATOS TÉCNICOS
Características del dispositivo
• Motor de 50 W
• 60° de oscilación para un enfriamiento más rápido y eficiente
• 3 niveles de velocidad (bajo | medio | alto | eco)
• 3 modos (normal | natural)
• compartimento para el mando a distancia
• Temporizador de 1-15 horas
• Pantalla táctil moderna con control remoto
• Baja emisión de ruidos
• Diseño compacto y espacioso
• Ideal tanto para el hogar como el trabajo
IMPORTANTE
El dispositivo está diseñado para su uso en interiores.
2. CONTENIDO
• 1 x Ventilador de pie VTX450
• 1 x Mando a distancia (pilas incluidas)
• 1 x Manual de instrucciones VTX450
DATOS TÉCNICOS
Dimensiones: 107 x31 x13,5 cm
Tensión necesaria: 220-240 V | 50 / 60 Hz
Motor: 50 W
Velocidad: 3 Stufen
Velocidad de ventilación: 4,6 m/s
Nivel de ruido: max. 50,3 dB
Longitud del cable de alimentación: 1,2 m
Ángulo de giro: 60°
Peso: 3,6 kg
38 RELA NOW3. INFORMACIÓN GENERAL
Lea detenidamente estas instrucciones de funcionamiento antes de utilizar este aparato y guárdelas en un lugar seguro.
Antes de utilizar el aparato, familiarícese con todas las instrucciones de uso y seguridad.
Retire el embalaje y compruebe que el producto no esté dañado.
Si hay alguna duda sobre la integridad del producto, no lo utilice y póngase en contacto con su proveedor.
• No introduzca objetos ajenos como dedos, palos, etc. a través de la rejilla protectora cuando el aparato está en
funcionamiento..
• Desconecte el dispositivo de la fuente de alimentación si desea ajustarlo o limpiarlo..
• Coloque el aparato sobre una superficie estable y nivelada para evitar que vuelque.
• No sumerja el aparato en agua. La lluvia puede provocar un cortocircuito.
No sumerja el aparato, el enchufe o el cable en agua y no lo rocíe con líquidos.
• No deje a los niños y animales solos con el dispositivo activo.
No deje el cable colgando de una mesa.
• No utilice el aparato si los cables o enchufes están dañados, si el aparato está defectuoso, si se ha caído o si se
ha utilizado de un modo inadecuado. En este caso, póngase en contacto con un electricista cualificado.
• No utilice el ventilador sin su soporte. El dispositivo debe estar SIEMPRE de pie cuando esté activado.
• No coloque el cable de forma no visible (ej.: debajo de una alfombra). No cubra el cable con alfombras u
objetos similares. Extienda el cable para que nadie se pueda tropezar con él.
• Utilice el ventilador sólo como se describe en el manual.
• No use el ventilador cerca de cortinas, plantas, decoraciones de ventanas u otras cosas que puedan obstruir
la hélice. Para desconectarlo de la red eléctrica, desenchufe el cable de alimentación de la toma de corriente.
Nunca desconecte el cable de un tirón.
RELA NOW 394. CONSEJOS DE SEGURIDAD IMPORTANTES
ATENCIÓN:
Lea estas instrucciones y consejos de seguridad al completo.
• El incumplimiento de los consejos de seguridad puede provocar descargas eléctricas, incendios y/o lesiones
graves.
• Los niños mayores de 8 años deben utilizar el aparato bajo la supervisión de un adulto.
• El ventilador de pie no es un juguete y debe mantenerse alejado del alcance de los niños.
• Si un niño realiza la limpieza o mantenimiento, debe estar siempre bajo la supervisión de un adulto.
• Coloque la unidad siempre en posición vertical y sobre una superficie nivelada.
• El dispositivo no debe utilizarse en un entorno potencialmente explosivo.
• No utilice el dispositivo en un entorno excesivamente ´húmedo o polvoriento, ya que esto podría provocar un
cortocircuito o que no funcione correctamente.
• Evite lugares húmedos para prevenir la aparición de óxido.
• Deje que el dispositivo se sece completamente después de un mantenimiento con materiales húmedos. No
active el ventilador de pie si está mojado.
• No toque el aparato con las manos mojadas o húmedas.
• Evite que el dispositivo entre en contacto directo con el agua.
• Compruebe que el dispositivo no tiene ningún desperfecto ANTES de cada uso. En caso de encontrar alguna
anomalía no ponga en marcha el dispositivo. Póngase en contacto con su fabricante o vendedor. os cables de
alimentación defectuosos son un grave peligro.
• La toma de corriente debe cumplir con las especificaciones técnicas.
• Desenchufe el dispositivo cuando ya no lo esté usando.
• Durante el montaje, respete siempre las distancias mínimas a las paredes y a los objetos.
• Mantenga la entrada y salida de aire libre de obstáculos o suciedad.
• Monte completamente el dispositivo antes de ponerlo en funcionamiento o conectarlo a la red eléctrica.
• Una instalación indebida puede provocar incendios, descargas eléctricas o lesiones graves.
• Nunca coloque la unidad sobre una superficie mojada.
• No coloque ningún objeto sobre el dispositivo (por ejemplo, ropa).
• No utilice el dispositivo al aire libre.
• No altere ni amplíe el dispositivo.
• Cualquier uso que no esté descrito en este manual está prohibido.
• No seguir estas instrucciones anulará cualquier reclamación de responsabilidad y garantía.
• Las personas que utilicen este equipo deben haber leído y comprendido todos los consejos de seguridad de
este manual.
• Este dispositivo tiene un enchufe polarizado. Para reducir el riesgo de descarga eléctrica, esta clavija está
destinada a utilizarse únicamente con una toma de corriente polarizada. Si el enchufe no encaja completamente
en la toma de corriente, dele la vuelta al enchufe. Si después de esto sigue sin encajar, póngase en contacto
con un electricista cualificado. No intente saltarse esta función de seguridad.
• No trabaje en estancias con vapores explosivos y/o inflamables.
• No coloque el ventilador u otras piezas cerca de una llama, un aparato de cocina u otro aparato de calefacción.
• No utilice este ventilador al aire libre o cerca del agua, como en el baño o en la lavandería.
ATENCIÓN:
• Este dispositivo no cuenta con piezas de sustitución. No intente desmontarlo.
• Para reducir el riesgo de incendio o descarga eléctrica, no utilice este ventilador con un regulador de velocidad
sólido.
40 RELA NOWRIESGO DE ASFIXIA
• No deje el material de embalaje en cualquier lugar de forma descuidada.
Puede poner en riesgo la vida de los niños.
EN CASO DE EMERGENCIA, SIGA LAS SIGUIENTES INSTRUCCIONES:
• Apague el dispositivo inmediatamente.
• Desconecte el ventilador de la red eléctrica.
• Nunca vuelva a conectar un dispositivo defectuoso.
ATENCIÓN:
• No utilice productos agresivos ni disolventes para limpiar el dispositivo.
ADVERTENCIAS DE SEGURIDAD
• Cualquier mantenimiento que vaya más allá del cuidado y uso normal debe ser realizado por un especialista
autorizado.
• No sumerja el aparato en agua.
• Para evitar el riesgo de incendio o descarga eléctrica, no retire ninguna pieza de la estructura.
• Encargue la reparación del aparato únicamente a especialistas autorizados.
• Si se dañan las conexiones a la red eléctrica, deben ser sustituidas por el fabricante, el servicio técnico responsable
o por una persona cualificada para evitar riesgos.
• Por favor, no intente abrir o reparar el ventilador usted mismo.
ATENCIÓN:
El dispositivo está destinado exclusivamente para uso doméstico privado y no con fines comerciales. Coloque y use la
unidad en una superficie seca, nivelada y antideslizante con al menos 2,5 m de espacio libre alrededor. No coloque el
producto cerca de ningún objeto que obstruya la ventilación.
RELA NOW 41Sie können auch lesen