TR2500TO Elektro-Warmwasserspeicher | Electric water storage tank Montage- en gebruikshandleiding
←
→
Transkription von Seiteninhalten
Wenn Ihr Browser die Seite nicht korrekt rendert, bitte, lesen Sie den Inhalt der Seite unten
Montage- und Gebrauchsanleitung
                              Installation and operating instructions
                              Notice de montage et d’utilisation
                              Istruzioni per l‘uso e per il montaggio
                              Montage- en gebruikshandleiding

                              Elektro-Warmwasserspeicher | Electric water storage tank
                              TR2500TO
                              TR2500TO 5 T
6 720 876 011 (2019/05) DIV
Inhaltsverzeichnis
Inhaltsverzeichnis 1 Sicherheitshinweise
Dieses Gerät ist nur für den Hausgebrauch und ähnli-
1 Sicherheitshinweise . . . . . . . . . . . . . . . . . . . . . . . . . . . . . . . . . . 2
che Zwecke bestimmt.
2 Montageanleitung . . . . . . . . . . . . . . . . . . . . . . . . . . . . . . . . . . . . 3 • Das Gerät wie in Text und Bild beschrieben montie-
2.1 Auspacken . . . . . . . . . . . . . . . . . . . . . . . . . . . . . . . . . . . . 3 ren und bedienen. Wir übernehmen keine Haftung
2.2 Produktbeschreibung . . . . . . . . . . . . . . . . . . . . . . . . . . . 3 für Schäden, die durch Nichtbeachtung dieser An-
3 Montagevorbereitung . . . . . . . . . . . . . . . . . . . . . . . . . . . . . . . . . 3 leitung entstehen.
3.1 Gerät tauschen (Bild 3). . . . . . . . . . . . . . . . . . . . . .....3 • Dieses Gerät ist für den Gebrauch bis zu einer Höhe
3.2 Erstinbetriebnahme . . . . . . . . . . . . . . . . . . . . . . . . .....3 von 2 000 m über dem Meeresspiegel bestimmt.
3.2.1 Elektroanschluss . . . . . . . . . . . . . . . . . . . . . . . . . . .....3 • Das Gerät nur in einem frostfreien Raum installieren
3.2.2 Heizvorgang überprüfen . . . . . . . . . . . . . . . . . . . . .....4 und lagern (Restwasser).
3.2.3 Wassertemperatur begrenzen. . . . . . . . . . . . . . . . .....4 • Das Gerät muss in trockenen und sauberen Räumen
4 Technische Daten . . . . . . . . . . . . . . . . . . . . . . . . . . . . . . . . . . . . . 4 installiert und betrieben werden.
5 Gebrauchsanleitung . . . . . . . . . . . . . . . . . . . . . . . . . . . . . . . . . . 4 WARNUNG:
5.1 Wassertemperatur einstellen . . . . . . . . . . . . . . . . . . . . . 4
Stromschlaggefahr!
5.2 Wassertemperatur begrenzen. . . . . . . . . . . . . . . . . . . . . 4
5.3 Ausschalten . . . . . . . . . . . . . . . . . . . . . . . . . . . . . . . . . . . 4 Ziehen Sie im Fehlerfall sofort den Netzstecker!
Bei einer Undichtigkeit am Gerät sofort die Kalt-
6 Reinigung . . . . . . . . . . . . . . . . . . . . . . . . . . . . . . . . . . . . . . . . . . . 4
wasser zuleitung schließen.
7 Entkalken. . . . . . . . . . . . . . . . . . . . . . . . . . . . . . . . . . . . . . . . . . . . 4
• Das Gerät nur von einem Fachmann anschließen
8 Wartung . . . . . . . . . . . . . . . . . . . . . . . . . . . . . . . . . . . . . . . . . . . . . 5 und in Betrieb nehmen lassen.
8.1 Exchange of the electrical connection cable . . . . . . . . . 5 • Um Gefährdungen zu vermeiden, dürfen Repara-
9 Eine Störung, was tun? . . . . . . . . . . . . . . . . . . . . . . . . . . . . . . . . 5 turen und Wartung nur von einem Fachmann
durchgeführt werden.
10 Kundendienst . . . . . . . . . . . . . . . . . . . . . . . . . . . . . . . . . . . . . . . . 5
• Vor der Montage die Wasserzuleitung absperren.
11 Umweltschutz/Entsorgung . . . . . . . . . . . . . . . . . . . . . . . . . . . . . 5 Netzstecker nicht einstecken.
VORSICHT:
Achtung!
Gerät erst vollständig mit Wasser füllen, dann Netz
stecker einstecken, sonst löst die wieder einschalt-
bare Sicherheitstemperaturbegrenzung aus.
• Die gesetzlichen Vorschriften sowie die Anschluss-
bedingungen
des ElektrizitätsVersorgungsunternehmens und
des Wasserwerkes einhalten.
• Das Gerät nur an eine vorschriftsmäßig installierte
Schutzkontakt-Steckdose anschließen. Kein Verlän-
gerungskabel verwenden.
• Vor dem Öffnen des Gerätes Netzstecker ziehen.
• Das Gerät darf nicht über eine externe Schaltvor-
richtung, wie beispielsweise eine Zeitschaltuhr, ver-
sorgt werden, um eine Gefährdung durch ein
unbeabsichtigtes Rücksetzen des Schutztempera-
turbegrenzers im Störfall zu vermeiden.
• Die Anschlussleitung darf nicht an heißen Teilen an-
liegen. Die Isolierung könnte beschädigt werden.
2 TR2500TO – 6 720 876 011 (2019/05)Montageanleitung
• Den Kleinspeicher nur offen (drucklos) und für
3 Montagevorbereitung
eine Zapfstelle verwenden. Der Warmwasser-
• Vor der Montage die Wasserzuleitung absperren. Netzstecker
Auslauf dient zum Druckausgleich und darf nur nicht einstecken.
an die dafür geeignete Armatur angeschlossen • Montagebügel am Gerät abnehmen und die Halteringe abbrechen (A).
werden (Bestell-Nr. BZ13051, BZ13062 • Anschlusskabel je nach gewünschter Länge auf der Geräterückseite
und BZ13071). fixieren (B).
• Der Auslauf der Armatur muss immer frei sein. Kei- Wandmontage (Bild 2)
ne Perlatoren (Luftsprudler) oder Brausearmaturen • Gerät auf der Wand ausrichten und an den drei Einkerbungen (oben,
verwenden. links und rechts am Gerät) die Markierungen anzeichnen (C).
• Die Markierungen mit der Wasserwaage zu einem Linienkreuz verbin-
• Dieses Gerät kann von Kindern ab 8 Jahren und da- den (D1 und D2).
rüber sowie von Personen mit verringerten physi- • Den Montagebügel an der Einkerbung oben am Kreuzungspunkt der
schen, sensorischen oder mentalen Fähigkeiten gezeichneten Linien ansetzen und die Löcher anzeichnen (E).
oder Mangel an Erfahrung und Wissen benutzt wer- • Löcher bohren und Dübel einsetzen (F1).
den, wenn sie beaufsichtigt oder bezüglich des si- • Den Montagebügel (Einkerbung oben) mit den Schrauben an der
Wand anbringen (F2).
cheren Gebrauchs des Gerätes unterwiesen • Gerät in den Montagebügel einhängen (F3).
wurden und die daraus resultierenden Gefahren
verstehen. Kinder dürfen nicht mit dem Gerät spie- 3.1 Gerät tauschen (Bild 3)
Bei Austausch eines alten Kleinspeichers durch dieses neue Gerät kön-
len. Reinigung und Benutzer-Wartung dürfen nicht
nen die vorhandenen Befestigungslöcher mit Dübeln verwendet werden.
von Kindern ohne Beaufsichtigung durchgeführt Es ist aber zu beachten, dass das neue Gerät etwa 2 cm höher ist.
werden. Soll das neue Gerät oben bündig wie das alte Gerät sein (G1):
• Kinder vom Gerät fern halten. • Den neuen Montagebügel mit der Einkerbung nach oben an der Wand
• Kinder beaufsichtigen, um zu verhindern, dass sie anbringen.
mit dem Gerät spielen. Soll das neue Gerät unten bündig wie das alte Gerät sein (G2):
• Das Warmwasserrohr kann heiß werden. Kinder da- • Den neuen Montagebügel umdrehen und mit der Einkerbung nach
unten an der Wand anbringen.
rauf hinweisen.
• Keine Scheuermittel oder anlösende Reinigungs- Wasseranschluss (Bild 4)
mittel verwenden. VORSICHT:
• Keinen Dampfreiniger benutzen. Achtung!
Die Montage- und Gebrauchsanleitung bitte sorg- Die vorhandene Armatur darf nicht verkalkt sein.
fältig durchlesen, danach handeln und aufbewah-
ren! • Gewinde nicht fetten!
Info: Ersatz für beschädigte Gewindestutzen ist beim Kundendienst
erhältlich.
2 Montageanleitung • Bei Bedarf Armatur montieren (A1 und A2).
• Dichtung einsetzen (B1).
2.1 Auspacken
• Auf den axialen Sitz der Anschlussrohre in den Stutzen achten.
• Das neue Gerät auf Transportschäden kontrollieren!
• Überwurfmutter gerade auf Gewinde aufsetzen und von Hand andre-
• Verpackung und gegebenenfalls Altgerät umweltgerecht entsorgen. hen (B2).
Lieferumfang (Bild 1) • Verschraubungen festziehen (C). Gewindestutzen am Speicher mit
Schraubenschlüssel gegenhalten.
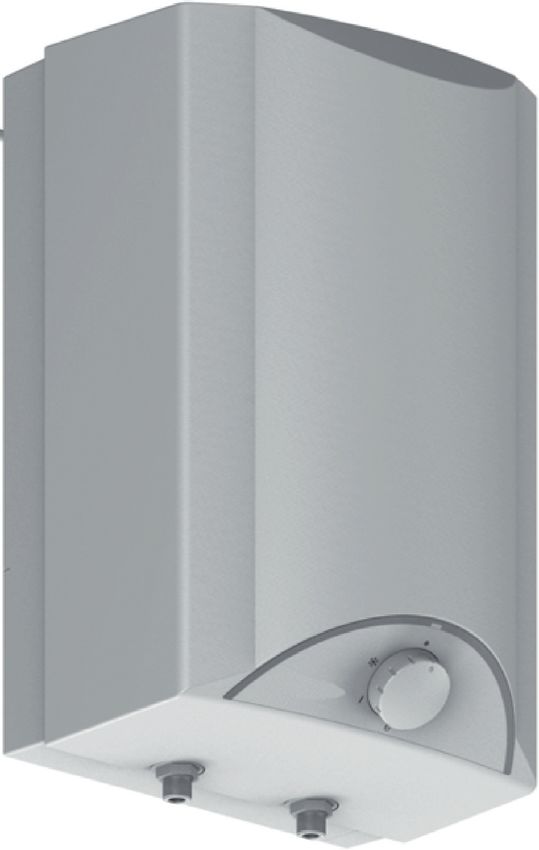
1 Gerät mit Bedienblende
• Verschraubung nach einigen Aufheizvorgängen nachziehen.
2 Montagebügel
• Durchfluss am Eckregulierventil auf 5 l/min (= 1 l in 12 Sekunden)
3 Befestigung (2 Schrauben, 2 Dübel) einstellen.
4 Schriftgut
3.2 Erstinbetriebnahme
2.2 Produktbeschreibung
3.2.1 Elektroanschluss
Der Kleinspeicher ist für den offenen (drucklosen) Anschluss geeignet.
• Wichtig: Netzstecker noch nicht einstecken!
Er erhitzt und speichert Trinkwasser bis ca. 85 °C. Mit dem Temperatur-
• Gerät erst vollständig mit Wasser füllen, das Wasser muss aus der
wähler können verschiedene Temperaturstufen eingestellt werden.
Armatur laufen.
Das Gerät darf nicht mit vorgewärmtem Wasser betrieben werden, sonst • Danach Netzstecker einstecken.
löst die Sicherheitstemperaturbegrenzung aus.
Das Gerät wird mit dem Netzstecker angeschlossen.
Hinweis: Bei einem nicht mit Wasser gefüllten Gerät löst die wieder ein-
schaltbare Sicherheitstemperaturbegrenzung aus!
TR2500TO – 6 720 876 011 (2019/05) 3Technische Daten
3.2.2 Heizvorgang überprüfen
• Drehwähler auf „3“ (ca. 85 °C) drehen. WARNUNG:
• Aufheizen überwachen, bis die Kontrolllampe nach ca. 12‒18 Minuten Stromschlaggefahr!
erlischt. Ziehen Sie im Fehlerfall sofort den Netzstecker!
• Temperatur prüfen. Bei einer Undichtigkeit am Gerät sofort die Kaltwasserzuleitung
schließen.
VORSICHT:
Achtung: Bitte die ausführlichen Sicherheitshinweise am Anfang dieser Anlei-
tung durchlesen und beachten!
Hat die Sicherheitstemperaturbegrenzung den Kleinspeicher abgeschal-
tet, Netzstecker ziehen, Warmwasserhahn öffnen und ca. 4 Liter Wasser Bedienung (Bild 5)
durchlaufen lassen, dann Netzstecker wieder einstecken.
Der Kleinspeicher erhitzt und speichert Trinkwasser bis ca. 85 °C.
Das Gerät ist nun wieder betriebsbereit.
5.1 Wassertemperatur einstellen
3.2.3 Wassertemperatur begrenzen • Die gewünschte Auslauftemperatur stufenlos mit dem Drehwähler
Die Auslauftemperatur des Kleinspeichers kann mechanisch auf Stufe von 35 °C bis 85 °C einstellen.
„1“ (ca. 38 °C) oder Stufe „eco“ (ca. 60 °C) begrenzt werden oder:
(siehe „Bedienung“, Seite 4).
• Die gewünschte Auslauftemperatur fest einstellen (A):
Energiesparen
Frostschutz
• Zum Energiesparen den Drehwähler auf „eco“ stellen.
1 ca. 38 °C (leichte Rastung)
• Bitte dem Benutzer die Montage- und Gebrauchsanleitung überge-
ben und das Gerät erklären. eco Energie sparen ca. 60 °C (leichte Rastung)
3 Heißwasser ca. 85 °C
Beim Aufheizen leuchtet die Kontrolllampe; es tropft etwas Ausdeh-
4 Technische Daten nungswasser aus dem Auslauf.
Typ TR2500TO 5 T Bei hohen Temperaturen verkalkt das Gerät schneller.
Nennleistung [kW] 2,2 Tipp: Um das Gerät ökonomisch zu betreiben und die Verkalkung zu re-
duzieren, den Drehwähler auf „eco“ stellen.
Nenninhalt [l] 5,0
CLICKFIX plus Montagetechnik
Mischwassermenge 40 °C
[l] 9,5/14 Hinweis: Wenn das Gerät längere Zeit nicht benutzt wurde, z. B. während
(15 °C/65 °C) / (15 °C/85 °C)
des Urlaubs, das Wasser auf Stufe „3“ kurz aufheizen lassen.
Temperatur stufenlos
[°C] 85
einstellbar bis
Bereitschaftsenergieverbrauch 5.2 Wassertemperatur begrenzen
[kWh/d] 0,20
bei 65 °C/24 h Um Verbrühungen durch heißes Wasser zu vermeiden, Auslauftempera-
Elektroanschluss [V] 230 tur begrenzen:
Aufheizzeit auf 60 °C • Drehwähler auf „●“ stellen.
[min] 8
(Zulauftemperatur 12 °C) • Abdeckung des Drehwählers aufklappen.
Absicherung [A] 10 • Zwischen „1“ = ca. 38 °C (B1) oder „eco“ = ca. 60 °C (B2) wählen.
Wasseranschluss ["] 3/8 • Abdeckung schließen.
Maximaler Durchfluss [l/min] 5
5.3 Ausschalten
Kabellänge [m] 0,6 Drehwähler auf „●“ stellen (A). Die Heizung ist ausgeschaltet.
Maße (Höhe×Breite×Tiefe) [mm] 435×270×240
Gewicht gefüllt [kg] 7,8
Energieeffizienzklasse A 6 Reinigung
Lastprofil XXS Keine Scheuermittel oder anlösende Reinigungsmittel verwenden.
Jahresenergieverbrauch [kWh] 531 Keinen Dampfreiniger benutzen.
Täglicher Stromverbrauch [kWh] 2,513 • Gerät außen mit einem milden Reinigungsmittel abwischen.
Schallleistungspegel [dB] 15 • Sieb im Strahlregler von Schmutz- und Kalkablagerungen reinigen.
Warmwasserbereitungs-
[%] 34,7
Energieeffizienz
7 Entkalken
• Auslaufrohr mit handelsüblichen Entkalkern oder Essig entkalken.
5 Gebrauchsanleitung • Bei Entkalkern die Warnhinweise des Herstellers beachten.
• Vor dem Gebrauch des Gerätes, bitte sorgfältig diese Anleitung Wenn bei voll geöffneter Armatur das Wasser deutlich langsamer aus-
durchlesen und beachten! läuft, Kleinspeicher und Armatur von einem Fachmann entkalken lassen.
• Wichtig: Das Gerät niemals Frost aussetzen!
4 TR2500TO – 6 720 876 011 (2019/05)Wartung
• Schutzleiterprüfung am Erdungskontakt (A) durchführen.
8 Wartung
Um Gefährdungen zu vermeiden, dürfen folgende Reparaturen und
Wartungsarbeiten nur von einem von uns konzessionierten Kunden- 9 Eine Störung, was tun?
dienst durchgeführt werden. Funktioniert Ihr Gerät nicht wie gewünscht, so liegt es oft nur an einer
• Bei allen Arbeiten das Gerät vom elektrischen Netz trennen und Kleinigkeit. Bitte prüfen Sie, ob aufgrund folgender Hinweise die Störung
den Wasserzulauf absperren. selbst behoben werden kann. Sie vermeiden dadurch die Kosten für ei-
nen unnötigen Kundendiensteinsatz.
8.1 Elektrische Anschlussleitung wechseln • Bei allen Arbeiten das Gerät vom elektrischen Netz trennen und den
Bei sichtbaren Schäden am elektrischen Kabel: Wasserzulauf absperren.
• Gerät ausschalten, Netzstecker ziehen und Kundendienst benach-
richtigen.
Schutzleiterprüfung (Bild 6)
Bei gewerblich genutzten Geräten einmal im Jahr die elektrische Sicher-
heit durch eine Elektro-Fachkraft nach BGV A3 prüfen lassen:
• Gerät ausschalten und Netzstecker ziehen.
Störung Ursache Behebung Wer
Das Gerät startet (heizt) nicht, es Die Sicherung in der Hausinstallation
Die Sicherung in der Hausinstallation prüfen. Kunde
fließt nur kaltes Wasser. hat ausgelöst.
Der Netzstecker ist nicht eingesteckt. Netzstecker einstecken. Kunde
Netzstecker ziehen, Warmwasserhahn öffnen
Die Sicherheitstemperaturbegrenzung
und ca. 4 Liter Wasser durchlaufen lassen. Kunde
hat geschaltet.
Netzstecker einstecken.
Zu geringer Durchfluss von Wasser
Das Sieb im Wasserhahn ist verstopft. Das Sieb entnehmen und reinigen oder entkalken. Kunde
bzw. kein Durchfluss.
Der Wasserauslauf oder die Armatur
Entkalken oder neue Armatur einbauen. Fachmann
ist verkalkt.
Der Warmwasseranschluss-Stutzen Warmwasseranschluss-Stutzen reinigen,
Fachmann
ist verstopft. falls nötig den Wasseranschluss tauschen.
Konnte die Störung nicht behoben werden, bitte den Kundendienst anrufen.
Nutzen Sie zur Entsorgung von Elektro- oder Elektronik-Altgeräten die
10 Kundendienst länderspezifischen Rückgabe- und Sammelsysteme.
Wenn Sie den Kundendienst anfordern, geben Sie bitte die E-Nr.
und die FD-Nr. Ihres Gerätes an. Sie finden die Nummern im Bereich Änderungen vorbehalten.
der beiden Wasseranschlussstutzen des Kleinspeichers.
11 Umweltschutz/Entsorgung
Der Umweltschutz ist ein Unternehmensgrundsatz der Bosch-Gruppe.
Qualität der Produkte, Wirtschaftlichkeit und Umweltschutz sind für uns
gleichrangige Ziele. Gesetze und Vorschriften zum Umweltschutz
werden strikt eingehalten.
Zum Schutz der Umwelt setzen wir unter Berücksichtigung wirtschaft-
licher Gesichtspunkte bestmögliche Technik und Materialien ein.
Verpackung
Bei der Verpackung sind wir an den länderspezifischen Verwertungssys-
temen beteiligt, die ein optimales Recycling gewährleisten.
Alle verwendeten Verpackungsmaterialien sind umweltverträglich und
wiederverwertbar.
Altgerät
Altgeräte enthalten Wertstoffe, die wiederverwertet werden können.
Die Baugruppen sind leicht zu trennen. Kunststoffe sind gekennzeichnet.
Somit können die verschiedenen Baugruppen sortiert und wiederver-
wertet oder entsorgt werden.
Nicht mehr gebrauchsfähige Elektro- oder Elektronikgerä-
te müssen getrennt gesammelt und einer umweltgerech-
ten Verwertung zugeführt werden (Europäische Richtlinie
über Elektro- und Elektronik-Altgeräte).
TR2500TO – 6 720 876 011 (2019/05) 5Table of Contents
Table of Contents 1 Safety information
This appliance is intended for domestic use and the
1 Safety information . . . . . . . . . . . . . . . . . . . . . . . . . . . . . . . . . . . . 6
household environment only.
2 Installation instructions . . . . . . . . . . . . . . . . . . . . . . . . . . . . . . . 7 • Install and operate the appliance as described in
2.1 Unpacking. . . . . . . . . . . . . . . . . . . . . . . . . . . . . . . . . . . . . 7 the text and illustrations. We do not accept liability
2.2 Product description . . . . . . . . . . . . . . . . . . . . . . . . . . . . . 7 for damage resulting from failure to heed these
3 Preparations for installation . . . . . . . . . . . . . . . . . . . . . . . . . . . 7 instructions.
3.1 Exchanging appliances (Fig. 3) . . . . . . . . . . . . . . . .....7 • This appliance is intended for use up to an altitude
3.2 First start-up. . . . . . . . . . . . . . . . . . . . . . . . . . . . . . .....7 of 2,000 m above sea level.
3.2.1 Electrical connection . . . . . . . . . . . . . . . . . . . . . . . .....7 • The appliance may only be installed and stored in a
3.2.2 Checking the heating . . . . . . . . . . . . . . . . . . . . . . . .....7 frost-free room (due to residual water).
3.2.3 Limitation of the water temperature . . . . . . . . . . . .....8 • Install and operate this appliance only in dry and
4 Technical data. . . . . . . . . . . . . . . . . . . . . . . . . . . . . . . . . . . . . . . . 8 clean areas.
5 Operating instructions . . . . . . . . . . . . . . . . . . . . . . . . . . . . . . . . 8 WARNING:
5.1 Setting the water temperature . . . . . . . . . . . . . . . . . . . . 8
Risk of electric shock!
5.2 Limitation of the water temperature . . . . . . . . . . . . . . . . 8
5.3 Switching off. . . . . . . . . . . . . . . . . . . . . . . . . . . . . . . . . . . 8 If an fault occurs, immediately disconnect the plug
from the power supply!
6 Cleaning. . . . . . . . . . . . . . . . . . . . . . . . . . . . . . . . . . . . . . . . . . . . . 8
Immediately shut off the cold water supply to the
7 Descaling . . . . . . . . . . . . . . . . . . . . . . . . . . . . . . . . . . . . . . . . . . . . 8 appliance should it leak.
8 Maintenance . . . . . . . . . . . . . . . . . . . . . . . . . . . . . . . . . . . . . . . . . 8 • The appliance may only be connected and put
8.1 Exchange of the electrical connection cable . . . . . . . . . 9 into operation by qualified professional.
9 A fault, what to do? . . . . . . . . . . . . . . . . . . . . . . . . . . . . . . . . . . . 9 • To avoid potential sources of danger, repairs and
maintenance may only be undertaken by a
10 Customer Service. . . . . . . . . . . . . . . . . . . . . . . . . . . . . . . . . . . . . 9
suitably qualified specialist.
11 Environmental protection/disposal. . . . . . . . . . . . . . . . . . . . . . 9 • Shut off the water supply before connecting the
appliance. Do not insert the plug into the mains
12 Guarantee . . . . . . . . . . . . . . . . . . . . . . . . . . . . . . . . . . . . . . . . . . . 9
socket.
CAUTION:
Caution!
Fill the appliance with water first, then insert the
mains plug, otherwise the resettable safety
temperature limitation will trip.
• Observe the statutory regulations as well as the
connection regulations of the electrical and water
utility companies.
• Only connect the appliance to a correctly earthed
electrical socket. Do not use extension cables.
• Disconnect the power supply before opening the
appliance.
• The appliance may not be powered via an external
switching device such as a timer switch in order to
exclude the danger of an unintentional reset of the
safety temperature limitation in the event of a fault.
• The connection cable may not make contact with
hot components. This can damage the insulation.
6 TR2500TO – 6 720 876 011 (2019/05)Installation instructions
• The small water heater is only suitable for use • Remove the installation bracket on the appliance and break off the
retaining rings (A).
with an open (unpressurised) and a single tap
• Fix the connection cable to the rear of the appliance to suit the
connection. The warm water outlet is used for required length (B).
pressure compensation and may only be
Wall mounting (Fig. 2)
connected to suitable fittings (Order
• Align the appliance on the wall and use the three indents (top, left and
No. BZ13051, BZ13062 and BZ13071). right on the appliance) to apply markings (C).
• The tap outlet must always remain free. Do not use • Connect the markings by a pattern of crossed lines with a spirit level
perlators (diffusers) or shower taps. (D1 and D2).
• This appliance can be used by children aged • Place the installation bracket on top at the point of intersection of the
drawn lines and mark the position for the holes (E).
8 years and older as well as by persons with • Drill the holes and insert wall plugs (F1).
diminished bodily, sensory or mental perception, or • Attach the installation bracket (notch at top) to the wall using the
those who lack knowledge or experience, if they are screws (F2).
monitored or have received instruction concerning • Suspend the appliance in the installation bracket (F3).
use and comprehend the possible dangers that can 3.1 Exchanging appliances (Fig. 3)
result. Children may not play with the appliance. When replacing an old small water heater with this new appliance, the
Cleaning and maintenance by the user may not be existing drill holes with wall plugs can be used. Please note that the new
performed by unsupervised children. appliance is approx. 2 cm higher.
If the new appliance is to be flush at the top like the old appliance (G1):
• Keep children away from the appliance.
• Attach the new installation bracket to the wall with the notches
• Please monitor children to ensure that they do not at the top.
play with the appliance. If the new appliance is to be flush at the bottom like the old appliance (G2):
• The warm water pipe may be hot. Please inform and • Turn the installation bracket around and attach to the wall with the
instruct children appropriately. notches at the bottom.
• Do not use aggressive or abrasive cleaning Water connection (Fig. 4)
detergents!
• Do not use a steam cleaner. CAUTION:
Caution!
Please read this installation and operating
The existing fitting may not be covered with scaling.
instruction manual carefully, then act accordingly!
Store for future reference. • Do not grease the thread!
Info: Replacement for damaged threaded nozzles available from
customer service.
2 Installation instructions
• Fit the taps if required (A1 and A2).
2.1 Unpacking • Insert the seals (B1).
• Inspect the new appliance for transport damage! • Ensure the axial fit of the connection pipes in the nozzles.
• Please dispose of the packaging, and if applicable, the old appliance • Place the union nuts on the thread and tighten them by hand (B2).
in an environmentally-friendly manner. • Tighten the screw fitting (C). Counter the threaded nozzles on the
warm water heater with a wrench.
Scope of delivery (Fig. 1)
• After the unit has been used to heat water a few times, retighten
1 Appliance with operating panel the screw fitting.
2 Installation bracket • Set the flow to 5 l/min (= 1 l in 12 seconds) on the corner valve.
3 Mounting (2 screws, 2 wall plugs)
3.2 First start-up
4 Documentation
3.2.1 Electrical connection
2.2 Product description • Important: Do not insert the plug into the mains socket yet.
The small water heater is only suitable for open (unpressurised) • Fill the appliance with water first. Water must flow from the fitting.
installation. It heats and stores drinking water up to approx. 85 °C. • Only then insert the plug into the mains socket.
Different temperature levels can be selected with the temperature
selector knob.
The appliance may not be operated with pre-heated water, as otherwise
Note: If the appliance is not filled with water, the resettable safety
the safety temperature limitation will trip.
temperature limitation will trip!
The appliance is connected using the mains plug.
3.2.2 Checking the heating
3 Preparations for installation • Turn the rotary selector switch to “3” (approx. 85 °C).
• Monitor the heating process until the pilot lamp switches off after
• Shut off the water supply before connecting the appliance.
approx. 12‒18 minutes.
Do not insert the mains plug.
• Check the temperature.
TR2500TO – 6 720 876 011 (2019/05) 7Technical data
Immediately shut off the cold water supply to the appliance should
CAUTION: it leak.
Caution:
If the safety temperature limitation has switched off the small water Please read and observe the detailed safety instructions at the start
heater, unplug the mains plug, open the warm water tap and allow of these instructions!
approx. 4 litres of water to flow. Then plug the mains plug back in. Operation (Fig. 5)
The appliance is ready again for operation.
The small water heater heats and stores drinking water up to approx. 85 °C.
3.2.3 Limitation of the water temperature 5.1 Setting the water temperature
The temperature of the water leaving the tap for the small water heater • The required outlet temperature from 35 °C to 85 °C can be set with
can be mechanically set to stage “1” (approx. 38 °C) or stage “eco” the rotary selector switch.
(approx. 60 °C) (see “Operation”, page 8). or:
Conserving energy • Set the required fixed outlet temperature (A):
• Set the rotary selector to “eco” to conserve energy.
Frost protection
• Hand over the installation and operating instructions to the user and
explain how the appliance operates. 1 Approx. 38 °C (soft lock-in)
eco Conserve energy approx. 60 °C (soft lock-in)
3 Hot water approx. 85 °C
4 Technical data The pilot lamp lights up during heat up; a little expansion water drips
Type TR2500TO 5 T from the outlet.
The appliance with be covered more quickly with limescale at higher
Rated output [kW] 2.2
temperatures.
Rated capacity [l] 5.0
Tip: Set the rotary selector switch to “eco” to operate the appliance
CLICKFIX plus installation
economically and to reduce the effects of limescale.
technology
Mixed water quantities 40 °C
[l] 9.5/14
(15 °C/85 °C) / (15 °C/85 °C)
Variable temperature Note: If the appliance has not been used for an extended period,
[°C] 85 e. g. during a holiday, allow the water to briefly heat up to stage “3”.
adjustment up to
Stand-by power consumption
[kWh/d] 0.20
at 65 °C/24 h 5.2 Limitation of the water temperature
Electrical connection [V] 230 Limit the outlet temperature to avoid scalding with hot water:
Heat-up time to 60 °C • Set the rotary selector switch to “●”.
[min] 8
(supply temperature 12 °C) • Open the cover of the rotary selector switch.
Fuse protection [A] 10 • Select between “1” = approx. 38 °C (B1) or
Water connection ["] 3/8 “eco” = approx. 60 °C (B2).
Maximum flow [l/min] 5 • Close the cover.
Cable length [m] 0.6 5.3 Switching off
Dimensions Set the rotary selector switch to “●” (A). The heating is switched off.
[mm] 435×270×240
(Height×Width×Depth)
Weight, filled [kg] 7.8
Energy efficiency class A 6 Cleaning
Load profile XXS Do not use aggressive or abrasive cleaning detergents!
Annual energy consumption [kWh] 531 Do not use a steam cleaner.
Daily energy consumption [kWh] 2,513 • Clean appliance externally with a mild cleaning agent.
Sound power level [dB] 15 • Clean the dirt and lime scale deposits in the aerator filter.
Hot water heating
[%] 34,7
energy efficiency
7 Descaling
• Descale the outlet pipe with commercially available descaling agent
5 Operating instructions or vinegar.
• Before using the appliance, please read the instructions • Please observe the manufacturers warnings when descaling.
carefully and observe them! If the water flows significantly slower when the tap is fully opened, the
• Important: The appliance may never be exposed to frost! small water heater and tap should be descaled by a specialist.
WARNING:
Risk of electric shock! 8 Maintenance
If a fault occurs, immediately disconnect the plug from the power The following repairs and maintenance may only be carried out by an
supply! authorised customer service representative to avoid potential sources of
danger.
8 TR2500TO – 6 720 876 011 (2019/05)A fault, what to do?
• The electrical mains supply and the water supply must be shut off by using the following guidelines. You will save yourself the costs of an
before all work on the appliance. unnecessary visit by customer service personnel.
• The electrical mains supply and the water supply must be shut off
8.1 Exchange of the electrical connection cable
before all work on the appliance.
When the electrical cable is visibly damaged:
• Switch off the device, unplug the mains plug and contact customer
service.
9 A fault, what to do?
If your appliance does not operate as required, it is often due to a very
minor problem. Please check whether you can remedy the fault yourself
Fault Cause Solution Who
The appliance does not start (heat), The fuse in the house electrical
Check the fuse in the house electrical installation. Customer
only cold water flows. installation has tripped/blown.
The mains plug is not inserted. Insert the plug into the mains socket. Customer
Unplug the mains plug, open the warm water
The safety temperature limitation
tap and allow approx. 4 litres of water to flow. Customer
has tripped.
Insert the plug into the mains socket.
Too low a water flow or no water flow. The filter in the tap is clogged. Remove the filter and either clean it or descale it. Customer
The water outlet or the tap is clogged
Descale or install a new fitting. Servicing expert
by limescale.
The warm water connection nozzle Clean the warm water connection nozzle
Servicing expert
is clogged. and exchange the water connection if necessary.
If the fault could not be eliminated, please call customer service.
10 Customer Service 12 Guarantee
We ask you to always provide the E-No. and the FD-No. of your appliance The guarantee conditions for this appliance are as defined by our
when calling in a customer service engineer. You will find the number representative in the country in which it is sold. Details regarding these
near both water connection nozzles of the small water heater. conditions can be obtained from the dealer, from whom the appliance
was purchased, or directly from our representative in the country.
Furthermore, the guarantee conditions can also be found on the Internet
11 Environmental protection/disposal at the website address stated. The bill of sale or receipt must be
Environmental protection is a fundamental corporate strategy of the produced when making any claims under the terms of this guarantee.
Bosch Group.
The quality of our products, their economy and environmental safety are
all of equal importance to us and all environmental protection legislation
and regulations are strictly observed.
We use the best possible technology and materials for protecting the
environment taking account of economic considerations.
Packaging
Where packaging is concerned, we participate in country-specific
recycling processes that ensure optimum recycling.
All of our packaging materials are environmentally compatible and can be
recycled.
Used appliances
Used appliances contain valuable materials that can be recycled.
The various assemblies can be easily dismantled. Synthetic materials are
marked accordingly. Assemblies can therefore be sorted by composition
and passed on for recycling or disposal.
Used electrical and electronic appliances
Electrical or electronic devices that are no longer
serviceable must be collected separately and sent for
environmentally compatible recycling (in accordance with
the European Waste Electrical and Electronic Equipment
Directive).
To dispose of old electrical or electronic devices, you
should use the return and collection systems put in place in the country
concerned.
Subject to change without notice.
TR2500TO – 6 720 876 011 (2019/05) 9Table des matières
Table des matières 1 Consignes de sécurité
Cet appareil est destiné exclusivement à une utilisa-
1 Consignes de sécurité . . . . . . . . . . . . . . . . . . . . . . . . . . . . . . . . 10
tion domestique et non professionnelle.
2 Instructions de montage . . . . . . . . . . . . . . . . . . . . . . . . . . . . . . 11 • Monter et utiliser l’appareil comme indiqué dans le
2.1 Déballage . . . . . . . . . . . . . . . . . . . . . . . . . . . . . . . . . . . . 11 texte et à l’écran. Nous n’assumons aucune garantie
2.2 Description du produit. . . . . . . . . . . . . . . . . . . . . . . . . . 11 pour les risques susceptibles de survenir en cas de
3 Préparation du montage . . . . . . . . . . . . . . . . . . . . . . . . . . . . . . 11 non-respect de cette notice.
3.1 Remplacement de l’appareil (Fig. 3). . . . . . . . . . . . . . . 11 • Cet appareil est destiné à une utilisation jusqu’à une
3.2 Première mise en service. . . . . . . . . . . . . . . . . . . . . . . . 11 hauteur maximale de 2 000 m au-dessus du niveau
3.2.1 Raccordement électrique . . . . . . . . . . . . . . . . . . . . . . . 11 de la mer.
3.2.2 Vérifier le procédé de chauffe . . . . . . . . . . . . . . . . . . . . 12 • Toujours installer et stocker l’appareil dans une
3.2.3 Limitation de la température de l’eau . . . . . . . . . . . . . . 12 pièce à l’abri du gel (eau résiduelle).
4 Données techniques . . . . . . . . . . . . . . . . . . . . . . . . . . . . . . . . . 12 • L’appareil doit être installé et utilisé dans des zones
sèches et propre.
5 Notice d’utilisation. . . . . . . . . . . . . . . . . . . . . . . . . . . . . . . . . . . 12
5.1 Réglage de la température de l’eau . . . . . . . . . . . . . . . . 12 AVERTISSEMENT :
5.2 Limitation de la température de l’eau . . . . . . . . . . . . . . 12
5.3 Mise hors marche . . . . . . . . . . . . . . . . . . . . . . . . . . . . . . 12
Danger de choc électrique !
En cas d’incident, immédiatement débrancher la
6 Nettoyage . . . . . . . . . . . . . . . . . . . . . . . . . . . . . . . . . . . . . . . . . . 12
fiche secteur !
7 Détartrage. . . . . . . . . . . . . . . . . . . . . . . . . . . . . . . . . . . . . . . . . . 13 En cas de fuite sur l’appareil, immédiatement cou-
per l’alimentation en eau froide.
8 Maintenance . . . . . . . . . . . . . . . . . . . . . . . . . . . . . . . . . . . . . . . . 13
8.1 Remplacement de la conduite de raccordement • Ne faire raccorder et mettre en service l’appareil
électrique . . . . . . . . . . . . . . . . . . . . . . . . . . . . . . . . . . . . 13
que par un technicien spécialisé.
9 Service après-vente . . . . . . . . . . . . . . . . . . . . . . . . . . . . . . . . . . 13 • Les réparations et les travaux de maintenance
10 En cas de panne que faire ?. . . . . . . . . . . . . . . . . . . . . . . . . . . . 13
ne doivent être effectués que par un technicien
spécialisé afin d’éviter tous dangers.
11 Protection de l’environnement/Recyclage. . . . . . . . . . . . . . . 13 • Couper l’arrivée d’eau avant de commencer le mon-
12 Conditions de garantie . . . . . . . . . . . . . . . . . . . . . . . . . . . . . . . 13 tage. Ne pas brancher la fiche secteur.
PRUDENCE :
Attention !
Tout d’abord complètement remplir l’appareil
d’eau avant de brancher la fiche secteur, le ther-
mostat de sécurité pouvant être remis en marche
risque autrement de se déclencher.
• Respecter les prescriptions légales, les conditions
de raccordement des entreprises d’approvisionne-
ment en électricité et en eau.
• L’appareil doit uniquement être raccordé à une
prise à contacts de protection installée correcte-
ment. Ne pas utiliser de câble de rallonge.
• Toujours débrancher la fiche secteur avant
d’ouvrir l’appareil.
• L’appareil ne doit pas être alimenté par le biais d’un
dispositif de commutation, tel par exemple un tem-
porisateur, afin d’éviter tous risques dus à une réini-
tialisation non souhaitée du thermostat de sécurité
en cas d’incident.
10 TR2500TO – 6 720 876 011 (2019/05)Instructions de montage
• La conduite de raccordement ne doit pas reposer L’appareil est branché au moyen de la fiche secteur.
sur des pièces chaudes. L’isolation risquerait autre-
ment d’être endommagée. 3 Préparation du montage
• Utiliser le chauffe-eau compact uniquement à • Couper l’arrivée d’eau avant de commencer le montage. Ne pas
l’état ouvert (hors pression) et pour une tireuse. brancher la fiche secteur.
La sortie d’eau chaude est uniquement destinée • Retirer l’étrier de montage sur l’appareil et casser les bagues de main-
tien (A).
à l’équilibrage des pressions et elle doit unique- • Fixer le câble d’alimentation électrique au dos de l’appareil, en fonc-
ment être raccordée à la robinetterie adéquate tion de la longueur souhaitée (B).
(référence BZ13051, BZ13062 et BZ13071). Montage mural (Fig. 2)
• La sortie de la robinetterie doit toujours être libre. • Positionner l’appareil sur le mur et dessiner les repères à hauteur des
Ne jamais utiliser d’aérateur ni de robinetterie de trois encoches (en haut, à gauche et à droite sur l’appareil) (C).
douche. • Tracer des lignes avec le niveau à bulle, afin de relier les repères et de
• Cet appareil peut être utilisé par des enfants d’au former un croisement des lignes (D1 et D2).
• Placer l’encoche en haut de l’étrier de montage à hauteur du point
moins 8 ans ainsi que par des personnes à capaci- d’intersection des lignes dessinées et marquer les trous (E).
tés physiques, sensorielles ou mentales réduites ou • Percer les trous et introduire les chevilles (F1).
par des personnes à expériences et savoir • Fixer l’étrier de montage (encoche en haut) au mur au moyen
insuffisants, dans la mesure où ils sont surveillés ou des vis (F2).
bien qu’ils ont été informés sur l’utilisation sûre de • Accrocher l’appareil dans l’étrier de montage (F3).
l’appareil et qu’ils comprennent les dangers résul- 3.1 Remplacement de l’appareil (Fig. 3)
tant d’une utilisation non conforme. Les enfants ne Si un ancien chauffe-eau compact est remplacé par ce nouveau modèle,
doivent jamais jouer avec l’appareil. Le nettoyage et les trous de fixation avec chevilles peuvent être utilisés. Il faut toutefois
tenir compte du fait que le nouvel appareil est plus haut d’environ 2 cm.
la maintenance utilisateur peuvent uniquement
Si le bord supérieur du nouvel appareil doit figurer au même niveau que
être effectués par des enfants s’ils sont sous sur- celui de l’ancien appareil (G1) :
veillance. • Monter le nouvel étrier de montage au mur en tournant l’encoche vers
• Tenir les enfants à l’écart de l’appareil. le haut.
• Surveiller les enfants afin qu’ils ne jouent pas avec Si le bord inférieur du nouvel appareil doit figurer au même niveau que
l’appareil. celui de l’ancien appareil (G2) :
• Le tuyau d’eau chaude peut devenir chaud. En aver- • Retourner le nouvel étrier de montage et le fixer au mur en tournant
l’encoche vers le bas.
tir les enfants.
Raccordement de l’eau (Fig. 4)
• Ne pas utiliser de détergents agressifs ou solvants.
• Ne pas utiliser de nettoyeur à vapeur. PRUDENCE :
Lire attentivement cette notice de montage et Attention !
d’utilisation, agir en conséquence et la conserver ! La robinetterie existante ne doit pas être entartrée.
• Ne pas graisser les filetages !
2 Instructions de montage Info : des embouts filetés de rechange sont disponibles auprès du ser-
vice après-vente.
2.1 Déballage
• Contrôler le nouvel appareil pour constater d’éventuels dégâts dus au • Le cas échéant, monter la robinetterie (A1 et A2).
transport ! • Monter un joint (B1).
• Eliminer l’emballage et, le cas échéant, l’ancien appareil en respec- • Veiller à la position axiale des tubes de raccordement dans les
tant l’environnement. embouts filetés.
• Placer l’écrou-raccord à la verticale sur le filetage et serrer à la main (B2).
Etendue de livraison (Fig. 1) • Serrer à fond les raccords vissés (C). Contre-bloquer les embouts
1 Appareil avec couvercle de commande filetés sur le chauffe-eau en utilisant une clé.
2 Etrier de montage • Resserrer les raccords vissés après quelques procédés de chauffe.
3 Fixation (2 vis, 2 chevilles) • Sur la soupape régulatrice d’équerre, régler le débit à
5 l/min (= 1 l en 12 secondes).
4 Documentation
3.2 Première mise en service
2.2 Description du produit
Le chauffe-eau compact est approprié pour le raccordement à l’état 3.2.1 Raccordement électrique
ouvert (hors pression). Il réchauffe et emmagasine l’eau potable • Important : ne pas encore brancher la fiche secteur!
jusqu’à env. 85 °C. Le sélecteur de température d’eau permet de régler • Tout d’abord complètement remplir l’appareil d’eau, l’eau doit sortir
différents niveaux de température. de la robinetterie.
L’appareil ne doit pas être exploité avec de l’eau préchauffée, ceci risque- • Débrancher ensuite la fiche secteur.
rait en effet de déclencher le thermostat de sécurité.
TR2500TO – 6 720 876 011 (2019/05) 11Données techniques
5 Notice d’utilisation
Remarque : si l’appareil n’est pas rempli d’eau, le thermostat de sécurité • Lire attentivement cette notice avant d’utiliser l’appareil et res-
pouvant être remis en marche risque autrement de se déclencher ! pecter les prescriptions qu’elle contient !
• Important : ne jamais exposer l’appareil au gel !
3.2.2 Vérifier le procédé de chauffe
AVERTISSEMENT :
• Tourner le sélecteur de température d’eau sur la position « 3 »
(env. 85 °C). Danger de choc électrique !
• Surveiller le procédé de chauffe jusqu’à ce que le voyant lumineux En cas d’incident, immédiatement débrancher la fiche secteur !
soit éteint, après env. 12‒18 minutes. En cas de fuite sur l’appareil, immédiatement fermer la conduite
• Vérifier la température. d’eau froide.
PRUDENCE : Obligatoirement lire et respecter les consignes de sécurité détail-
Attention : lées fournies au début de cette notice !
Si le thermostat de sécurité a mis le chauffeeau compact hors marche, Utilisation (Fig. 5)
débrancher la fiche secteur, ouvrir le robinet d’eau et laisser env. 4 litres Le chauffe-eau compact chauffe l’eau potable et l’emmagasine jusqu’à
d’eau traverser l’appareil, et finalement rebrancher la fiche secteur. env. 8 °C.
L’appareil est maintenant de nouveau prêt au fonctionnement.
5.1 Réglage de la température de l’eau
3.2.3 Limitation de la température de l’eau • Régler la température souhaitée pour l’eau de sortie au moyen du
La température de sortie du chauffe-eau compact peut être limité par voie sélecteur rotatif de température à une valeur entre 35 °C et 85 °C.
mécanique au niveau « 1 » (env. 38 °C) ou au niveau « eco » (env. 60 °C) ou :
(voir également le chapitre « Utilisation » à la page 12). • Régler la température souhaitée pour l’eau de sortie à une valeur
Economie d’énergie fixe (A) :
• Pour économiser de l’énergie, tourner le sélecteur rotatif en position Protection antigel
« eco ».
1 env. 38 °C (léger enclenchement)
• Remettre la notice de montage et d’utilisation à l’utilisateur et expli-
quer l’appareil. eco Economie d’énergie, env. 60 °C (léger enclenchement)
3 Eau chaude, env. 85 °C
Le voyant lumineux est allumé pendant le procédé de chauffe; quelques
4 Données techniques gouttes d’eau d’expansion s’échappent du tuyau de déversement.
L’appareil est plus rapidement entartré si les températures sont élevées.
Type TR2500TO 5 T
Conseil : pour une utilisation économique de l’appareil et une réduction
Puissance nominale [kW] 2,2
du procédé d’entartrage, tourner le sélecteur rotatif de température en
Sommaire nominale [l] 5,0 position « eco ».
CLICKFIX plus technique de montage
Quantité d’eaux usées combinées 40 °C
[l] 9,5/14
(15 °C/65 °C) / (15 °C/85 °C)
Remarque : Si l’appareil n’a pas été utilisé pendant une durée plus
Température réglable longue, par exemple pendant les vacances, laisser brièvement chauffer
[°C] 85
en continu jusqu’à l’eau en tournant le sélecteur en position « 3 ».
Consommation d’énergie à l’état prêt
[kWh/d] 0,20
au fonctionnement à 65 °C/24 h
5.2 Limitation de la température de l’eau
Raccordement électrique [V] 230
Limiter la température de sortie pour éviter de se brûler avec l’eau
Temps de chauffe à 60 °C chaude :
[min] 8
(température d’arrivée d’eau 12 °C)
• Tourner le sélecteur rotatif en position « ● ».
Protection par fusibles [A] 10
• Soulever le couvercle du sélecteur rotatif.
Raccordement de l’eau ["] 3/8 • Choisir entre « 1 » = env. 38 °C (B1) ou « eco » = env. 60 °C (B2).
Débit maximal [l/min] 5 • Rabattre le couvercle.
Longueur de câble [m] 0,6
5.3 Mise hors marche
Dimensions
[mm] 435×270×240 Tourner le sélecteur rotatif en position « ● » (A). Le chauffage est
(hauteur×largeur×profondeur)
désactivé.
Poids, rempli [kg] 7,8
Classe d’efficacité énergétique A
Profil de soutirage XXS 6 Nettoyage
Consommation annuelle d’énergie [kWh] 531 Ne pas utiliser de détergents agressifs ou solvants.
Consommation quotidienne Ne pas utiliser de nettoyeur à vapeur.
[kWh] 2,513
de courant • Essuyer l’extérieur de l’appareil en utilisant un détergent doux.
Niveau de puissance acoustique [dB] 15 • Nettoyer le crible du régulateur de jet pour éliminer des dépôts cal-
Efficacité énergétique caires et de saletés.
[%] 34,7
de la préparation d’eau chaude
12 TR2500TO – 6 720 876 011 (2019/05)Détartrage
• Toujours débrancher l’appareil du réseau électrique et couper l’arri-
7 Détartrage vée d’eau avant d’effectuer tout type de travaux.
• Détartrer le tube de sortie avec des détartreurs d’usage courant ou
8.1 Remplacement de la conduite de raccordement
du vinaigre.
électrique
• Si des détartreurs sont utilisés, tenir compte des avertissements
En cas de dégâts visibles sur le câble électrique :
fournis par le fabricant.
• Mettre l’appareil hors marche, débrancher la fiche secteur et contac-
Si l’eau s’écoule nettement plus lentement alors que la robinetterie est
ter le service après-vente.
entièrement ouverte, faire détartrer le chauffeeau compact et la robinet-
terie par un spécialiste.
9 Service après-vente
8 Maintenance Si vous contactez le service après-vente, veuillez indiquer le no E et le
no FD de votre appareil. Les numéros sont indiqués entre les deux tubu-
Afin d’éviter tous risques, les réparations et les travaux de maintenance
lures de raccordement d’eau du chauffe-eau compact.
ne doivent être effectués que par un service après-vente auquel nous
avons donné une concession.
10 En cas de panne que faire ?
Si votre appareil ne fonctionne pas comme souhaité, la cause est sou-
vent minime. Vérifiez si vous pouvez vous-même éliminer la panne en
vous aidant des conseils suivants. Ceci permet d’éviter des frais occa-
sionnés par une intervention inutile du service après-vente.
• Toujours débrancher l’appareil du réseau électrique et couper l’arri-
vée d’eau avant d’effectuer tout type de travaux.
Erreur Cause Remède Qui
L’appareil ne démarre (chauffe) pas, Le fusible dans l’installation domes-
Contrôler le fusible dans l’installation domestique. Client
l’eau sortant est froide. tique s’est déclenché.
La fiche secteur n’est pas branchée. Brancher la fiche secteur. Client
Débrancher la fiche secteur, ouvrir le robinet
Le thermostat de sécurité a commuté. d’eau et laisser env. 4 litres d’eau traverser l’appa- Client
reil. Brancher la fiche secteur.
Débit trop faible de l’eau ou pas
Le crible dans le robinet est bouché. Retirer le crible, puis le nettoyer ou le détartrer. Client
de débit du tout.
La sortie d’eau ou la robinetterie Détartrer ou bien monter une nouvelle Technicien
sont entartrées. robinetterie. spécialisé
La tubulure du raccord d’eau chaude Nettoyer la tubulure du raccord d’eau chaude, Technicien
est bouchée. si nécessaire remplacer le raccord d’eau. spécialisé
Si la panne n’a pas pu être éliminée, contacter le service après-vente.
Appareils électriques et électroniques usagés
11 Protection de l’environnement/Recyclage Les appareils électriques et électroniques hors d'usage
La protection de l’environnement est un principe de base du groupe doivent être collectés séparément et soumis à une élimi-
Bosch. nation écologique (directive européenne sur les appareils
Nous accordons une importance égale à la qualité de nos produits, à leur usagés électriques et électroniques).
rentabilité et à la protection de l’environnement. Les lois et prescriptions
Pour l'élimination des appareils électriques et électro-
concernant la protection de l’environnement sont strictement obser-
niques usagés, utiliser les systèmes de renvoi et de col-
vées.
lecte spécifiques au pays.
Pour la protection de l’environnement, nous utilisons, tout en respectant
les aspects économiques, les meilleurs technologies et matériaux pos-
sibles.
12 Conditions de garantie
Emballages Les conditions de garantie établies par la représentation responsable
En matière d’emballages, nous participons aux systèmes de mise en dans le pays d’achat respectif de l’appareil sont en vigueur pour cet
valeur spécifiques à chaque pays, qui visent à garantir un recyclage opti- appareil. Les conditions de garantie sont à tout moment disponibles
mal. auprès du commerçant spécialisé où l’appareil a été acheté ou directe-
Tous les matériaux d’emballage utilisés respectent l’environnement et ment chez le représentant du pays respectif. Les conditions de garantie
sont recyclables. sont en outre également disponibles à l’adresse Internet citée. La pré-
sentation de la pièce justificative d’achat est en tout cas nécessaire pour
Appareils usagés avoir recours à des prestations de garantie.
Les appareils usés contiennent des matériaux qui peuvent être réutili-
sés.
Les composants se détachent facilement. Les matières synthétiques
sont marquées. Ceci permet de trier les différents composants en vue de
leur recyclage ou de leur élimination.
Sous réserve de modifications.
TR2500TO – 6 720 876 011 (2019/05) 13Indice
Indice 1 Indicazioni di sicurezza
Questo apparecchio è pensato esclusivamente per
1 Indicazioni di sicurezza . . . . . . . . . . . . . . . . . . . . . . . . . . . . . . . 14
l’utilizzo in abitazioni private e in ambito domestico.
2 Istruzioni per il montaggio . . . . . . . . . . . . . . . . . . . . . . . . . . . . 15 • Montare e utilizzare l’apparecchio come descritto
2.1 Disimballaggio . . . . . . . . . . . . . . . . . . . . . . . . . . . . . . . . 15 nelle figure e nel testo di queste istruzioni. Non ci
2.2 Descrizione del prodotto . . . . . . . . . . . . . . . . . . . . . . . . 15 assumiamo alcuna responsabilità per eventuali
3 Preparazione del montaggio. . . . . . . . . . . . . . . . . . . . . . . . . . . 15 danni causati dall’inosservanza delle presenti istru-
3.1 Sostituzione dell’apparecchio (Fig. 3) . . . . . . . . . . . . . 15 zioni.
3.2 Messa in esercizio . . . . . . . . . . . . . . . . . . . . . . . . . . . . . 16 • Questo apparecchio è previsto per l’impiego fino a
3.2.1 Allacciamento elettrico . . . . . . . . . . . . . . . . . . . . . . . . . 16 un’altitudine di 2000 m sopra il livello del mare.
3.2.2 Controllo della procedura di riscaldamento . . . . . . . . . 16 • Installare e immagazzinare l’apparecchio soltanto in
3.2.3 Limitazione della temperatura dell’acqua. . . . . . . . . . . 16 locali che non siano soggetti al gelo (acqua residua).
4 Dati technici . . . . . . . . . . . . . . . . . . . . . . . . . . . . . . . . . . . . . . . . 16 • Installare e utilizzare questo apparecchio esclusiva-
mente in ambienti asciutti e puliti.
5 Istruzioni per l’uso . . . . . . . . . . . . . . . . . . . . . . . . . . . . . . . . . . . 16
5.1 Impostazione della temperatura dell’acqua . . . . . . . . . 16 AVVERTENZA:
5.2 Limitazione della temperatura dell’acqua. . . . . . . . . . . 16
5.3 Spegnimento . . . . . . . . . . . . . . . . . . . . . . . . . . . . . . . . . 16
Rischio di scosse elettriche!
In caso di anomalie staccare subito la spina dalla
6 Pulizia. . . . . . . . . . . . . . . . . . . . . . . . . . . . . . . . . . . . . . . . . . . . . . 16
presa di rete!
7 Rimozione dei depositi di calcare . . . . . . . . . . . . . . . . . . . . . . 17 In caso di perdite dall’apparecchio, chiudere imme-
diatamente la tubazione di alimentazione
8 Manutenzione . . . . . . . . . . . . . . . . . . . . . . . . . . . . . . . . . . . . . . . 17
dell’acqua fredda.
8.1 Sostituzione del cavo di collegamento elettrico . . . . . . 17
9 Assistenza Clienti. . . . . . . . . . . . . . . . . . . . . . . . . . . . . . . . . . . . 17 • Per il montaggio e la messa in funzione
dell’apparecchio incaricare personale
10 Cosa fare in caso di guasto? . . . . . . . . . . . . . . . . . . . . . . . . . . . 17 qualificato.
11 Protezione ambientale e smaltimento . . . . . . . . . . . . . . . . . . 18 • Per evitare situazioni di pericolo, fare eseguire
gli interventi di riparazione e manutenzione solo
12 Condizioni di garanzia . . . . . . . . . . . . . . . . . . . . . . . . . . . . . . . . 18
da personale qualificato.
• Prima del montaggio chiudere la tubazione di ali-
mentazione dell’acqua. Non inserire la spina nella
presa di rete.
ATTENZIONE:
Attenzione!
Riempire completamente il bollitore con acqua
prima di inserire la spina nella presa di rete, altri-
menti scatta il dispositivo automatico di limita-
zione della temperatura.
• Rispettare le vigenti norme legali e le condizioni di
collegamento previste dall’ente erogatore della cor-
rente elettrica e dell’acqua.
• L’apparecchio può essere collegato esclusivamente
ad una presa con contatto di terra installata
secondo le rispettive norme. Non utilizzare cavi di
prolunga.
• Estrarre la spina dalla presa di rete prima di
aprire l’apparecchio.
• Per evitare situazioni di pericolo causate dal ripri-
stino involontario del termostato di protezione in
14 TR2500TO – 6 720 876 011 (2019/05)Sie können auch lesen