Gebrauchsanweisung Backofen - KB A25 - Steba
←
→
Transkription von Seiteninhalten
Wenn Ihr Browser die Seite nicht korrekt rendert, bitte, lesen Sie den Inhalt der Seite unten
220 – 240 V~; 50/60 Hz; 1500 W
Backofen
KB A25
Gebrauchsanweisung 2
Instructions for use 15
Mode d´emploi 26
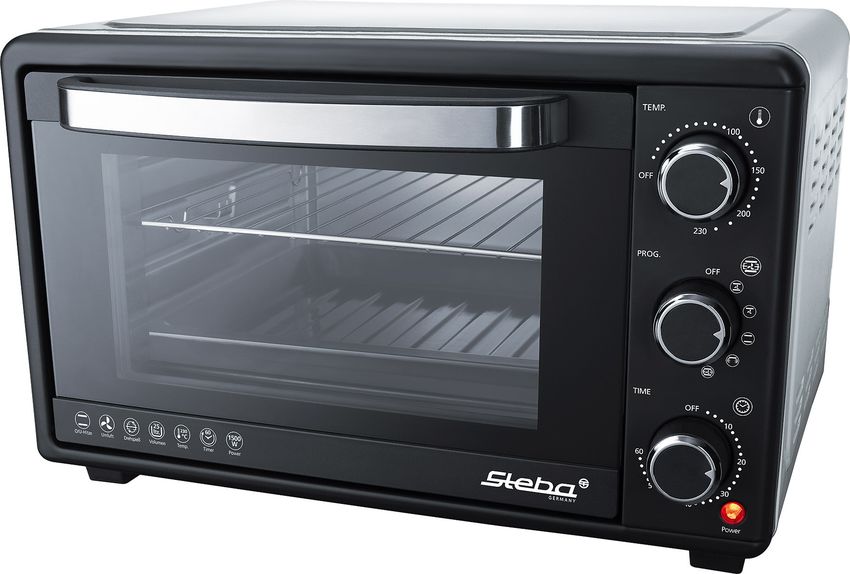
www.steba.com Gebruiksaanwijzing 381 Thermostat
2 Programm
3 Power
4 Timer
5 Grillrost
6 Backblech
Drehspieß
7 Pfannenausheber
8 Türgriff
9 Glastür
10 Heizkörper
11 Einschubebene 1
Spießausheber
12 Einschubebene 2
13 Einschubebene 3
2Allgemein
Dieses Gerät ist nur für den Gebrauch im Haushalt und Innen-
räumen, jedoch nicht im Gewerbe bestimmt. Es eignet sich zum
Grillen, Backen, Gratinieren und Wärmen von Lebensmitteln. Bit-
te lesen Sie die Gebrauchsanweisung aufmerksam durch und be-
wahren Sie diese sorgfältig auf. Bei Weitergabe des Gerätes an
andere Personen ist die Gebrauchsanweisung mit zu übergeben.
Benutzen Sie das Gerät wie angegeben und beachten Sie die Si-
cherheitshinweise. Für Schäden oder Unfälle, die durch Nichtbe-
achtung entstehen, wird keine Haftung übernommen. Entfernen
Sie jegliches Verpackungsmaterial und alle Aufkleber. Waschen
Sie alle Teile gründlich (siehe Reinigung).
Sicherheitshinweise
∙∙ Heiße Oberfläche! Es besteht Verbrennungsgefahr
bei Berühren der Oberfläche im laufenden Betrieb. Das
Gerät mit der Rückseite im Abstand von 10cm an die
Küchenwand stellen.
∙∙ Gerät nur gemäß Angaben auf dem Typenschild anschließen
und betreiben.
∙∙ Das Gerät ist kein Einbauofen und darf nicht als solcher verwen-
det werden.
∙∙ Nur benutzen, wenn Zuleitung und Gerät keine Beschädi-
gungen aufweisen. Vor jedem Gebrauch überprüfen!
∙∙ Berühren Sie den Netzstecker nicht mit nassen Händen.
∙∙ Schließen Sie den Netzstecker nur an eine ordnungsgemäß ge-
erdete und gut zugängliche Steckdose an.
∙∙ Um den Netzstecker zu ziehen, immer am Stecker – nie am Ka-
bel – ziehen.
∙∙ Stecker ziehen nach jedem Gebrauch oder im Fehlerfall
∙∙ Reißen Sie nicht an der Netzanschlussleitung. Scheuern Sie die-
se nicht an Kanten und klemmen Sie diese nicht ein.
∙∙ Zuleitung von heißen Teilen fernhalten.
3∙∙ Das Gerät kann von Kindern ab 8 Jahren sowie von Per-
sonen mit reduzierten physischen, sensorischen oder men-
talen Fähigkeiten oder Mangel an Erfahrung und/oder Wissen
benutzt werden, wenn sie beaufsichtigt oder bezüglich des si-
cheren Gebrauchs des Gerätes unterwiesen wurden und die da-
raus resultierenden Gefahren verstanden haben. Reinigung
und Benutzer-Wartung dürfen nicht durch Kinder durchgeführt
werden, es sei denn sie sind älter als 8 Jahre und beaufsichtigt.
∙∙ Kinder jünger als 8 Jahre sind vom Gerät und der Anschlusslei-
tung fernzuhalten.
∙∙ Kinder sollten beaufsichtigt werden, um sicherzustellen, dass
sie nicht mit dem Gerät oder dem Verpackungsmaterial spielen
(z.B. Plastiktüten)
∙∙ Das Gerät darf nicht mit einer Zeitschaltuhr oder mit einem se-
paraten Fernwirksystem betrieben werden!
∙∙ Lassen Sie das Gerät während des Betriebes niemals ohne Auf-
sicht.
∙∙ Bewahren Sie das Gerät nicht im Freien oder einem feuchten
Raum auf.
∙∙ Stellen Sie nichts auf dem Gerät ab und decken Sie die
Lüftungsschlitze nicht ab.
∙∙ Tauchen Sie das Gerät niemals ins Wasser.
∙∙ Lassen Sie rund um das Gerät mindestens 10cm Platz.
∙∙ Benutzen Sie das Gerät niemals nach einer Fehlfunktion, z.B.
wenn es heruntergefallen ist oder auf eine andere Weise be-
schädigt wurde.
∙∙ Der Hersteller übernimmt keine Verantwortung bei falschen
oder unsachgemäßen Gebrauch, der durch die Nichtbeachtung
der Gebrauchsanleitung zustande kommt.
∙∙ Um Gefährdungen zu vermeiden dürfen Reparaturen am Ge-
rät, wie z.B. eine beschädigte Zuleitung austauschen, nur durch
einen Kundendienst ausgeführt werden. Es dürfen nur original
Ersatzteile verwendet werden.
∙∙ Gerät wird heiß, nur nach dem Abkühlen transportieren.
4∙∙ Das Gerät nur für die in der Bedienungsanleitung beschrie-
benen Zwecke benutzen.
∙∙ Den Rost nicht mit Alufolie einwickeln (Hitzestau).
∙∙ Keine Materialien wie Papier, Pappe, Plastik etc. in das Gerät
geben.
∙∙ Dieses Gerät ist dazu bestimmt im Haushalt und ähnlichen An-
wendungen verwendet zu werden wie beispielsweise:
o in Küchen für Mitarbeiter in Läden, Büros und anderen
gewerblichen Bereichen
o in landwirtschaftlichen Anwesen und von Kunden in Ho-
tels, Motels und anderen Wohneinrichtungen
o in Frühstückspensionen.
∙∙ Vor dem ersten Gebrauch: Alle Teile – außer dem Heizkör-
per- gründlich reinigen und trocknen. Um den Neugeruch zu
beseitigen, das Gerät ca. 15 min. aufheizen lassen.
∙∙ Vorsicht! Gerät wird heiß. Verbrennungsgefahr!
Während des Betriebes kann die Temperatur der be-
rührbaren Oberflächen sehr heiß sein! Gerät auf eine
ebene nicht empfindliche Unterlage stellen und mindestens
70cm Abstand zu brennbaren Materialien (z.B. Gardinen) ein-
halten.
∙∙ Während des Gebrauchs tritt Dampf aus. Halten Sie Hände und
Gesicht auf Abstand.
∙∙ Bei Verwendung eines Verlängerungskabels muss dieses einen
Querschnitt von 1,5mm² haben.
∙∙ Bei einer GS-geprüften 16 A Mehrfach-Steckerleiste darf die-
se wegen Brandgefahr nicht mit mehr wie 3680 Watt belastet
werden.
∙∙ Achten Sie drauf, dass Kinder nicht am Kabel ziehen oder eine
Stolperfalle entsteht.
∙∙ Das Gerät ist bei nicht vorhandener Aufsicht und vor dem Zu-
sammenbau, dem Auseinandernehmen oder Reinigen stets
vom Netz zu trennen.
5∙∙ Achtung: Da sich herabtropfende Fette leicht am Heizkörper
entzünden können, niemals ohne Pfanne grillen! Beim Heraus-
nehmen der vollen Pfanne kein Fett auf den Heizkörper kippen.
∙∙ Bitte benutzen Sie zum Herausnehmen des Rostes oder der
Pfanne den beigefügten Griff.
∙∙ Das Gerät nach Gebrauch reinigen.
∙∙ Das Krümelblech immer unter den unteren Heizkörper schie-
ben.
∙∙ Hygiene: Darauf achten, dass das Gerät wegen Bakterien- oder
Schimmelbefall immer gereinigt werden soll.
Reinigung
∙∙ Achtung! Vor jeder Reinigung Netzstecker ziehen
und das Gerät abkühlen lassen.
∙∙ Gerät nicht in Wasser tauchen.
∙∙ Fettrückstände müssen aus hygienischen Gründen und wegen
Brandgefahr entfernt werden.
∙∙ Keine Scheuermittel, Backofenspray oder Lösungsmittel ver-
wenden.
∙∙ Das Gehäuse und den Innenraum mit einem feuchten Tuch mit
Spülmittel, die Glasscheibe mit Glasreiniger säubern und trock-
nen.
∙∙ Das Krümelblech sowie das Zubehör kann in heißem Wasser ge-
reinigt und dann getrocknet werden. Das Krümelblech wieder
einschieben.
Arbeitsplatz
Wichtig:
Das Gerät niemals auf oder neben eine heiße Oberfläche stellen (z.B. Herdplatte),
sondern nur auf einer ebenen, stabilen und temperaturbeständigen Unterlage be-
treiben. Es ist immer darauf zu achten, dass sich keine entflammbaren Gegenstände
in der Nähe befinden.
Das Gerät nicht an die Tischkante stellen, damit es nicht von Kindern berührt werden
kann oder bei Berührung herunterfällt.
6Einstellungen
1) AN / AUS
2) Backen Ober-/Unterhitze mit Umluft oder
Zum Backen, Garen, Aufbacken
Die Zeit und Temperatur gemäß Rezept einstellen. Die Heizkörper glühen unter-
schiedlich. Der Ventilator verteilt die Temperatur gleichmäßig im Innenraum. Stel-
len Sie bei Umluft den Thermostat etwas höher.
Auftauen: Bei niedriger Temperatur die gefrorenen Lebensmittel in der Pfanne
auftauen.
3) Oberhitze mit Umluft
Zum Grillen von Wurst, Fleisch, Gratinieren, etc.
Maximale Temperatur einstellen.
Die Grillpfanne im unteren Einschub einschieben, das Grillgut mit entsprechen-
dem Abstand zum oberen Heizkörper auf den Grillrost einschieben.
Die Lebensmittel dürfen nicht am Heizkörper anliegen!
4) Grillen mit Drehspieß oder
Zum Grillen von Geflügel, Rollbraten, etc.
Maximale Temperatur einstellen.
Die Grillpfanne unten einschieben, damit das Fett abtropfen kann. Stark fetthal-
tige Lebensmittel können spritzen.
Befestigen Sie einen Mitnehmer auf dem Spieß. Stecken Sie das gebundene Fleisch
oder Geflügel auf den Spieß und fixieren Sie dann mit dem zweiten Mitnehmer
das Grillgut.
Achten Sie darauf, dass das Grillgut in
der Mitte des Spießes sitzt. Legen Sie
den Spieß mit dem Grillgut auf den
Spießausheber und stecken Sie die Spit-
ze des Spießes in die Öffnung des Ge-
triebes in der rechten Seite des Innen-
raums.
Legen Sie dann das andere Ende des
Spießes auf die Spießauflage.
Zur Entnahme des fertigen Grillgutes den Spießausheber, sowie den Pfannenaus-
heber für die Pfanne verwenden.
7Inbetriebnahme Wichtig! Das Gerät immer ca. 5 min vorheizen. Das Gerät kann am Anfang leicht qualmen. Keine übergroßen Speisen in das Gerät geben, damit kein Kontakt zu den Heizelementen entsteht. Stark fetthaltige Speisen in Einschubebene 2 auf dem Grillrost zubereiten, wobei die Pfanne auf Einschubebe- ne 1 sein sollte. Thermostat gegebenenfalls etwas zurückdrehen. Bitte schieben Sie auch immer das Krümelblech ganz unten ein. Zeitschaltuhr: Das Gerät funktioniert nur wenn die Zeitschaltuhr eingestellt ist. Die Uhr zunächst voll aufziehen (auf 60 Min drehen) und dann auf die gewünschte Zeit zurückstellen. Bitte berücksichtigen Sie bei der Zeiteinstellung die Vorwärmzeit von 5 Minuten. Sollte das Lebensmittel nicht braun genug sein, dann verlängern Sie die Zeit. Nach Ablauf der Zeit schaltet sich das Gerät aus und ein kurzes Signal ertönt. Wird das Gerät nicht mehr benötigt, den Netzstecker ziehen und die Schalter auf OFF stel- len. 8
Korrekte Entsorgung dieses Produkts:
Ausgediente Geräte sofort unbrauchbar machen.
       Innerhalb der EU weist dieses Symbol darauf hin, dass dieses Produkt nicht
       über den Hausmüll entsorgt werden darf. Altgeräte enthalten wertvolle recy-
       clingfähige Materialien, die einer Wiederverwertung zugeführt werden soll-
       ten und um der Umwelt bzw. der menschlichen Gesundheit nicht durch un-
kontrollierte Müllbeseitigung zu schaden. Bitte entsorgen Sie Altgeräte deshalb über
geeignete Sammelsysteme oder senden Sie das Gerät zur Entsorgung an die Stelle,
bei der Sie es gekauft haben. Diese wird dann das Gerät der stofflichen Verwertung
zuführen.

Verpackungs-Entsorgung
Wenn möglich heben Sie die Verpackung auf um im Falle einer Garantie das Gerät
zurückschicken zu können. Verpackungsmaterial nicht einfach wegwerfen, sondern
der Wiederverwertung zuführen. Papier-, Pappe- und Wellpappeverpackungen bei
Altpapiersammelstellen abgeben. Kunststoffverpackungsteile und Folien sollten
ebenfalls in die dafür vorgesehenen Sammelbehälter gegeben werden.

                  In den Beispielen für die Kunststoffkennzeichnung steht: PE für
                  Polyethylen, die Kennziffer 02 für PE-HD, 04 für PE-LD, PP für Poly-
                  propylen, PS für Polystyrol.

Kundenservice:
Sollte Ihr Gerät wider Erwarten einmal den Kundendienst benötigen, wenden Sie
sich bitte an nachfolgende Anschrift. Wir werden dann im Garantiefall die Abholung
veranlassen. Das Gerät muss transportfähig verpackt sein.

Unfreie Pakete können nicht angenommen werden!

                        STEBA Elektrogeräte GmbH & Co KG
                      Pointstr. 2, 96129 Strullendorf / Germany
                         Vertrieb-Tel.: 09543 / 449-17 / -18,
                 Service-Tel.: 09543 / 449-44, Fax: 09543 / 449-19
           E-Mail: elektro@steba.com Internet: http://www.steba.com

Achtung! Elektrogeräte dürfen nur durch Elektro-Fachkräfte repariert werden, da
durch unsachgemäße Reparaturen erhebliche Folgeschäden entstehen können.

                                                                                     9
Rezepte Flachgrilladen Grillfleisch nicht klopfen, sondern nur leicht flachdrücken und danach wie- der in Form bringen. Niemals in das Fleisch hineinstechen, da sonst der Saft herausläuft und das Fleisch beim Garen austrocknet. Soll das Fleisch mürbe oder geschmacklich verändert werden, so legt man es in eine Marinade und lässt das Fleisch darin längere Zeit ziehen. Gefrorene Stücke sofort in die Marinade legen und darin auftauen lassen. Vor dem Garen ward das marinierte Fleisch abgetropft und gut abgetupft. Bratwürste Sie können je nach Geschmack grobe oder feine Bratwürste verwenden, am besten eignen sich dünne Grillbratwürstchen. Bratwürste einige Minuten in heißes Wasser legen, bis sie sich stramm anfühlen, und mit einem sauberen Tuch gut abtrocknen. Auf den Rost legen und einschieben. Frikadelle für 4 Personen 150g Tartar, 100 g Hackfleisch, 1 Eigelb, ½ mittlere Zwiebel, ½ Bund Petersilie, 2 Esslöffel Öl, 1 Knoblauchzehe (je nach Geschmack auch weglassen), 1 trockenes Brötchen, Salz, Pfeffer, Paprika, Muskat. Tartar und Hackfleisch mit Eigelb und dem in Wasser eingeweichten Brötchen gut vermengen. Die kleingehackten Zwiebeln, kleingehackte Petersilie, zerdrückte Knoblauchzehe und Öl hinzufügen. Den Fleischteig mit Salz, Pfeffer , Paprika und et- was Muskat je nach Geschmack und Schärfe würzen. Aus dem Fleischteig Frikadellen formen, in die Backpfanne legen und garen. Filetsteak Pro Person 150-200g Rinderfilet. Das Filet auf beiden Seiten mit Öl einreiben, auf den Rost geben und einschieben. Je nach Geschmacksrichtung kann das Fleisch „englisch“(innen noch leicht roh), medium (innen zartrosa) oder völlig durchgebra- ten werden. Den jeweiligen Zustand des Steaks kann man durch Andrücken mit ei- ner Gabel feststellen. Gibt das Fleisch der Gabel leicht nach, ist es innen noch blutig oder „englisch“. Ein durchgebratenes Steak dagegen dehnt sich jedoch nicht mehr so stark. Nach dem Garen wird das Steak mit Salz und Pfeffer gewürzt. Zur Geschmacks- verfeinerung bestreicht man das Filetsteak mit einer Kräuterbutter. Vorgesteckte Spieße (Schaschliks) Wichtig für gemischte Spieße: Zutaten in gleich große Stücke schneiden, damit alles miteinander gleichmäßig bräunt und gar wird. 10
Gemischte Spieße
Für 4 Spieße
200g Rinderfilet, 200g Schweinefilet, 100g durchwachsener Speck, 3 Zwiebeln, 2
Paprikaschoten, Salz, Pfeffer, Paprika, Curry, Öl, Spezial-Schaschliksoße (im Handel
zu kaufen).
Die Zwiebeln in dicke Scheiben schneiden. Das Fleisch in gleichmäßig großen Würfel
abwechselnd mit Paprikaschoten, Zwiebelringen und Speckscheiben auf Spieße
stecken und einölen. Nach dem Garen würzen und verschiedene Schaschliksaucen
dazu reichen.

Balkanspieße
Für 4 Spieße
400gr gemischtes Schweinefleisch (Lende, Kamm), 4 große Zwiebeln, 200gr Gurken,
100g Peperoni (eingelegt), Salz, Paprika, Pfeffer, Curry, Tomatenketchup.
Geviertelte Zwiebeln leicht andünsten. Fleisch in gleichmäßige Stücke schneiden und
zusammen mit den Zwiebeln, kleingeschnittenen Gurken und Peperoni abwechselnd
auf Spieße reihen, einölen und garen. Nach dem Garen mit der Gewürzmischung
würzen und etwas Tomatenketchup darüber geben.

Kaukasischer Schaschlik
Für 4 Spieße: 400g magerer Lammfleisch, 1 Knoblauchzehe, 100-150g durchwachse-
ner Speck, 3 große Zwiebeln, Öl Salz, Curry.
Fleisch mit der Knoblauchzehe einreiben und in gleich große Stücke würfeln. Speck in
entsprechende Scheibchen, die geschälten Zwiebeln in Viertel schneiden.
Abwechselnd Fleisch, Zwiebelviertel und Speck auf Spieße stecken. Fleischstücke
von allen Seiten mit Öl bestreichen und garen. Nach dem Garvorgang mit Salz und
reichlich Curry würzen.

Geflügel
Von Natur aus ist Geflügel für das Garen mit Strahlungshitze wie geschaffen. Die
Haut wirkt wie eine Schutzhülle unter der sich das Fleisch mit dem eigenen Fett von
selbst begießt.
Wichtig: Geflügel kann man vor dem Garen salzen, da durch die Haut der Saft nicht
auslaufen kann. Das Fleisch ist gar, wenn sich die Haut an der Keule zurückgezogen
hat. Beim Einstechen muss der Fleischsaft klar sein.
Gefrorenes Geflügel muss vor dem Garen restlos auftauen, denn nur dann können
die Innereien entnommen werden. Mit einer Marinade, vor allem wenn Sie Paprika
und Curry enthält, erst in den letzten Minuten bepinseln. Die Haut wird sonst zu
dunkel und das Fleisch schmeckt leicht verbrannt.
Beachten Sie bitte, dass Geflügel nur durchgegart verzehrt werden soll.

                                                                                  11
Französisches Hähnchen Für 2 Personen 1 Hähnchen ca. 1000g, etwas Estragon, 50g Butter, 1 Teelöffel Salz, Pfeffer, Paprika Das Hähnchen abspülen, gut trocknen und innen mit Salz, Pfeffer und Paprika kräftig würzen. Die Butter zerlaufen lassen, mit Salz und dem Estragon verrühren und das Hähnchen gleichmäßig bepinseln. Fisch Auch Fisch eignet sich vorzüglich zum Garen mit Strahlungshitze. Er ist in wenigen Minuten gar und braucht fast kein Fett. Fisch muss bei großer Hitze gegart werden, damit das Eiweiß seiner äußeren Zellschichten sofort gerinnt und das zarte Fleisch innen schön saftig bleibt. Für diese Art Zubereitung eignen sich besonders kleinere Fische, wie z.B. Forellen, Makrelen, Heringe, Felchen; ebenso Schleie, kleine Hechte, Seezunge, Aal, Fischfilets, Fischschnitten, Stein- oder Heilbutt, Lachs und Fischstäbchen. Goldbarsch oder Seelachsfilet 1 Packung Goldbarsch oder Seelachsfilet aus der Tiefkühlruhe, Zitronensaft, Salz, Tomaten, Öl. Die Fischfilets aus der Packung nehmen und auftauen. Vor dem Garen den Fisch mit Zitronensaft beträufeln und leicht salzen. Pfanne einölen. Nach dem Garen mit frischen Tomaten garnieren. Fischstäbchen Tiefgekühlte Fischstäbchen auf den Rost geben, mit Butterflocken belegen und ga- ren. Forelle Müllerin Pro Person 1 Forelle (ca. 300g), Zitronensaft, Salz, Butter. Möglichst frische Forellen verwenden. Forellen ausnehmen und abtrocknen. Innen und außen mit Zitronensaft beträufeln und etwas salzen. Eventuell mit Kräutern fül- len. Die Forelle auf den Rost legen und garen. Nach dem Servieren die filetierte Forelle mit etwas zerlassener Butter übergießen. Makrelen Pro Person 1 Makrele, Zitronensaft, Salz, Butter Für die Paste: 2 Esslöffel Senf, 2 Esslöffel gehackte Petersilie Makrele ausnehmen, abspülen und abtrocknen. Auf jeder Seite dreimal schräg einschneiden, innen und außen mit Zitronensaft beträufeln und etwas salzen. 12
Überbackenes:
Hawaii Toast
Pro Person 1 Scheibe gekochten Schinken (20g), 1 Scheibe Ananas, 1 Scheibe
Emmentaler, Butter, 1 Scheibe Toastbrot
Das vorgetoastete Brot mit Butter bestreichen und mit Schinken, Ananas und Käse
belegen. Toast auf den Rost geben und einschieben.

Pizza mit Champignons und Salami
Für 4 Personen
Für den Teig: 15g Hefe, 2 Esslöffel lauwarmes Wasser, 1 Prise Zucker, knapp 2
Tassen Mehl, ½ Teelöffel Salz 1 Esslöffel Olivenöl
Für die Soße: 1 Zwiebel, ½ Dose geschälte Tomaten, 1 kleine Dose Tomatenmark, ½
Teelöffel Basilikum, je ½ Teelöffel Oregano, Zucker und Salz, ½ zerdrückte
Knoblauchzehe, 1 Esslöffel Olivenöl
Für den Belag: 250g Mozarella Käse, 125 g Salami, 1 kl Dose Champignons
Die Hefe mit dem Wasser und dem Zucker verrühren. Zugedeckt an einen warmen
Platz stellen, bis sie aufsteigt und Blasen wirft. Inzwischen Mehl mit Salz in eine
Schüssel sieben. In die Mitte des Mehls eine Vertiefung drücken und die
aufgegangene Hefe mit dem übrigen Wasser und dem Öl hineingeben. Alles mit dem
Knethaken verarbeiten. Aus dem Teig eine Kugel formen. Die Kugel mit Mehl
bestäuben, in ein Tuch einschlagen und warm stellen, bis sie zur doppelten Größe
aufgegangen ist- dauert etwa 1 Stunde.
Für die Soße die Zwiebeln in heißem Öl glasig dünsten. Den Knoblauch, die grob
gehackten Tomaten mit dem Tomatensaft und das Tomatenmark dazugeben und
umrühren. Die Soße mit den übrigen Zutaten würzen und min 30 min bei kleiner
Flamme halb bedeckt köcheln lassen. Die Soße zwischen Teig und Belag gibt dem
Gericht Fülle, Saft und intensiveren Geschmack. Sie ist für viele Pizza- Varianten zu
verwenden.
Das Backblech mit etwas Fett oder Öl bestreichen und den Teig darauf verteilen. Die
Soße auf den Teig geben, darüber den in Würfel geschnittenen Mozarella Käse, die
Salami Scheiben und die zerkleinerten Pilze streuen. Abschließend etwas Olivenöl
über die Pizza träufeln. Backblech einschieben

                                                                                  13
Kuchen und Gebäck: Gesundheitskuchen Kastenform 30cm lang Zutaten: 200g Zucker, 200g Mehl, 200g Butter oder Margarine (weich), 1 Päckchen Vanillezucker, 4 mittlere Eier, 1 ½ Tl. Backpulver, 1 Prise Salz Geben Sie Butter, Zucker und Vanillezucker in eine Schüssel und rühren Sie mit dem Handrührer (auf höchster Stufe) 5 min den Teig schaumig. Geben Sie die Eier nach und nach zu und verrühren Sie sorgfältig. Geben Sie das gesiebte Mehl dazu, ebenso das Salz und das Backpulver und verrühren sie rasch und gründlich. Die Kastenform fetten und mehlen. Den Teig einfüllen und auf den Rost stellen. Backen Sie den Kasten, bis er eine schöne goldgelbe Farbe hat. Apfelkuchen 20cm Springform Zutaten: Teig: 120g Zucker, 200g Mehl, 100g kalte Margarine oder Butter, 1 Prise Salz, ½ Ei Fülle: 600g saure Äpfel, 60g Rosinen, 60g Zucker, 2 Esslöffel gehackte Nüsse, 1 Teelöffel Zimt, 1 Teelöffel Zitronensaft Zum Bestreichen: die 2. Hälfte des Eies Geben Sie alle Zutaten des Teigs in eine Schüssel und verkneten sie sorgfältig zu einem glatten Teig. Den Teig ab einen kühlen Ort ruhen lassen. Rollen Sie 2/3 des Teigs ca. 1/2cm dick aus und legen Sie damit den Boden und den Rand der gebutterten und gemehlten Springform aus. Schälen Sie die Äpfel und schneiden sie in schmale Spalten. Vermischen Sie die Äpfel mit den Rosinen, Zucker, Nüssen, Zimt und Zitronensaft und geben Sie diese Mischung auf den Teig. Aus dem restlichen Teig radeln Sie die Streifen und legen sie kreuzweise auf den Kuchen. Bestreichen Sie den Kuchen mit dem restlichen Ei. Nach dem Backen den Kuchen noch lauwarm aus der Form nehmen. Nusskuchen (Fertigkuchen) Bitte die allgemeinen Hinweise des Herstellers auf der Packung der backfertigen Kuchenmischung beachten. 14
1    Thermostat
2    Program
3    Power
4    Timer
5    Wire grill
6    Baking tray                                    Rotisserie spit
7    Pan handle
8    Door handle
9    Glas door
10   Heating element
11   Shelf level 1                             Spit handle
12   Shelf level 2
13   Shelf level 3

Generally
This insulated appliance is for private and indoor use only and
must not be used commercially. It is suitable for grilling, baking,
cook au gratin and warming of food. Please read the instruction
manual carefully and keep it at a safe place. When the appli-
                                                                 15
ance is given to another person the instruction manual should be
passed to that person, too. Only use the appliance as described in
the instruction manual and pay attention to the safety informa-
tion. No liability for damages or accidents will be accepted, which
are caused by not paying attention to the instruction manual.
Remove all packaging and sticker. Wash up all parts carefully (see
cleaning).
Safety information
∙∙ Hot surface! There is danger of burning when touch-
ing the surface during operation. Set the back of the
device with a distance of 10cm to the kitchen wall.
∙∙ Connect and operate the appliance in accordance with the
specifications shown on the rating label.
∙∙ This device is no built-in oven and cannot be used like this.
∙∙ Do not use if the plug cord is damaged. Verify before every use.
∙∙ Do not plug with wet hands.
∙∙ Connect the power plug to a properly installed and easily acces-
sible socket only.
∙∙ To unplug the power plug, always pull the plug – not the cable.
∙∙ Plug off the appliance after each use or in case of failure.
∙∙ Do not pull at the cord. Don’t pull it over edges and don’t bend
it too much.
∙∙ Keep the cord away from hot parts.
∙∙ The appliance can be used by children aged 8 and above
and persons with limited physical, sensory or mental capa-
bilities or lack of experience/knowledge, provided that are su-
pervised or have been provided with instruction in the safe use
of the appliance and have understood the resulting dangers.
Children must not use the packaging as a toy. Cleaning and user
maintenance must not be carried out by children unless they
are 8 years or older and are supervised.
∙∙ Children under the age of 8 must be kept away from the appli-
ance and the connecting cable.
16∙∙ Children should be supervised to ensure that they do not play
with the appliance or packaging material (e.g. Plastic Bags).
∙∙ The appliance must not be operated using a timer or a separate
remote system!
∙∙ Never leave the appliance unattended when in use.
∙∙ Do not leave the appliance outdoors or in a damp area.
∙∙ Never place anything on top of the device and do not cov-
er the ventilation slots.
∙∙ Never immerse the unit in water.
∙∙ Leave a space of about 10cm around the device.
∙∙ Never use the device after a malfunction, e.g. if it felt down or
has been damaged in any other manner.
∙∙ The manufacturer is not liable for damage which is occurring
due to the usage of the appliance in a different way as de-
scribed or a mistake in the handling has been made.
∙∙ To prevent injury, repairs such as replacing a damaged cord,
should only be carried out by a customer service. Only original
spare parts have to be used.
∙∙ The device gets hot, only transport if it cooled down.
∙∙ Only use the device as described in this manual.
∙∙ You must not wrap the grill with tin foil (accumulation of heat).
∙∙ You must not put any materials such as paper, cardboard, plas-
tic etc. into the appliance.
∙∙ This appliance is intended to be used in household and similar
applications such as:
o staff kitchen areas in shops, offices and others working
environments
o by clients in hotels, motels and other residential type en-
vironments
o bed and breakfast type environments.
∙∙ Before initial use: clean all parts carefully and leave to dry.
Heat up the device for about 15 min. to eliminate the smell of
newness.
17∙∙ Attention! Device gets hot. Danger of burns!
Touchable surfaces will be hot during operation! Place
the device on a flat and insensitive surface with and
keep a distance of at least 70cm to burnable materials.
∙∙ During operation steam emerge. Keep hands and face away.
∙∙ If an extension cable is used, it has to have a cross-section of
1,5mm²
∙∙ If a GS-tested 16 A multi-pin extension is used, it may not be
charged with more than 3680 watts due to fire hazard.
∙∙ Make sure that children do not tease the cable or that a trip
hazard occurs.
∙∙ The device must always be disconnected from the power supply
if it is not supervised and before assembling, disassembling or
cleaning.
∙∙ Attention: as dripping fats can easily ignite the radiator, never
grill without a pan! When removing the full pan, do not tip any
grease on the radiator.
∙∙ Please use the enclosed handle to remove the wire grill and
baking tray.
∙∙ Clean after every use.
∙∙ Always push the crumb tray under the lower radiator.
∙∙ Hygiene: Please always clean the device to avoid bacteria and
mold formation.
Cleaning
∙∙ Attention! Pull the plug before cleaning and allow
the device to cool down.
∙∙ Never immerse the unit into water.
∙∙ Fat residues must be removed for reasons of hygiene and fire
hazard.
∙∙ Do not use abrasives, oven spray or solvents.
∙∙ Clean the housing and the interior with a damp cloth with de-
tergent, clean the glass with glass cleaner and dry.
∙∙ The crumb tray and accessories can be cleaned in hot water and
then dried. Insert the crumb tray again.
18Workplace
Important:
Never place this device on or next to hot surfaces (e.g. hot stoves). Only use it on a
even, stable and a heat resisting surface. It is important that no inflammable items
are near to the device. Do not place the device on the edge of the table so that it
cannot be touched by children or fall down when touched.
Settings
1) ON / OFF
2) Baking upper/lower heat with convection or
For baking, cooking, crisping.
Set the time and temperature according to the recipe. The heating element glow
differently. The fan distributes the temperature evenly in the interior. With con-
vection, set the thermostat slightly higher.
Defrosting: Defrost the food with low temperatures in the baking tray.
3) Upper heat with convection
For grilling of sausage, meat, cook au gratin, etc.
Set the max. temperature.
Insert the grill pan into a lower slot, insert the food onto the wire grill with a
distance to the upper heating element.
The food must not contact the radiator!
4) Rotisserie grilling or
For grilling poultry, rolled pork roast, etc.
Set the max. temperature.
Insert the grill pan at the bottom to allow the fat to drip off. High-fat foods can
splash.
Fix a rotisserie fork at the spit. Put the tied meat or poultry on the spit and fix it
with the second rotisserie fork.
Be careful, that the meat is in the middle
of the spit. Put the spit with the meat on
the rotisserie handle and insert the top
of the spit in the spit motor opening on
the right side of the inner housing. Then
put the other side of the spit on the spit
holder.
To remove the ready cooked food, use
the spit handle and the pan handle.
19Put into operation
Important: Heat the appliance up for at least 5 min. The appliance can smoke slight-
ly when used the first time. Never put oversized food inside the oven and prevent
any contact to the heating elements. Food which contains much fat should be grilled
on the wire grill in position 2; the baking pan should be put at position 1. If necessary
turn the thermostat a little lower. Always insert the crumb tray.
Timer
The device only works when the timer is set. Fully inflate the watch (turn to 60 min)
and then reset to the desired time. Please consider the preheating time of 5 minutes
when setting the time. If the food is not brown enough, then extend the time.
When the time has elapsed, the device switches off and a short signal sounds. If the
device is no longer needed, unplug the power cord and set the switches to OFF.
Correct Disposal of this product
This marking indicates that this product should not be disposed with other
household wastes throughout the EU. To prevent possible harm to the envi-
ronment or human health from uncontrolled waste disposal, recycle it re-
sponsibly to promote the sustainable reuse of material resources. To return
your used device, please use the return and collection systems or contact the retailer
where the product was purchased. They can take this product for environmental safe
recycling.
Packaging disposal: Do not throw away the package materials. Please put it in the
recycling bin.
Gift box: Paper, should be put to the old paper collection point.
Plastic packaging material and foils should be collected in the spe-
cial collection containers.
Service and Repair:
If the appliance must be repaired, please get in touch with your trader or with the
manufacturer:
STEBA Elektrogeräte GmbH & Co KG
Pointstr. 2, 96129 Strullendorf / Germany
Distribution-Tel.: 09543 / 449-17 / -18,
Service-Tel.: 09543 / 449-44, Fax: 09543 / 449-19
e-Mail: elektro@steba.com Internet: http://www.steba.com
20Recipes
Food for flat grilling
Meat for grilling should not be pounded, but it should be pressed flat gent-
ly. After that the shape should be restored. Never prick into the meat, as the
juice can pour out and the meat can get dry.
When the meat should get more tender or achieve a different flavor then the meat
should be placed in a marinade for some time. Frozen meat can be placed in the ma-
rinade and be defrosted in it. Before the grilling the marinade should be removed by
a kitchen towel.
Grill sausage
Different styles of grill sausages can be grilled according the own taste. Thin sausa-
ges are better for a good grilling result. Raw grill sausages should be placed in hot
water until the skin is tight. Then the skin of the sausages should be dried with a
kitchen towel. Place the sausage then on the wire grill and insert it into the grill.
Flat meatball for 4 persons
150g Tartar, 100gr minced meat, 1 egg yolk, ½ middle sized onion, ½ bunch of pars-
ley, 2 tablespoon of oil, 1 clove of garlic (can be omitted), 1 dry bun, salt, pepper,
paprika, nutmeg
The dried bun should be soaked in some water. Then it should be mixed well together
with the Tartar, the minced meat and the egg yolk. Then add the chopped onion,
small cut parsley, pressed garlic and the oil. Then season the meat with salt, pepper,
paprika and some nutmeg. The seasoning should be according to the own taste and
spiciness. Meat loafs can be formed from the meat dough. Place them into the bake
pan and grill.
Fillet Steak
150-200g per person. The filet should be rubbed with oil on both sides. Place it on the
wire grill and insert it into the oven. Turn the steak over after half of the time. The
steak can be grilled to rare, medium or well done. The grilling result can be tested
by pressing a fork gently on the meat. When the meat can be pressed easily then the
steak is still rare. A well-done steak is harder to press. After the finishing of the grill
add some salt and pepper. A with herbs seasoned butter can be added to achieve a
better taste.
Meat skewer (Shashlik)
Important notice: All ingredients should be cut in the same size, to achieve an evenly
result in browning and doneness.
21Mixed Skewer For 4 skewers 200g beef fillet, 200g pork fillet, 100g thick bacon, 3 onion, 2 bell pepper, salt, pep- per, paprika powder, curry, oil, shashlik sauce (from the shop) The onions should be cut in thick slices and the meat in cubes of same size. Put the meat altering with the bell pepper pieces, onion slices and bacon on the skewer and oil the skewers. After grilling the Shashlik can be seasoned and should be offered with different shashlik sauces. Skewer “Balkan” style For 4 skewers 400g mixed pork meat, 4 large onion, 200g pickled cucumber, 100g pickled peperoni, salt, pepper, paprika powder, curry, tomato ketchup The onions should be cut in quarters and then be stewed for a short time. The meat should be cut in pieces of same size and then be pinned on the skewer altering with the onions, cut cucumber and peperoni. After grilling the skewers can be seasoned and witch a ketchup topping. Shashlik “Caucasian” style For 4 skewers 400g lamb meat (not fat), 1 clove of garlic, 100-150gr thick bacon, 3 large onion, oil, salt, curry The meat should be rubbed with the garlic clove and cut into pieces of same size. The onion should be cut into quarters and the bacon in slices. The meat and the other ingredients should be pinned on the skewer altering. Oil the skewer before grilling. After grilling salt and curry should be put on the skewer. Poultry Poultry is perfect for the preparation with infrared heat. The skin acts like a protec- tion under which the meat is infused by its on fat. Important: Poultry can be salted before grilling, as the skin protects the meat from dehydrating. The meat is ready when the skin retracts from the drumstick ends. When the meat is pricked the leaking juice must be clear. Frozen poultry must be defrosted completely before grilling. All giblets must be re- moved before grilling. Especially when the marinade contains paprika powder or curry then the poultry should be marinated with a kitchen brush short before ending the grilling process. Else the skin becomes dark and there can be bitter aroma. It is important that poultry meat should be consumed only when it is cooked com- pletely. 22
French chicken
For 2 persons
1 chicken ca. 1000g, some tarragon, 50g butter, 1 teaspoon salt, pepper, paprika
powder
The chicken should be rinsed and afterward dried with a paper towel completely.
Then it should be seasoned inside with sufficient salt, pepper and paprika powder.
Melt the butter and mix it with some tarragon and brush the mixture on the chicken
evenly.

Fish
Fish can be prepared with infrared radiation perfectly. It is ready after short time
and contains nearly no fat.
Fish must be prepared with a lot of heat, that the protein in the cells coagulate fast
and that the tender meat keeps juicy. For this kind of preparation smaller fish are
more suitable, like Trout, Mackerel, Herring, Tench, Pike, Eel, Halibut, Salmon, Pieces
of Fish.

Gold Bass or Pollack
1 pack of Gold Bass or Pollack fillet from the freezer, lemon juice, salt, tomato, oil
The fillet should be removed from the packaging and defrosted. Add some lemon
juice on the fish and salt it a little. Put some oil on the bake pan. After grilling please
add some tomato for garnish.

Fish sticks
The fish sticks should be placed on the wire grill. Add some flake of butter on them
and prepare them.

Trout “Miller” style
1 Trout (ca. 300g) per person, lemon juice, salt, butter
To achieve best results some fresh trout should be used. All intestines must be remo-
ved, and dried completely after washing. Put some lemon juice inside and outside of
the fish and salt a little. Some herbs can be added inside of the fish.
Place the trout on the wire grill and prepare. When the fish is served pour some mel-
ted butter over the trout.

Mackerel
1 Mackerel per Person, lemon juice, salt, butter
For the paste: 2 tablespoon mustard, 2 tablespoon chopped parsley
Remove the intestines of the Mackerel. Then wash and dry the fish. Cut diagonal 3
times on each side into the fish. Then put some salt and lemon juice inside and out-
side of the fish. Put the paste inside the fish. Place it on the wire grill and prepare.

                                                                                        23
Toasting Toast Hawaii Per Toast: 1 slice of ham (ca. 20g), 1 slice of pineapple, w slice of melting cheese, 1 slice of toast bread The bread should be toasted before putting the ingredients on it. Then butter the toasted bread and put the ham then the pineapple and then the cheese on it. After that the toast should be placed on the wire grill and placed in the grill. Pizza with mushroom and salami For 4 persons For the dough: 15g yeast, 2 tablespoon warm water, 1 pinch sugar, 2 cups flour, ½ teaspoon salt, 1 tablespoon olive oil For the sauce: 1 onion, ½ can of skinned tomato, 1 small can of tomato paste, ½ teaspoon basil, ½ teaspoon of oregano, sugar and salt, ½ clove minced garlic, 1 tab- lespoon olive oil For the Topping: 250g Mozzarella cheese, 125g sliced salami, 1 small can of cut mushroom. The yeast should be mixed together with the water and sugar. Place the mixture at a warm place and cover it with some cloth until the yeast swims on the top of the water. In the meantime, the flour and the salt should be sieved together in a bowl. Make a deepening in the middle of the flour and pour the yeast with the water and the oil into the deepening. Then mix it completely with a dough hook. Then form the dough to a ball. Put some flour on the ball and put it into a kitchen cloth and place it at a warm place until it reaches about double size (ca. 1hour). The onions should be prepared in a pan until they are half transparent. Put the garlic, the tomatoes and the tomato paste to the onions and stir it. Then add the rest sauce ingredients and cook it covered for ca. 30min with low heat. The sauce between the dough and the topping will make the Pizza juicier and more intense flavor. It can be used for many different types of Pizza. Oil the bake pan with some oil and distribute the dough evenly on the pan. Put the sauce on the dough. Place the topping on the Pizza and add some drops of oil over it. Then insert the Pizza into the oven. 24
Cake
Basic recipe
Rectangular baking form (ca 30cm)
200g sugar, 200g flour, 200g soft margarine or butter, 1 pinch salt, 1 small parcel of
vanilla sugar, 4 medium size eggs, 1 ½ teaspoon baking powder
Add the butter, sugar and vanilla sugar in a bowl. Then stir it with a mixer on the
highest level for ca 5min until the mixture is foamy. Add the eggs and mix it tho-
roughly. Add now the flour through a sieve into the bowl and add the baking pow-
der and the salt and mix it fast and thoroughly. Butter or oil to the inside walls of the
baking form and cover them with some flour. Insert the dough to the form and place
the form on the wire grill. Bake it until the crust becomes golden.

Apple pie
Springform pan, ca 20cm
Dough 120g sugar, 200g flour, 200g cold margarine or butter, 1 pinch salt, 1 small
parcel of vanilla sugar, 1/4 eggs
Filling: 600g sour apples, 60g raisins, 60g sugar, 2 tablespoon of chopped nuts, 1
teaspoon cinnamon, 1 teaspoon of lemon juice
Glazing: the rest of the egg used for the dough
Put all ingredients of the dough into a bowl and knead it thoroughly to smooth dou-
gh. Place the dough at a cool place for some time. Butter and put flour on the bottom
and the inside wall of the Springform. Roll out 2/3 of the dough to a thickness of ca
½ cm and put it on the bottom and the sides of the Springform.
Peel and cut the apples into thin slices. Mix the apples with the raisins, sugar, cinna-
mon and the lemon juice and put them into the form.
The rest of the dough should be rolled out now and cut into stripes. Place the stripes
in a cross pattern on the cake. Use a kitchen brush to add the glazing egg on the
stripes.
After the baking the cake should be removed from the form when it is still warm.

                                                                                      25
1 Thermostat 2 Programme 3 Power 4 Minuterie 5 Grille Tournebroche 6 Tôle à pâtisserie 7 Support pour tôle 8 Poigné 9 Porte en verre 10 Elément du chauffage Support pour 11 Niveau d’insertion 1 tournebroche 12 Niveau d’insertion 2 13 Niveau d’insertion 3 26
Généralement
Cet appareil isolé contre la chaleur est conçu pour un usage privé
et non commercial. Il est adapté pour griller, cuisson, gratiner
et réchauffer la nourriture. Veuillez lire attentivement le mode
d‘emploi et gardez-le soigneusement. En cas de remise de l‘appa-
reil à une tierce personne, n’oubliez pas de joindre le mode d’em-
ploi. N’utilisez l‘appareil que selon les indications et respectez les
consignes de sécurité. Nous déclinons toute responsabilité en cas
de dommages ou d’accidents résultant du non-respect des indi-
cations du mode d’emploi. Enlever tout matériel d‘emballage et
tous les autocollants. Nettoyez toutes les pièces (voir nettoyage).

Consignes de sécurité
∙∙          Surface chaude ! Il y a un risque de brûlure en touchant la
            surface pendant le fonctionnement. Placez l‘appareil avec
            le dos avec une distance de 10cm au mur de la cuisine.
∙∙ L‘appareil doit être branché et utilisé conformément aux indica-
   tions de la plaque signalétique.
∙∙ L‘appareil n‘est pas un four encastrable et ne doit pas être uti-
   lisé comme tel.
∙∙ Contrôler avant chaque utilisation, que l’appareil ou le câble
   d’alimentation en courant n’est pas endommagé.
∙∙ Ne touchez jamais la fiche d’alimentation avec des mains mouil-
   lées.
∙∙ Connectez la fiche d’alimentation seulement à une prise de
   courant correctement installée et facilement accessible.
∙∙ Pour débranchez la fiche d’alimentation, tirez toujours la fiche
   – pas le câble.
∙∙ Retirer la prise après chaque utilisation ou en cas de disfonc-
   tionnement.
∙∙ N’arracher pas la prise et ne l’endommager pas. Ne coincer pas
   le câble d’alimentation.
∙∙ Tenir le câble d’alimentation éloigné des parties chaudes.

                                                                     27
∙∙ L‘appareil peut être utilisé par des enfants à partir de 8 ans
ainsi que par des personnes atteintes de déficiences phy-
siques, sensorielles ou mentales, ou manquant d‘expérience et/
ou de connaissances, si elles sont surveillées ou ont été instruites
de la manière d‘utiliser l‘appareil en toute sécurité et qu‘elles en
ont compris les dangers potentiels. Le nettoyage et l‘entretien
de l‘appareil ne doivent pas être réalisés par des enfants, sauf
s‘ils sont âgés de plus de 8 ans et exécutent ces opérations sous
surveillance.
∙∙ Tenir l‘appareil et le cordon d‘alimentation hors de portée des
enfants de moins de 8 ans.
∙∙ Veillez á ce que des enfants ne jouent pas avec l’emballage (par
exemple sac en plastique).
∙∙ L´appareil ne doit pas fonctionner avec une minuterie ou avec
un système séparé de télécommande !
∙∙ Ne laissez jamais l‘appareil sans surveillance lors de son fonc-
tionnement.
∙∙ N‘entreposez pas l‘appareil à l‘extérieur ou dans une pièce hu-
mide.
∙∙ Ne posez rien sur l‘appareil et ne recouvrez pas le système
d‘aération.
∙∙ Ne mettez jamais l‘appareil dans l‘eau.
∙∙ Laissez au moins 10 cm distance autour de l‘appareil.
∙∙ N‘utilisez jamais l‘appareil après un fonctionnement défaillant,
par ex. s’il est tombé ou s’il a été endommagé d‘une autre ma-
nière.
∙∙ Le fabricant ne sera pas tenu responsable en cas de mauvaise
utilisation ou d‘utilisation inappropriée par non-respect du
mode d‘emploi.
∙∙ Pour éviter tout danger, les réparations sur l‘appareil, notam-
ment le remplacement d‘un câble endommagé, ne peuvent
être réalisées que par un service après-vente autorisé. Seule-
ment les pièces détachées original peuvent être utiliser.
∙∙ L‘appareil chauffe beaucoup, ne le transportez donc qu‘après
refroidissement.
28∙∙ N‘utilisez l‘appareil que pour les applications décrites dans le
mode d‘emploi.
∙∙ N’enveloppez jamais le gril avec papier alu (choc thermique).
∙∙ Ne placez aucun des matériaux que le papier, carton, plastique
etc. dans l’appareil.
∙∙ Cet appareil est conçu pour un usage privé et similaires telles
que :
o dans les cuisines pour les employés dans les magasins,
bureaux et autres zones industrielles
o dans les propriétés agricoles et par les clients des hôtels,
motels et autres établissements résidentiels
o dans chambres d’hôtes
∙∙ Avant la première utilisation : toutes les pièces – en dehors des
résistances – doivent être nettoyées et séchées minutieuse-
ment. Pour éliminer l‘odeur du neuf, faites chauffer l‘appareil
pendant environ 15 minutes.
∙∙ Attention ! L´extérieur de l´appareil devient
chaud. Risque de brûlures. Pendant le fonctionne-
ment, la température des surfaces touchables peut être
très chaude ! Ne pas déposez l’appareil sur une surface sensible
et le posez de sorte qu’il ait au moins 70 cm de place libre des
matières inflammables.
∙∙ Vapeur peut sortir pendant l’utilisation. Gardez les mains et le
visage à une distance.
∙∙ Si vous utilisez une rallonge, celle-ci doit avoir une section de
1,5 mm².
∙∙ Si vous utilisez une multiprise testée pas GS avec 16 A, il est
interdit de le charger avec plus de 3680 watts en raison d’un
danger incendie.
∙∙ Si vous utilisez une rallonge, faire attention que les enfants ne
le tirent pas où trébucher sur le câble.
∙∙ Tirez Ia fiche d‘alimentations toujours si l‘appareil est sans sur-
veillance, avant le montage, le démontage, ou le nettoyage.
29∙∙ Attention : Puisque les graisses dégoulinantes peuvent facile-
ment enflammer sur le radiateur, ne grillez jamais sans casse-
role ! Lorsque vous enlevez la casserole pleine, ne versez pas de
graisse sur le radiateur.
∙∙ Pour enlever la tôle et le grille utilisez le support joint.
∙∙ Nettoyez l‘appareil après utilisation.
∙∙ Poussez toujours le tôle à miettes sous le radiateur inférieur.
∙∙ Hygiène : Assurez-vous que l‘appareil doit être nettoyé tou-
jours pour éviter le formation les bactéries ou de moisissures.
Nettoyage
Toujours débrancher l´appareil et le laisser complétement
refroidir avant de le nettoyer.
- Ne jamais plonger l’appareil dans l’eau.
- Les résidus de graisse doivent être éliminés pour des raisons
d‘hygiène et d‘incendie.
- N‘utilisez pas d‘abrasifs, nettoyant pour fours ou de solvants.
- Nettoyez le boîtier et intérieure du l’appareil avec un chiffon
humide avec un peu de produit vaisselle, la porte avec nettoyant
vitres. Laissez sécher.
- La tôle a miettes et les accessoires peuvent être nettoyés à l‘eau
chaude puis séchés. Insérez la tôle à miettes.
Plan de travail
Important : Ne jamais placer l’appareil sur une surface chaude ou à côté (par ex-
emple plaque de cuisson d’une cuisinière). Faire fonctionnez seulement sur un sup-
port plan, stable et thermorésistant. Veiller à ce que des objets inflammables ne se
trouvent pas à proximité. Ne placez pas l’appareil sur le bord de la table afin qu’il ne
puisse pas être touché par les enfants ou qu’il ne tombe pas lorsque vous le touchez.
Réglage
1) Marche / Arrêt
2) Fonctionnement du four avec chaleur tournante ou
Pour fair la pâtisserie, la cuisson et réchauffer.
Choisissez la durée de cuisson et le température. Lors de la cuisson, les résistances
prennent des couleurs claires différentes. Le ventilateur distribue la température
30uniformément à l‘intérieur. Avec la chaleur tournante, réglez le thermostat légè-
rement plus haut.
Décongelation : Décongelez les aliments à basse température dans la poêle.
3)
Chaleur supérieur avec chaleur tournante
Pour griller des saucisses, de la viande, gratiner, etc.
Choisissez la température maximal.
Insérez la tôle au niveau inférieure, insérez les aliment sur le gril avec une distance
appropriée aux résistances.
Éviter tout contact avec les résistances !
4) Griller avec le tournebroche oder
Pour griller la volaille, rôti, etc.
Choisissez la température maximal.
Insérez la tôle au niveau inférieure pour permettre à la graisse de s’égoutter. Les
aliments riches en gras peuvent éclabousser.
Fixez un support sur la broche. Embrochez la viande ou la volaille préalablement
attachées sur la broche et la fixez ensuite avec le deuxième support.
Vérifiez que la grillade se trouve bien
au milieu de la broche. Placez la broche
avec la grillade sur le support de broche
et mettez l‘extrémité de la broche dans
l‘ouverture du moteur sur la partie
droite de l‘intérieur du four. Placez en-
suite l‘autre extrémité de la broche sur
le support de broche.
Pour retirer les aliments finis, utilisez le support pour tournebroche et le support
pour la tôle.
Mise en service de l‘appareil
Important ! Préchauffez toujours l‘appareil durant environ 5 minutes avant d‘utiliser.
Au début, l‘appareil peut dégager des fumées abondantes. Ne mettez pas d‘aliments
de taille trop importante dans l‘appareil pour éviter tout contact avec les résistances.
Placez les aliments très gras sur le 2ème niveau de plaque à griller mais le plat devrait
être sur le niveau de plaque 1. Baisser le thermostat le cas échéant. Merci de toujours
installer la tôle á miettes dans le bas du four.
31Minuterie
L’appareil ne fonctionne que lorsque la minuterie est réglée. La montre doit être
tout d‘abord complètement remontée (mettre sur 60 minutes) puis réglée à la durée
de cuisson désirée. Prenez en compte le temps de préchauffage de 5 minutes dans
le réglage de la durée. Si l‘aliment n‘est pas assez coloré, augmentez la durée de
cuisson. Dès que la minuterie a compté à rebours, l’appareil s’éteint et émet un son.
Si l’appareil n’est plus nécessaire, débranchez le cordon d’alimentation et réglez tous
les commutateurs sur OFF.
Evacuation correcte de ce produit:
Mettre les appareils usagés immédiatement au rebut.
Au sein de l‘UE, ce symbole indique que le produit ne doit pas être jeté avec
les déchets ménagers. Les anciens appareils contiennent des matériaux de
valeur recyclables qui doivent être valorisés afin d‘éviter toute atteinte à
l‘environnement ou à la santé humaine due à une élimination incorrecte des déchets.
Les anciens appareils doivent par conséquent être mis au rebut via des systèmes de
collecte appropriés ou ramenés à cet effet au point de vente où ils ont été achetés.
Les appareils seront alors confiés à un centre de recyclage des matériaux.
Élimination de l‘emballage
Ne pas jeter l‘emballage avec les déchets ménagers, mais avec les déchets recyclables.
Jeter les emballages en papier, carton et carton ondulé aux points de collecte de vi-
eux papiers. Les composants d‘emballage en plastique et les films doivent également
être jetés dans les conteneurs prévus à cet effet.
Exemples d‘identification des plastiques :
PE pour le polyéthylène, code 02 pour le PEHD, 04 pour le PEBD,
PP pour le polypropylène, PS pour le polystyrène.
Service après-vente
Si, contre toute attente, l‘appareil doit être confié au service après-vente, nous con-
tacter aux coordonnées suivantes. En cas de garantie applicable, nous nous charge-
ons de l‘enlèvement de l‘appareil. L‘appareil doit être correctement emballé pour le
transport.
Les paquets non affranchis ne pourront pas être pris en charge !
STEBA Elektrogeräte GmbH & Co KG
Pointstr. 2, 96129 Strullendorf / Allemagne
tél. service commercial : 09543 / 449-17 / -18, tél. S.A.V. : 09543 / 449-44, fax : 09543 /
449-19 e-mail : elektro@steba.com Internet : http://www.steba.com
Attention ! Les appareils électriques doivent être réparés exclusivement par des élec-
triciens qualifiés, les réparations non conformes pouvant entraîner des conséquences
graves.
32Recettes
Grillades plates
N’aplatissez pas la viande à griller avec un marteau à viande mais appuyez
légèrement dessus pour qu’elle soit plus plate et laissez la ensuite reprend-
re sa forme. Ne piquez jamais la viande avec un objet pointu car le jus pour-
rait en sortir et la viande sècherait trop pendant la cuisson.
Pour que la viande soit plus tendre ou pour qu’elle ait plus de goût, placez la dans
une marinade et laissez la ainsi pendant plusieurs heures. Mettez les morceaux con-
gelés directement dans la marinade pour qu’ils s’y décongèlent. Égouttez et tampon-
nez bien la viande marinée avant de la faire cuire.
Saucisses à rôtir / griller
Vous pouvez utiliser, selon votre goût, des saucisses fines ou épaisses, la fonction
gril de votre four s’appropriant cependant particulièrement bien aux saucisses fi-
nes. Mettez les saucisses dans de l’eau froide pendant quelques minutes jusqu’à ce
qu’elles soient ferme au toucher puis séchez les bien avec un chiffon propre. Placez
les sur la grille et enfournez.
Boulettes pour 4 personnes
150g de tartare, 100 g de viande hachée, 1 jaune d’œuf, 1/2 oignon moyen, 1/2 bou-
quet de persil, 2 cuillères à soupe d’huile, 1 gousse d’ail (ou pas, selon le goût), 1 petit
pain sec, du sel, du poivre, du paprika, de la noix de muscade.
Mélangez bien le tartare et la viande hachée avec le jaune d’œuf et le pain que vous
aurez fait ramollir dans un peu d’eau. Ajoutez les oignons coupés en petits morceaux,
le persil haché, la gousse d’ail et l’huile. Assaisonnez la préparation avec du sel, du
poivre, du paprika et un peu de muscade selon le goût et le niveau de piment désiré.
Faites des boulettes, déposez les sur la plaque à cuisson et faites cuire.
Steak
150-200g de filet de bœuf par personne. Huilez les deux côtés du filet avec de l’huile,
déposez la viande sur la plaque et enfournez. Vous pouvez obtenir une viande saig-
nante ou bleue (encore légèrement crue à l’intérieur), à point (rose clair à l’intérieur)
ou bien cuit, selon votre goût. Vérifiez le niveau de cuisson en appuyant sur la viande
avec une fourchette. Si la viande est encore souple, l’intérieur est encore saignant ou
bleu. Un steak bien cuit au contraire présentera une surface moins élastique. Le steak
sera poivré et salé après cuisson. Vous pouvez affiner le goût de votre viande avec
une noix de beurre maître d’hôtel (ou beurre d’escargot).
Vorgesteckte Spieße (Schaschliks)
Important für gemischte Spieße: Zutaten in gleich große Stücke schneiden, damit
alles miteinander gleichmäßig bräunt und gar wird.
33Sie können auch lesen